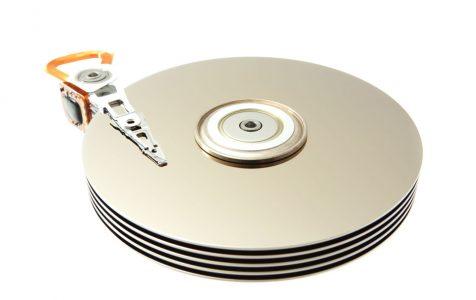
The hard disk drive (HDD) is crucial hardware for storing permanent data in the Windows operating system. During OS installation, users can create disk partitions, dividing the storage into different sizes. Each partition is assigned a unique drive letter, ensuring independence from other partitions.
Partitioning your hard drive is recommended because it provides an extra layer of protection for your files. It makes it difficult for malware to affect system files that are partitioned from the affected section.
Perhaps, you didn’t know about partitioning when you installed your OS. On the other hand, you may have changed your plans after using your system for a while. If so, you can still repartition it to suit your current needs without having to erase data in Windows 10.
It is normal for plans to change for a used HDD and repartitioning simply means re-allocating drive letters, volume size, as well as the file system. Here are some of the reasons to repartitioning a used HDD:
Expert Tip: For smoother PC performance, consider using a PC optimization tool. It handles junk files, incorrect settings, and harmful apps. Make sure it's right for your system, and always check the EULA and Privacy Policy.
Special offer. About Outbyte, uninstall instructions, EULA, Privacy Policy.
- Change partition volume size – To meet your growing needs for a particular partition, you can resize its volume. For instance, if you have so much data to store in the desired partition but it’s getting full, resizing the volume will be the best solution.
- Virtual computer – If you want to run two different operating systems in one computer, you can repartition a used HDD in Windows 10. To do so, you must create two different primary sections with enough space and different file systems to install your operating systems.
- Classification of data storage – You may want to classify your data being stored in the HDD using partitions. For instance, having a media partition, operating system partition, games partition, work partition, etc.
There are many reasons why you may need to section your storage drive but what matters is knowing how to re-partition a hard drive without erasing data in Windows 10.
How to Re-Partition without Destroying the Data in Windows 10
The most important part when re-partitioning a used HDD is protecting the data in it. You don’t want to mess any essential files stored in your drive while re-partitioning it as it may lead to permanent loss of information. We have prepared a couple of safe approaches that you can use to re-partition a used HDD.
Use Disk Management Utility
Disk Management is an inbuilt utility for Windows 10 system that is capable of re-partitioning the disk. There are also other things that you can achieve with this tool. To launch, follow the steps below:
- In the Taskbar Search field, type “Disk Management” (no quotes) and hit the Enter key.
- Select the drive letter of the disk you wish to re-partition and you will have various options on what to do with its volume.
Disk management can do the following:
Extend Partition of the existing volume size if there is still space unallocated to any partition. This can be done by right-clicking on the partition of interest, then selecting Extend Volume from the emerging floating menu. If there is no unallocated space adjacent to the partition, the Extend Volume feature will be inactive.
Shrink partition volume to half the actual size. You can do this by right-clicking on the partition of interest and then select the Shrink Volume option before following the prompts.
Add a New Partition. You can also create a new disk partition using unallocated space. This can be achieved by right-clicking on the unallocated space, before selecting New Simple Volume. The wizard will then guide you through the process.
Re-partition your HDD completely. You can also re-partition an HDD completely by erasing all previous partitions to create one unallocated space. This will let you create new partitions based on your preferences. Note that this can only be done on external HDDs since the partition with the operating system cannot be deleted.
Use Command Prompt
You can use the Command Prompt to perform disk re-partitioning. To do so, follow the steps below:
- Launch the Run dialog by pressing the Windows + R keys simultaneously.
- In the text field, type “diskpart” (no quotes) and press Ctrl + Shift + Enter keys to run Diskpart utility with Administrator privileges.
- Now, insert the command lines below with each followed by the Enter key:
list volume
select volume # (replace the # with the drive number of interest)
extend size = 15480 (sizes are in MBs)
exit - You can format a particular partition by inserting the command line below followed by the Enter key after selecting the drive number:
format fs=ntfs (or fat32)
The hard disk drive is a very sensitive hardware component that needs to be taken care of. A failing hard disk can lead to many issues which include BSOD errors. Therefore, we advise taking the appropriate approach when re-partitioning a used HDD. To get the most out of your hard disk, you can also optimize it to achieve top speed as well as maximum efficiency. There are dedicated powerful tools with smart technology that you can use to defrag your HDD.
