
We all know that Microsoft frequently rolls out updates. While some updates contain fixes for previously known bugs and issues, others introduce new features that help improve productivity and make the operating system a lot better.
Unfortunately, some of these updates are far from perfect. Sometimes, they only open a can of worms, meaning they make errors worse. Other updates even fail to install due to error messages that pop up at random.
Such is the case of the Windows Update error 0x8024402f. You will understand this error better by reading on.
What You Should Know About the Windows Update 0x8024402f Error
Are you among the unlucky few who have come across the Windows 10/11 Update error 0x8024402f? Well, it’s not the end of the world. It’s an error that can be fixed using different troubleshooting methods.
Expert Tip: For smoother PC performance, consider using a PC optimization tool. It handles junk files, incorrect settings, and harmful apps. Make sure it's right for your system, and always check the EULA and Privacy Policy.
Special offer. About Outbyte, uninstall instructions, EULA, Privacy Policy.
The error code 0x8024402f on Windows 10/11 is a clear sign that some of the CAB files are corrupted. CAB files are compressed files that store data associated with different system-based installations. Examples of these files are device drivers and system files.
While there are various reasons for the corruption of these files, tech geeks say that the most common cause of the issue has something to do with your ISP. They may have cached Microsoft updates so they don’t download again and again. But the problem is, some of the files may already be corrupted.
Aside from your ISP, there are other possible culprits. The error code could appear due to changes made to your network or firewall settings. It could also be the case of Microsoft’s servers being unable to handle all the update requests.
Regardless of the reason behind the error 0x8024402f, you can always get rid of it yourself. We’ll provide you with easy-to-follow but effective solutions in the succeeding sections.
Resolving the Windows 10/11 Update Error 0x8024402f
Before we discuss the more technical fixes, let’s begin with some basic troubleshooting methods. Here you go:
Disable Your Antivirus
Be sure your antivirus suite is disabled before you start the installation of any Windows update. Antivirus suites are quite notorious for messing with the process of installing updates. Your antivirus application should have a Disable option in the notification tray. Double-click on its icon and find the option there.
Use the Windows Update Troubleshooter
Using the Windows Update Troubleshooter has worked for some users. Because this tool is pretty straightforward to use, we suggest that you try using it as well. If it resolves the error code 0x8024402f, then you need not proceed with troubleshooting.
Here are the steps to follow:
- Open the Control Panel, switch View to Large Icons and click Troubleshooting.
- Navigate to the left pane and click View All.
- Click Windows Update.
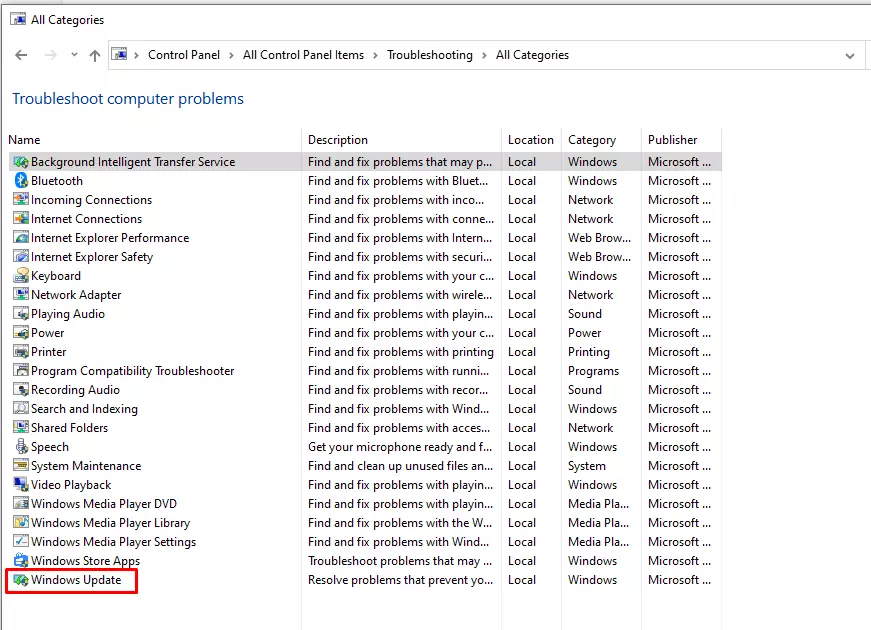
- Click Next to start troubleshooting Windows Update issues.
- Once done, close the troubleshooter and restart your computer.
Change the Date and Time Settings
Another troubleshooting method you should give a try is to ensure that your date and time settings are correct. Make sure they match the current date and time of your location. Here is what you should do:
- Open the Control Panel and go to Date and Time.
- Click the Change date and time button. Set the current date and time.
- Click OK.
- Next, click the Change time zone button and select the time zone of your country. Click OK.
- Go to the Internet Time tab.
- Click the Change Settings button.
- Select Update Now.
- Click the OK button twice and close all the windows.
If none of these troubleshooting steps works, proceed with these error code 0x8024402f fixes:
Fix #1: Reset the Windows Update Components
The Windows Update utility is programmed to install updates automatically. And for it to do its work, it relies on several components. But then again, there are times when these components fail, resulting in a failed update installation. And in that case, resetting them will do the trick.
To deal with the error code 0x8024402f, you have to reset the BITS, Cryptographic, and Windows Update services. Here’s a detailed guide that you should follow:
1. Press the Win + S shortcut.
2. Type cmd into the search box and right-click on the top search result. Choose Run as Administrator.
3. The Command Prompt will launch with administrator access. Type these commands into the command line. Don’t forget to hit Enter after each command:
- net stop bits
- net stop wuauserv
- net stop appidsvc
- net stop cryptsvc
4. Next, go to this location and delete everything in it: C:\Windows\SoftwareDistribution\Download.
5. After that, you will have to delete a certain .dat file. You will do that by entering this command into the command line: Del “%ALLUSERSPROFILE%\Application Data\Microsoft\Network\Downloader\qmgr*.dat”
6. Press Enter to proceed.
7. You should now change your directory so you can re-register more DLL files. To do that, type this command: regsvr32.exe atl.dll.
8. Hit Enter.
9. The next thing that you will have to do is to register some files. You can easily do that by typing the commands below one at a time. Don’t forget to hit Enter after each command. If you notice an error after executing a command, just ignore it and proceed to the next.
- regsvr32.exe urlmon.dll
- regsvr32.exe mshtml.dll
- regsvr32.exe shdocvw.dll
- regsvr32.exe browseui.dll
- regsvr32.exe jscript.dll
- regsvr32.exe vbscript.dll
- regsvr32.exe scrrun.dll
- regsvr32.exe msxml.dll
- regsvr32.exe msxml3.dll
- regsvr32.exe msxml6.dll
- regsvr32.exe actxprxy.dll
- regsvr32.exe softpub.dll
- regsvr32.exe wintrust.dll
- regsvr32.exe dssenh.dll
- regsvr32.exe rsaenh.dll
- regsvr32.exe gpkcsp.dll
- regsvr32.exe sccbase.dll
- regsvr32.exe slbcsp.dll
- regsvr32.exe cryptdlg.dll
- regsvr32.exe oleaut32.dll
- regsvr32.exe ole32.dll
- regsvr32.exe shell32.dll
- regsvr32.exe initpki.dll
- regsvr32.exe wuapi.dll
- regsvr32.exe wuaueng.dll
- regsvr32.exe wuaueng1.dll
- regsvr32.exe wucltui.dll
- regsvr32.exe wups.dll
- regsvr32.exe wups2.dll
- regsvr32.exe wuweb.dll
- regsvr32.exe qmgr.dll
- regsvr32.exe qmgrprxy.dll
- regsvr32.exe wucltux.dll
- regsvr32.exe muweb.dll
- regsvr32.exe wuwebv.dll
10. Once done with all the commands, reset Winsock by typing the following command and hitting Enter: netsh winsock reset.
11. Type netsh winhttp reset proxy and hit Enter.
12. You should now restart all the services that you have stopped earlier. Type these commands and hit Enter after each one:
- net start bits
- net start wuauserv
- net start appidsvc
- net start cryptsvc
13. Lastly, restart your computer and try installing Windows updates.
Fix #2: Change the Windows Update Settings
This solution worked for many users, and that is why you should definitely try it. So, to update your Windows Update settings, follow these steps:
- Press the Win + I shortcut to launch the Settings app.
- Select Update and Security.
- Click Advanced Options.
- Toggle the Receive updates for other Microsoft products when you update Windows option to Off.
- Restart your computer.
It is worth noting that in some cases, the Windows Update settings cannot be changed because the service is disabled. If it applies to you, then skip this method.
Fix #3: Change the Proxy Settings
As mentioned above, the error 0x8024402f may appear due to cache corruption. So, changing your proxy settings may work.
The typical way to change the proxy settings is via the Windows Settings window, but it does not always work for every user. We will discuss all the known ways to change the proxy settings below.
Via Windows Settings
- Press the Win + I shortcut to launch the Settings app.
- Choose Network and Internet.
- Click Proxy from the left pane of the window.
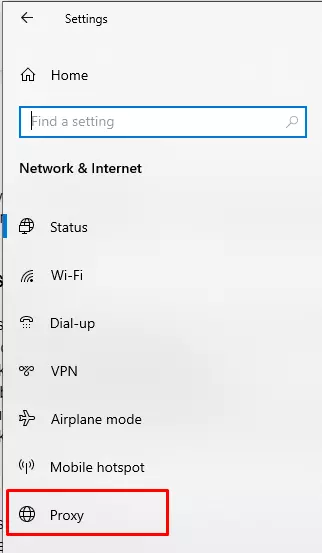
- Enable the Use a proxy server option.
- Input the proxy server IP address and its port number.
- Click Save and try installing your update once again.
Via Command Prompt
- Press the Windows key or click the Start menu.
- Type cmd into the search box.
- Right-click on the top result and choose Run as Administrator.
- Type this command into the command line: netsh winhttp show proxy.
- Hit Enter to see your current proxy settings.
- Next, change the proxy settings by typing this command: netsh winhttp set proxy proxy-server=”your address”:”port number”.
- Make sure you change the value of the proxy server address and its port number.
- Try installing your Windows update.
Fix #4: Modify the Settings of the Windows Update Service
If changing the proxy settings doesn’t resolve the error, consider modifying the settings of the Windows Update service itself. Here’s how it is done:
- Press the Win + R combination to open the Run command box.
- Type services.msc into the text area and hit Enter.
- Find and double-click on the Windows Update service.
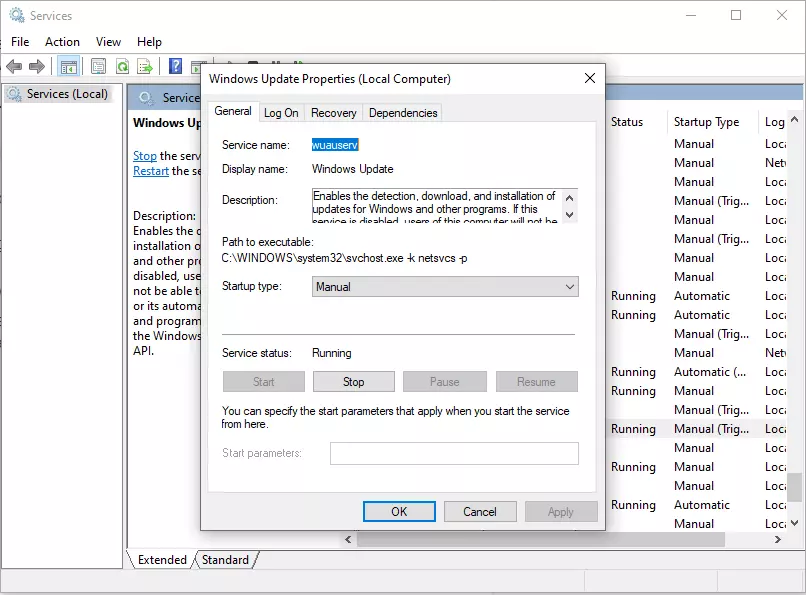
- Click the Startup Type menu and choose Delayed Start.
- Select Start if the status is “Stopped”.
- Click Apply and OK.
- Try updating Windows once again and see if it works fine now.
Fix #5: Get Rid of Any Temporary Files
If the update files get corrupted during the download stage, you may see the update error code 0x8024402f. This often happens when installing new updates and experiencing network problems.
To resolve this, you need to remove the temporary files from your system. For this fix, you need a reliable PC repair tool, such as Outbyte PC Repair, which can eliminate any unnecessary files and other space hogs.
Download and install a PC repair tool of your choice, run it, and let it do its job. Once done, run the Windows Update tool once again and see if you can update your system without any problems.
Fix #6: Use a VPN Service or Connect to Another Network
To protect their users and control web traffic, internet service providers use different techniques. They sometimes cache web pages and sites that users visit again and again to improve their browsing experience. However, this often results in problems, like the error code 0x8024402f.
As a workaround, you can use a VPN service so your network traffic and browsing activities won’t be seen by your ISP. You can also connect to another network or use your smartphone’s hotspot to access the web.
Here’s a step-by-step guide on what to do:
- Connect to a VPN network or another network. If you use your smartphone’s hotspot, consider the size of the update you will be downloading.
- Run the Windows Update tool and see if the download completes without any problem.
Fix #7: Change Your DNS Settings
The Domain Name System, or DNS, is a component of your system that is responsible for connecting you with remote addresses. It translates your URL into a specific IP address, which is forwarded to other ports to establish a connection.
While the DNS plays a vital role in establishing a connection between networks, it sometimes causes Windows Update errors. To avoid this, try using a public DNS server. Here’s how:
- Right-click on the network icon in the notifications tray.
- Click Open Network & Internet settings.
- Navigate to the Advanced network settings section and click Change adapter options.
- The Network Connections folder will now open. Find your primary network connection. Right-click on it and select Properties.
- Next, find the IPv4 option and open its properties by clicking on it and selecting Properties.
- And then, select the Use the following DNS server addresses option and provide the primary and secondary DNS servers you prefer.
- Click OK and close the window to apply the new settings.
- Check if you can install the update without issues.
Fix #8: Turn On Your Firewall
If none of the fixes has worked so far, then check your firewall settings. Perhaps your firewall is disabled, keeping you from installing the update and triggering the update error instead.
To switch it on, do the following:
- Open the Control Panel, set View to Large Icons and select Windows Defender Firewall.
- Navigate to the left pane and select Turn Windows Defender Firewall ON or OFF.
- Tick the box next to the Turn on Windows Defender Firewall option.
Fix #9: Reinstall Recent Updates
This solution allows you to get rid of any corrupted updates you have recently installed. Corrupted updates are, after all, infamous for causing Windows Update-related errors. To start with this fix, follow the steps below:
- Open Settings by pressing the Win + I shortcut.
- Next, go to the Update and Security section.
- Select View update history.
- You should now see a list of recent updates. Click the Uninstall updates link.
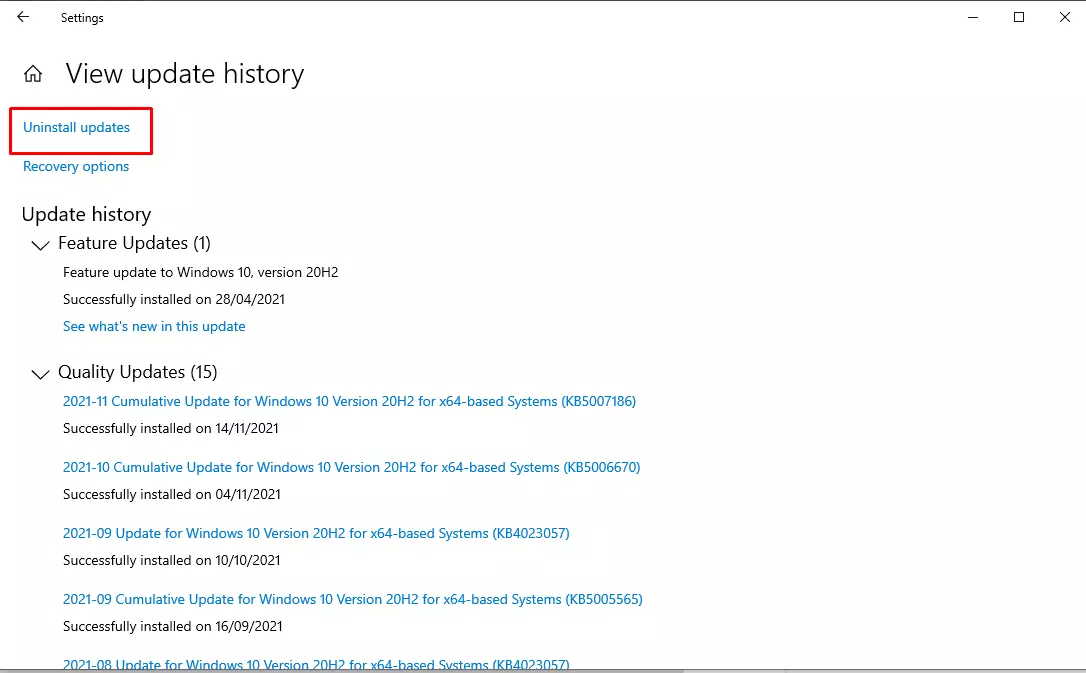
- Find the most recent updates and uninstall them.
- Once the recent updates have been removed, restart your computer. Windows will automatically download and install any deleted updates to replace them.
Conclusion
The Windows Update error 0x8024402f is a common problem caused by file corruption or a wrongly configured setting. When it occurs, you cannot install an update successfully. However, it is no reason to worry because the fixes above should resolve the error easily.
Do you have any suggestions or comments regarding this issue? Let us know below!