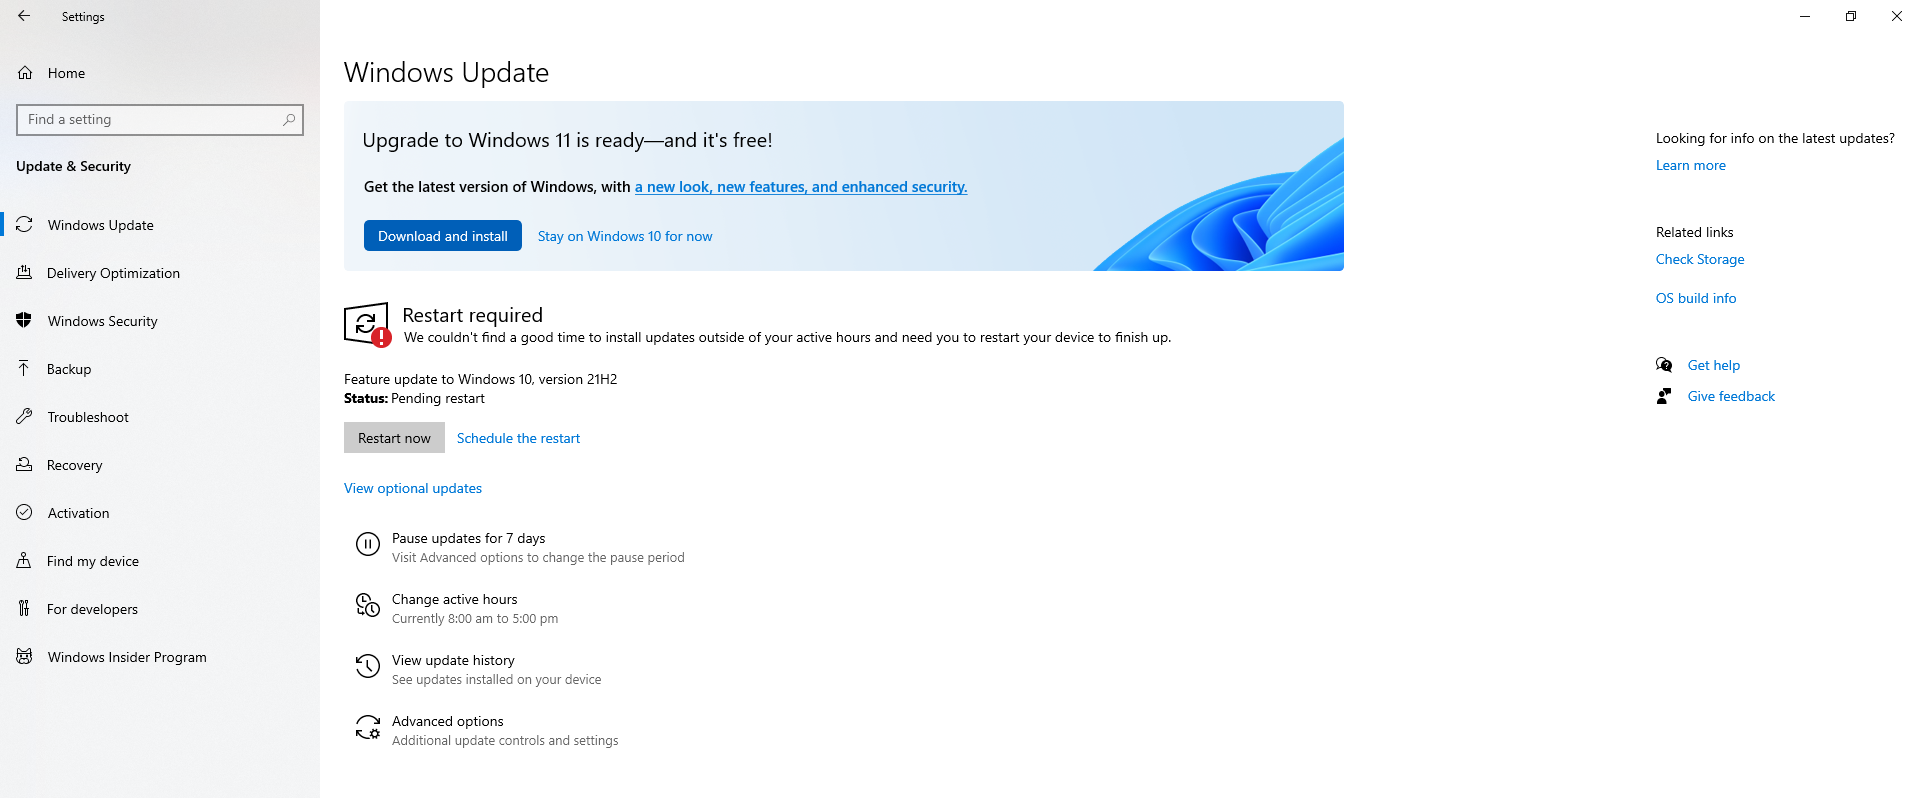
Windows 10/11 is a popular and productive operating system, but it is not free from issues. The 0xc19001e1 error is one such problem that users may encounter while updating to the 20H2 version.
Well, we all know and understand the importance of keeping your Windows 10/11 operating system up-to-date, right? Microsoft regularly releases new updates to resolve known bugs and issues, introduce new features, and improve the operating system’s performance. These updates also fix security loopholes to prevent attacks. But with the Windows 10 version 20h2 – error 0xc19001e1 keeping you from installing updates, is there anything else you can do?
Of course, there is! And in this blog, we will talk about the 20h2 update failed 0xc19001e1 error on Windows 10/11 and suggest fixes that can fix it.
What Is the Windows Update Error 0xc19001e1?
The error 0xc19001e1 20h2 that appears during a Windows update is one that is quite frustrating to deal with. It ruins your plans as it prevents the update from being downloaded and installed. No matter how many times you attempt to install the update, it just doesn’t end up successful.
Expert Tip: For smoother PC performance, consider using a PC optimization tool. It handles junk files, incorrect settings, and harmful apps. Make sure it's right for your system, and always check the EULA and Privacy Policy.
Special offer. About Outbyte, uninstall instructions, EULA, Privacy Policy.
So, what causes the 0xc19001e1 error code to appear? The most common causes are:
- Corrupted System Files – Corrupted system files are the primary reasons that trigger the 0xc19001e1 Windows 10/11 update error. Most of the time, doing an SFC or DISM scan will resolve the issue.
- Several Updates Are in Queue – One of the known causes of Windows update failures is when multiple updates are in the queue. In this case, rebooting your computer will do the trick.
- Insufficient Disk Space – If there is not enough disk space to complete the update, it is likely that the update will stop, and Windows will give you an error message. To fix this, use a PC repair tool to get rid of any unnecessary temp and junk files in your folders.
- Corrupted Update Files – Did you accidentally shut down your computer? Was there an unexpected power interruption that caused your device to switch off suddenly while installing the update? Chances are the update files have now become corrupted, resulting in the error 0xc19001e1. Deleting these corrupted update files should fix the problem.
- Hardware Component Conflict – The error 0xc19001e1 may also appear if there is a hardware component that is connected to your PC and interrupts the entire update process. Disconnect these components and see if the update completes without any problem.
- Driver Incompatibility or Conflict – Are your device drivers obsolete? Are they corrupted? If they are, there are possibilities that they will interrupt the whole Windows Update process. Make sure they are up to date and compatible with your software by using third-party software updater tools.
- Malware – Malware entities can also cause Windows update errors to show. These harmful entities can mess with your system processes or important files. As a result, you see update errors.
What to Do When You Encounter the Windows Update 0xc19001e1 Error
So, you’ve come across the Windows update error 0xc19001e1. What should you do? Before anything else, perform these basic troubleshooting steps:
- Ensure all unnecessary external peripherals are disconnected before installing the updates. Disconnect your printers, speakers, and other components that won’t be needed during the Windows update.
- Close and exit the programs that are actively running in the background. For this, you may use Task Manager or clean boot your PC.
- Disable your firewall, antivirus, or security programs temporarily as they may interfere with the update process.
- If you are connected to a wireless network, make sure that there are no other devices using it as well. In that scenario, they may consume more bandwidth, which is needed for downloading the updates.
- Restart your computer and your router. A quick restart will flush your cache and allow you to choose another faster channel for your network.
If none of the above troubleshooting steps works, proceed to the fixes below:
Fix #1: Run the Windows Update Troubleshooter
Windows 10/11 users have a handy tool that can be used if ever problems with Windows updates arise. It is called the Windows Update Troubleshooter. It automatically detects and resolves issues that prevent your device from installing the most recent OS updates.
Here’s how to run the troubleshooter on Windows 10/11:
- Open the WinX menu by pressing the Windows + X keys.
- From the menu that appears, select Settings.
- A window will now open. Navigate to the Update and Security section and click Troubleshooter.

- Then choose Additional Troubleshooters.
- Finally, hit the Update Troubleshooter button.
- At this point, the troubleshooter will do its task. Wait for it to complete before reinstalling the update.
Fix #2: Restart the Windows Update Components
For some affected users, restarting the Windows Update components resolved the problem. Restarting basically gives the components a fresh start. Here’s a detailed guide on how to restart the Windows update components:
- Open the WinX menu by pressing the Windows + X keys simultaneously.
- A menu will pop up now. Here, choose Command Prompt (Admin).
- Next, input the commands below one at a time. Make sure to press the Enter key on your keyboard after each command:
- net stop wuauserv
- net stop cryptSvc
- net stop bits
- net stop msiserver
- net start wuauserv
- net start cryptSvc
- net start bits
- net start msiserver
- Once done, check if you can now install the available Windows Update.
Fix #3: Check Your Hard Disk for Errors
If there are problematic sectors in your hard disk, it is possible that you get error codes like 0xc19001e1. So, try to scan your hard disk and see if problems exist in your disk. Here’s how to do that:
- Click the search field and type command prompt.
- Right-click on the top-most or relevant result and choose Run as Administrator.
- In the Command Prompt window, type these commands one at a time:
- dism /online /cleanup-image /scanhealth
- dism /online /cleanup-image /checkhealth
- dism /online /cleanup-image /restorehealth
- Lastly, restart your computer and see if the Windows update error 0xc19001e1 persists.
Fix #4: Run the SFC Command
If you are still being disturbed by the error, and it is affecting your productivity and PC’s performance, you can use the System File Checker utility. It will help you scan and repair corrupted or faulty system files automatically. Here’s how:
- Launch the Run applet using the Windows + R command.
- Input cmd into the blank field and press the CTRL + Shift + Enter keys simultaneously.
- Hit Yes if prompted by the UAC dialog.
- Into the command line, input the basic sfc /scannow command and tap Enter.
- The process may take several minutes to complete. Make sure you don’t interrupt the process, so wait patiently.
- Restart your computer to apply the changes and try to install the update.
Fix #5: Download the Windows Update Manually
Assuming you are still seeing the error 0xc19001e1 while updating Windows. What you can do is force the update process by manually downloading the files and installing them by yourself.

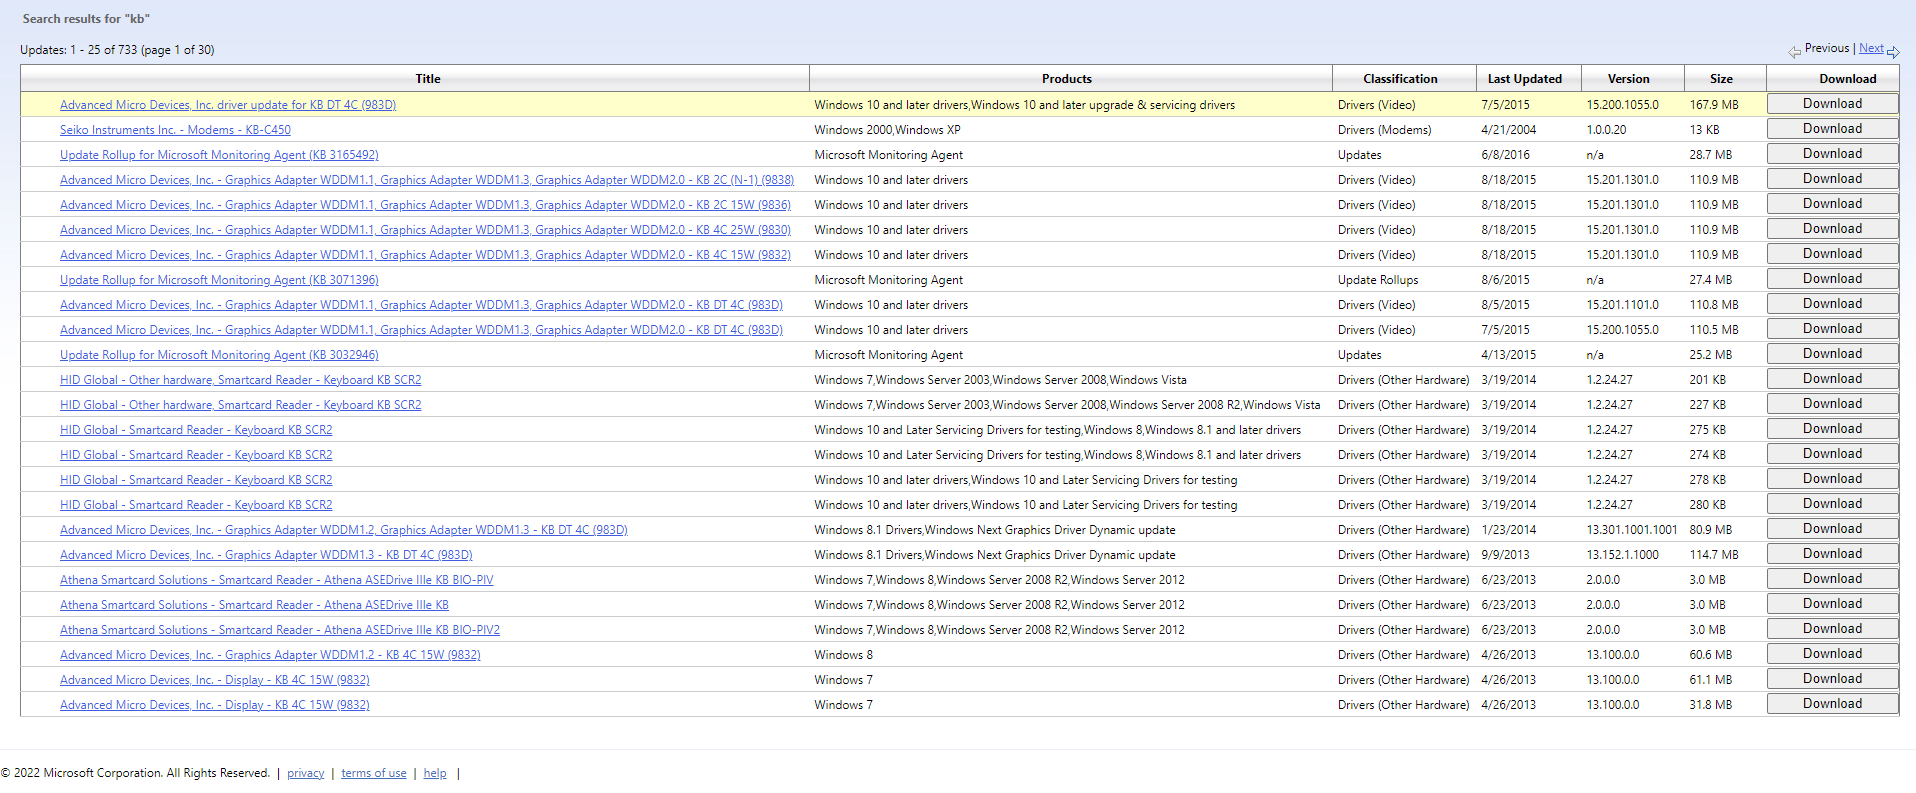
You have two ways to do this, but your choice depends on the type of update you need to install. For instance, if you wish to install a feature update, you need to get the Microsoft Update Assistant first. And once you have the update assistant, download the Media Creation Tool to proceed. You will then have the option to upgrade your PC. Follow the instructions shown on your screen to install the update. If you are installing a cumulative or security update, you can get it on Microsoft’s official Update Catalog website.
Fix #6: Disable Windows Defender Temporarily
Windows has an in-built feature called Windows Defender that protects it against viruses and other threats. It also prevents data leaks from your PC. Although it is a useful feature, in some cases, it blocks important system processes, especially those involved in installing updates. So, it is worth trying to temporarily disable this feature. To do that, follow these steps:
- Right-click on the Windows menu, and from the list of choices, select Run.
- In the blank field, input firewall.cpl and hit Enter.
- In the new window that appears, select the Turn Windows Defender Firewall On or Off option.
- Then check the boxes next to Turn off Windows Defender Firewall for both public and private network settings.
- Scroll down and tap OK.
- Log out of your current Windows account then log in.
- Install the update once again.
Fix #7: Perform a Clean Install
After trying a couple of workarounds, and the error still appears, we suggest that you perform a clean installation of Windows. Here’s how:
- Begin by inserting the Windows Media Creation Tool into an available port. Then restart your computer.
- While BIOS is loading, press a function key.
- On the screen that appears, hit Next then select Install Now.
- Now, provide a genuine product key if asked.
- Next, delete every partition available and reallocate the space to your hard drive.
- Choose your keyboard layout, preferred language, and region. Hit Next.
- Follow the on-screen instructions to proceed.
- Once done, try to install the pending update.
Fix #8: Update the Display Driver
You may be wondering why the need to update the display driver. In case you don’t know, the display driver plays an important role in keeping the system free from errors and ensuring smooth navigation. If the display driver is corrupted or damaged, it is possible that you may encounter an update error.
To fix any problems with your display driver, install any available update. Here’s how:
- Press the Windows + R keys to access the Run applet.
- Input devmgmt.msc into the text field and press Enter.
- Then expand the Display Adapter section and right-click on your installed graphics driver.
- Select Update Driver.
- After that, choose the option that searches for an updated driver software automatically.
- Now, your system will search the web for a compatible driver for your display. It will also install it automatically.
- Once done, restart your Windows 10/11 computer to save the latest changes.
- Then reinstall the update and see if the error is already gone.
Fix #9: Disable Any Third-Party Antivirus Program
Antivirus programs are designed to protect your computer against malware entities and other threats. But sometimes, these programs are too strict to the point that they interfere with the update process.
To rule out the possibility of your antivirus causing the issue, disable it temporarily. Here’s how:
- Right-click on the Windows menu and choose Settings.
- Then choose Apps and Apps & Feature.
- After that, scroll down the list and find your antivirus program.
- Hit the Uninstall button.
- If asked to confirm, click Yes.
- Once the task is done, restart your device.
Fix #10: Uninstall Any Unused Device Drivers
Did you just connect a new device to your computer? In this scenario, a new driver may have been installed on your system, and this new driver may continue to exist even if you no longer need it.
Now, unnecessary device drivers may prohibit the Windows update process and result in errors while downloading patches. The best solution to fix this–remove these unused device drivers. Here’s how:
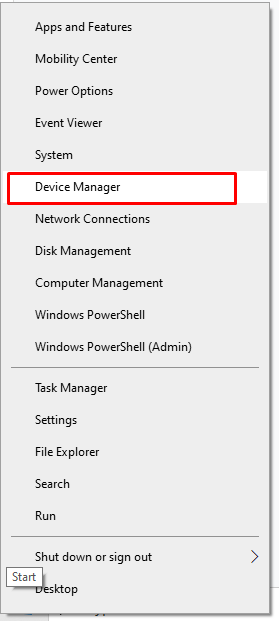
- Right-click on the Windows icon or menu, and select Device Manager.

- When the Device Manager window opens, a list of apps and drivers will show. Find the specific device driver that you want to remove.
- Right-click on it and select the Uninstall Device option.
- A warning window will pop up. Select Yes to grant access.
- Finally, restart your Windows 10/11 computer to apply your recent changes.
In Conclusion
If you find yourself dealing with the Windows update error 0xc19001e1, fret not. You know you have this article. The first thing you have to do is perform basic troubleshooting steps like restarting your PC and router or disconnecting external hardware components. This way, you can find out if anything is blocking the update process.
Now, if basic troubleshooting methods don’t work, you can proceed to other fixes, such as using the Windows update troubleshooter, restarting the Windows Update components, or scanning your disk for errors. You can also try updating the display drivers or uninstalling any unused device drivers. But if all else fails, and you wish to still install the update, feel free to download it manually.
Which of the above fixes worked for you? Share your experience below!
