
While Windows can be challenging to manage at times, it is remarkable to acknowledge the sheer variety of errors and issues that can arise within the Windows ecosystem.
As we’ve mentioned, many weird things will happen on your computer—but fortunately, most of them can be fixed with a quick Google search or by just plain old fiddling around with some settings.
If you’ve ever started your computer and seen the session “circular kernel context logger” stopped due to the following error: 0xc0000188, then you have discovered one of the most annoying Windows errors.
This guide will show you how to fix Session ‘Circular Kernel Context Logger’ Stopped Due to the Following Error 0xc0000188?
Expert Tip: For smoother PC performance, consider using a PC optimization tool. It handles junk files, incorrect settings, and harmful apps. Make sure it's right for your system, and always check the EULA and Privacy Policy.
Special offer. About Outbyte, uninstall instructions, EULA, Privacy Policy.
What Is the Session “Circular Kernel Context Logger” Stopped Due to the Following Error: 0xc0000188?”
This annoying error exists among Windows devices, where users, after using their computers for a certain period, see their displays suddenly become gray and unrecognizable. And when they check the Event Viewer to get more details of the issue, they see this message: “session “circular kernel context logger” stopped due to the following error: 0xc0000188″.
Well, it is understandable if you feel concerned, as this usually renders the computer unusable, at least temporarily. But it is a common Windows error that you should not worry about.
There are various culprits behind this error, including display drivers not correctly working, corrupt files, outdated Windows operating system, and many more. And while this issue was first discovered on Windows 7, other Windows operating system versions may also experience it. We’ll talk more about this in the next section.
What Causes 0xc0000188 Error Code on Windows?
Here are some common culprits behind the 0xc0000188 error code:
- Disabled Superfetch Service – In some cases, the error is triggered because the Superfetch service is disabled. Some Windows users disable this service to improve the performance of their devices, not knowing it can cause problems with the operating system.
- Lower File Size – If the file size in the Startup Event Trace Sessions setting is set to a lower amount than what is required by the operating system, the error code 0xc0000188 may appear. Hence, increase the file size to resolve the problem.
- Malware Attacks – Malware attacks are also known to cause Windows errors like this. It helps to get rid of the malware entities once and for all to prevent causing more severe problems.
- Outdated Display Drivers – Some affected users say that an obsolete display driver causes the error. To resolve this, updating the drivers will do the trick.
Luckily, though, there are many ways to solve it. And we’ll go through the solutions below.
Basic Troubleshooting
Before you proceed with the complicated fixes, let’s begin with the basic steps that can help get rid of error code 0xc0000188.
Restart your computer.
Restarting your computer is one of the most common fixes for display errors. To restart your Windows computer, press the Windows key, type shut down in the search box, and then click on Shut Down. After shutting down, turn off your monitor and unplug it from the wall outlet. Leave it off for at least 20 minutes before turning it back on.
Check your computer’s resolution.
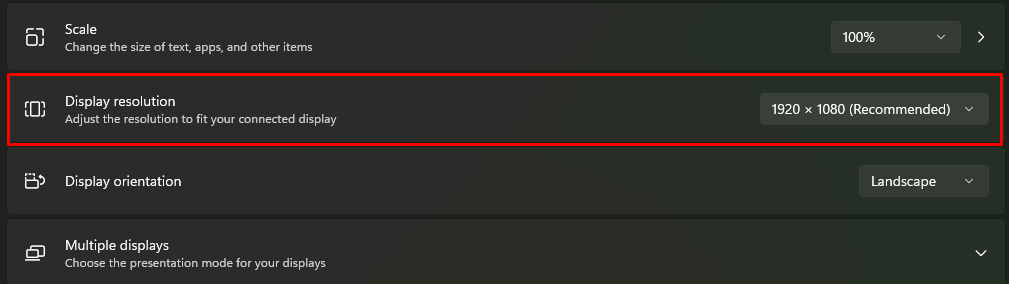
If you need to find out what resolution your screen is set at, open your Control Panel and click on Display. In the box that pops up, check the Settings tab. If it says something like 800×600 or 1024×768, you’re probably running at a lower resolution than you want.
You can usually change this setting by right-clicking on an empty part of your desktop and going into properties. Click on the Settings tab in the window that pops up, and then choose what sort of resolution you want to run in. Once that’s set, save it by clicking OK and restarting your computer.
Fix #1: Install any available Windows updates.
Installing any available Windows updates is vital to keep your computer secure and running smoothly. Updates often include bug fixes and security updates to help protect you against viruses and malware.
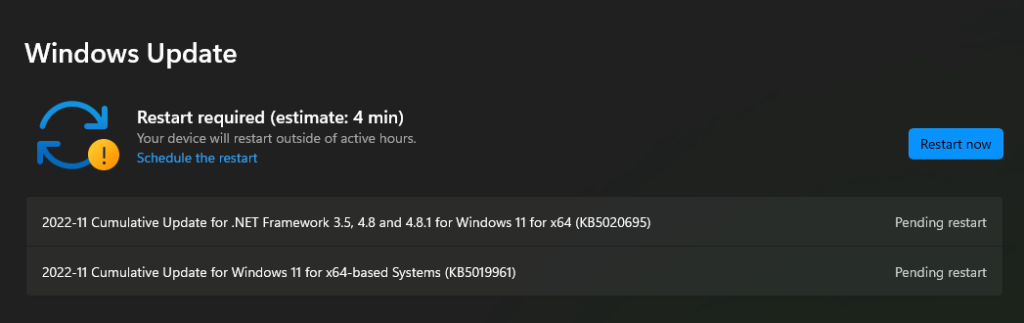
You can check for Windows updates by going to Settings > Update & Security > Check for Updates in your Control Panel. If updates are available, you’ll be prompted to install them.
You should also set up a system restore point before installing an update to quickly get back to a stable point if something goes wrong.
Here’s how to create a system restore point on Windows 10:
- Go to Start > Settings > System > Backup; under Create a system image of this PC, select System Image Backup and click Next.
- Select whether or not you want an extra copy of your files saved with the system image (we recommend selecting this), and then click Next again.
- Click Create now, wait while it creates the backup, then click Close when finished.
Fix #2: Update your outdated display driver.
A display driver is a software component that enables your computer to interact with your graphics card. It is responsible for taking information from the operating system and translating it into instructions that the graphics card can understand. The driver then sends these instructions to the GPU, which processes them.
Sometimes, when your display driver is outdated, it can cause an error in Windows called Session ‘Circular Kernel Context Logger’ stopped due to the following error 0xC0000188.
This is often resolved by updating your display drivers again. To do this:
- Go to Device Manager, right-click on the name of your graphics card, and select Update Driver Software.
- Select Search automatically for updated driver software to let your system find new driver versions.
- After installing the new version of your display driver from a list of manufacturers (e.g., Intel), reboot your computer to finish installing everything needed for the new driver to work correctly.
Alternatively, you can use a third-party driver updater tool to install any outdated driver automatically. This will also keep you from installing incompatible driver versions that will only cause more problems.
Fix #3: Perform malware scans.
Malware can sometimes cause error 0xC0000188 and crashes. You can try the following steps if you think your computer has malware.
- Run a virus scan by downloading an antivirus program such as AVG, Avast, or Avira.
- Check for any suspicious programs that may have been installed on your computer. If any are found, they should be removed using the manual uninstallation procedure from the website of the program’s developer or Windows Control Panel in Programs and Features.
- Try booting in Safe Mode to see if that fixes your problem. If it does, it’s likely a driver problem, and you can fix it by following the previous fix.
Fix #4: Check if the Superfetch service is up and running.
You could see the session “circular kernel context logger” stopped due to the following error: 0xc0000188 because the Superfetch service is disabled for some reason. And to fix this, all you have to do is enable the service, and the error code 0xc0000188 will be nowhere to be seen.
Here’s a detailed guide to enabling the Superfetch service:
- Press the Windows logo + R on your keyboard to open and access the Run applet.
- Input services.msc into the blank field and hit Enter.
- Navigate to the Services section, scroll down, and find Superfetch.
- Right-click on the service and select Properties.
- Click on the dropdown menu that says Startup Type.
- Select Automatic.
- If the service is disabled, select Start to enable the Superfetch service. Otherwise, skip this step.
- Hit the Apply button, then OK.
- Exit the Services manager and reboot your Windows computer.
Fix #5: Roll back your display driver.
The display driver is a piece of software that allows Windows and other programs on your computer to communicate with hardware components.
If you’ve had a recent hardware component installed, such as a second display or a keyboard, the problem may be due to a problem with the driver for this new hardware. To fix this, roll back the display driver by following these steps:
- Right-click on Computer and select Properties.
- Select the Device Manager option from the left-hand menu.
- In the Device Manager window, select Display adapters.
- Click on the + symbol next to your display adapter and then click on Roll Back Driver.
- Restart your computer after completing this step.
Fix #6: Increase the Startup Event Trace Session’s maximum file size.
The maximum file size of the Startup Event Trace Sessions is set at 250 MB by default.
To increase this size, do this:
- Right-click on Computer and click Properties.
- Click Advanced System Settings, then click the Advanced tab.
- Click Settings in the Performance section, then click Change in the Virtual Memory section. Increase the Maximum Size (KB) from 250 to 524288 or higher.
If you can’t find these options, take this route instead:
- Launch the Start menu and input cmd into the Search field.
- Click on the most relevant result and select Run as Administrator to launch Command Prompt with administrator privilege.
- Then input perfmon and hit Enter. This will launch the Performance Monitor window on your screen.
- Navigate to the Data Collector Sets section and double-click on it to expand it.
- Select Startup Event Trace Sessions.
- Find the ReadyBoot entry and double-click on it.
- Go to the Stop Condition tab and replace the value with 40.
- Hit Apply, then OK.
- Exit the Performance Monitor window and the Command Prompt.
Fix #7: Use a PC repair tool.
PC repair tools are a great way to fix display errors on a Windows machine. Even if you’re not an expert, you can use these to resolve all kinds of errors.
The best part about a PC repair tool is that it is easy to use and doesn’t cost a lot. It’s worth trying before taking your computer into the shop!
You might find it hard to believe, but these PC repair tools really do work. All of them provide a quick and easy way to scan your system to check for any issues that may be causing the problem with your display.
In Conclusion
The session “circular kernel context logger” stopped due to the following error: 0xc0000188 can be easy to fix for some, but others may require step-by-step help from guides like this. That is why we outlined this to be as detailed and clear as possible so that you can get back on track in no time!
Let us know which of the above fixes worked. Comment below!