Windows 10 and 11 come with pre-installed UWP apps that are essential for daily use. Among these is the Camera app, which allows you to record yourself if your device has a webcam. In case you have uninstalled the Camera app, you can easily reinstall it from the Microsoft Store.
With work from home and distance learning becoming popular because of the coronavirus, a lot of people rely on their camera for their online meetings, remote classes, video calls, online conferences, and even live streaming.
Most of the time, the camera works well with various applications, except for when camera errors like 0xA00F429F happen. Several Windows users have recently found that Windows 10/11 can’t start camera, and error code 0xA00F429F occurs. This has happened to users using Zoom, Skype, Facebook Messenger, and other applications that use the camera, which means that the problem is not program-specific.
When users try to use the application with a camera, only a black screen appears with the following error message:
Expert Tip: For smoother PC performance, consider using a PC optimization tool. It handles junk files, incorrect settings, and harmful apps. Make sure it's right for your system, and always check the EULA and Privacy Policy.
Special offer. About Outbyte, uninstall instructions, EULA, Privacy Policy.
Can’t start your camera
If you’re sure the camera is connected and installed properly, try checking for updated drivers.
If you need it, here’s the error code: 0xA00F429F<WindowShowFailed>(0x887A0004)
This error has affected several Windows users, particularly those who have recently installed updates.
Reasons Behind Windows 10/11 Can’t Start Camera, Error Code 0xA00F429F
At first glance, it seems like the user gets the “Can’t start camera on Windows 10/11” error 0xA00F429F because of driver problems. It is stated in the error message to check for updated drivers. If you recently installed a system update, such as Windows 10/11 1809 or other major builds, it is recommended to check your hardware drivers for those that need to be updated, including your camera. It is possible that the update corrupted the installed driver for the camera or the manufacturer of your camera has also released an updated driver in response to that system update.
There is also a chance that the update has reset the permissions granted to your applications, so you need to request permission again to be able to use the camera.
Sometimes the error is caused by the simple fact that another application is currently using the camera. Take note that you cannot simultaneously run applications that use the same camera. Depending on the application, you’ll either get the message that the camera is already in use or some other error message, like Windows 10/11 can’t start camera, error code 0xA00F429F.
There are numerous other issues that can cause the “Something went wrong camera” error, and in order to resolve it, you may need to update your drivers to ensure the compatibility of your PC and the device.
Finally, it’s possible that your laptop camera isn’t working for another reason, but thankfully, this article is here to help.
How to Fix Can’t Start Camera Error 0xA00F429F
When you get the Windows 10/11 Can’t start camera error code 0xA00F429F, the first thing you need to do is restart your computer and check if the camera is now working. Determine whether the error affects a specific program only or if it affects all the other applications. If it is program-specific, uninstall the app and reinstall a fresh, clean copy to fix the error.
If you’re using a third-party camera connected via USB, check whether your camera is plugged in correctly to your computer. If there is a switch, make sure that it is turned on. You should also close all other applications that you don’t use but are currently running, particularly those that use the camera as well. For the purpose of troubleshooting this error, leave one application that uses the camera running and close everything else.
To resolve this error, try the solutions listed below:
Solution 1: Give your computer access to the camera.

- Press the Win+X keys on your keyboard to open the Settings
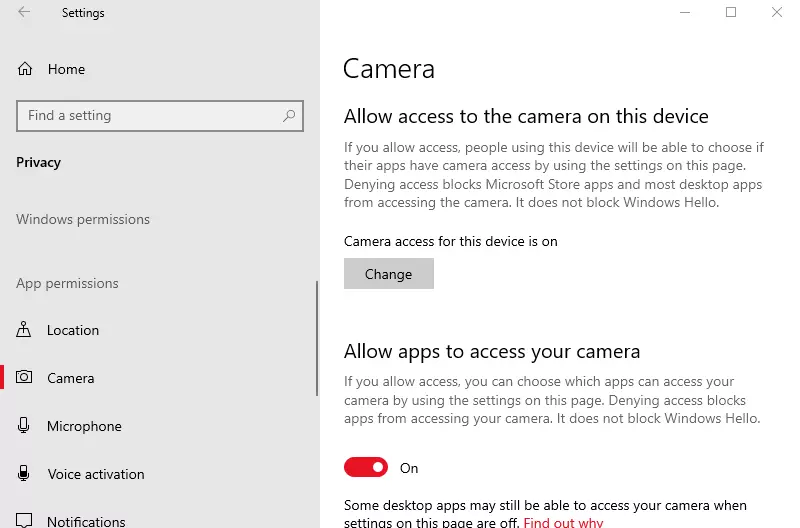
- Select Privacy from the Settings window.
- Go to Camera and enable Allow apps to access your camera.
- If the above-mentioned toggle is grayed out, first enable the Allow camera access on this device
Solution 2: Give the Camera app access to firewall or antivirus.

To give your camera app access to Firewall:
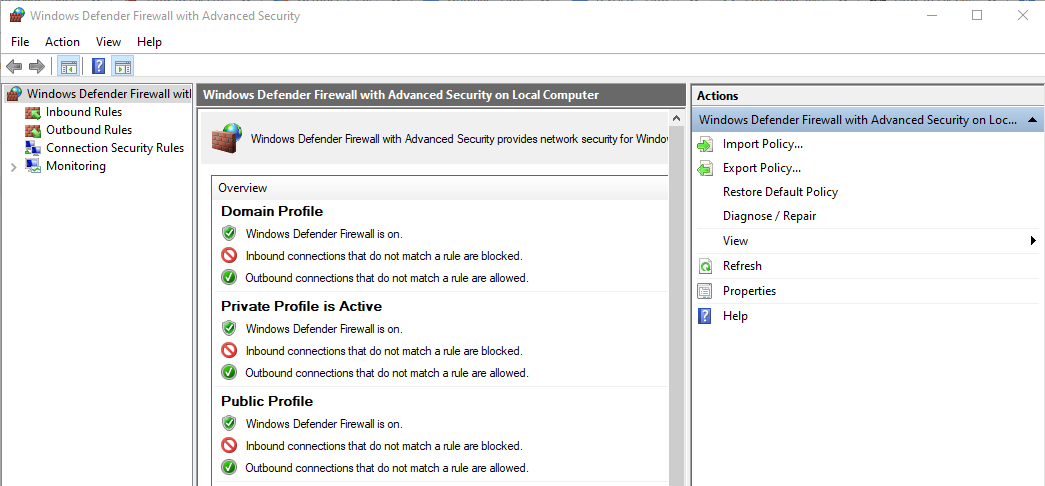
- Open Cortana search -> type firewall -> select the first option from the list.
- Select Allow an app or service through Windows Defender Firewall from the Firewall settings.
- Look for the camera app and grant incoming and outgoing access.
To allow camera access via third-party antivirus software (steps differ depending on software):
- Double-click the antivirus software icon to launch it.
- Navigate to Firewall settings and ensure that the Camera app has access.
Solution 3: Reset/Reinstall the Windows Camera App.
If the problem is related to the Camera app itself, you can first reset it by following the instructions here:
- Open Settings from the Start menu or by pressing Windows + I.
- Click on Apps > Apps & features and look for Camera from the list.
- Click on it, then click on the Advanced options link.
- Scroll down and click the Reset button to reset the app.
If that does not work, you can reinstall the app using a PowerShell command. Press Windows + X, then choose Windows PowerShell (Admin) from the menu. Execute the following command in the PowerShell window:
Get-AppxPackage *camera* | Remove-AppxPackage
This should uninstall the camera app. Next, reboot your computer and install the latest Camera app from the Microsoft Store.
Solution 4: Edit the Registry.
This worked for several Windows users but remember that editing the registry may cause irreversible changes to your computer, so proceed with caution. To resolve this error:
- Press Windows + S, then search for Registry Editor.
- Navigate to the following key: Computer\HKEY_LOKAL_MACHINE\SOFTWARE\WOW6432Node\Microsoft\Windows Media Foundation\Platform
- Right-click on the right pane, then choose New > DWORD (32-bit) Value.
- Type in EnableFrameServerMode under Value name.
- Double-click the newly created EnableFrameServerMode entry.
- Under Value data, type in 0 with the base value as Hexadecimal.
- Click OK to save your changes.
Restart your computer and check if the camera is now working.
Solution 5: Reset Permissions.
If you upgraded to Windows 10/11 or installed a major system update recently, you might need to allow your applications again to use the camera. In some more recent versions of Windows 10/11, some programs do not have standard access to the camera by default.
To allow your apps to access the camera, follow the steps below:
- Click Start > Settings.
- Click on Privacy > Camera.
- In the list of apps, choose the applications you want to allow access to your camera by toggling the switch to On.
- If the switch is grayed out, click Allow access to the camera on this device.
Restart your computer and open the affected application again to see if the camera has been fixed.
Solution 6: Update, Rollback, or Uninstall Camera Driver.
If the older camera driver does not work well with the updated version of Windows 10/11, you can check the manufacturer’s website for the latest version of the camera driver and install it on your computer. You may also consider using tools like Outbyte Driver Updater or similar products to scan your computer for outdated device drivers, including your camera, and potentially update them automatically.
On the other hand, if the driver was updated in the background, you can try rolling back to an older version of that driver, the version that does not trigger the error code 0xA00F429F.
Or, you can uninstall the driver and replace it with the basic driver from Microsoft. There is a chance that you might lose some features, but if you only need to use the camera for some basic video calls or record videos, this might be a good solution for you.
Solution 7: Set up a new user account.
If the error persists, create a new user account and see if the camera resolves itself after switching to a new user account.
Some webcams include an external switch. We must turn it on to ensure that it is operational.
Most recent HP laptops include a camera key on the keyboard. Please ensure that it is turned ON. Examine your keyboard carefully to see if there are any mistakes.
Solution 9: Quit all apps running in the background.

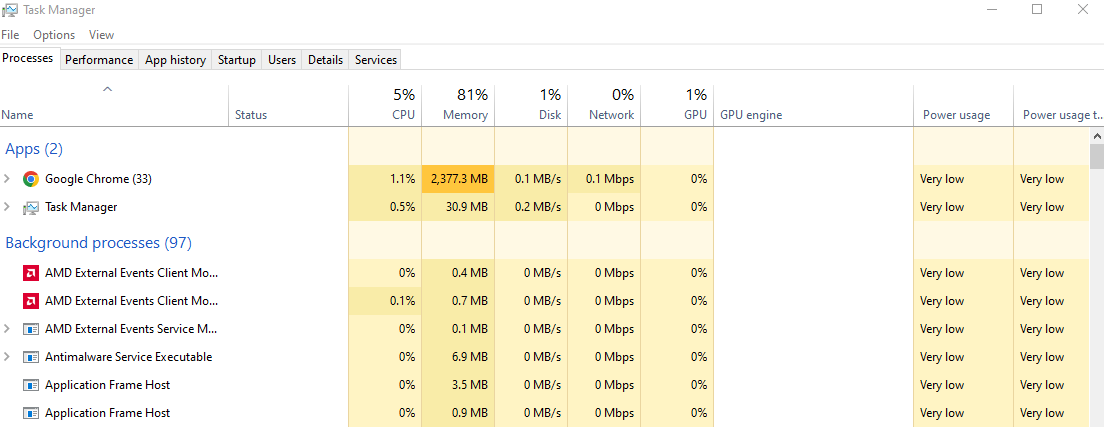
- To open Task Manager, press CTRL + SHIFT + Esc at the same time.
- In the task manager window, find the apps that are running the camera in the background, right-click on them, and choose End task from the menu.
Check to see if the problem has been resolved and the camera is operational. If not, proceed to the next step.
Solution 10: Delete your Camera Roll folder.
Many users reported that deleting the Camera Roll folder solved their problem. To accomplish this:
- Press Windows+E at the same time to launch the Explorer window.
- Select Pictures.
- Right-click on the Camera Roll Folder and press Ctrl+D on your keyboard to delete it.
- When the Delete Confirmation Dialog appears, click Yes.
- Restart your computer.
Check the camera’s functionality after applying this fix. If that doesn’t work, try the next solution.
Wrapping Up
Getting camera error code 0xA00F429F can be a hassle for students and remote workers who rely on messaging applications to stay connected with their peers. If this error keeps bugging you, the above steps should easily help you troubleshoot this one.
