Windows users may encounter error code 0x800703f1 while attempting to install a Windows Update. This error may prevent necessary upgrades and bug fixes, which can affect the overall performance and security of the PC. It is important to resolve this issue promptly.
How to Fix Windows 10 Update Error 0x800703F1
Issues like error 0x800703F1 on Windows 10 are fairly common, but there are various troubleshooting options available to help you fix them. For this specific error, the following PC repair options may prove useful.
Run the Windows Update Troubleshooter
This is the first step you should try.
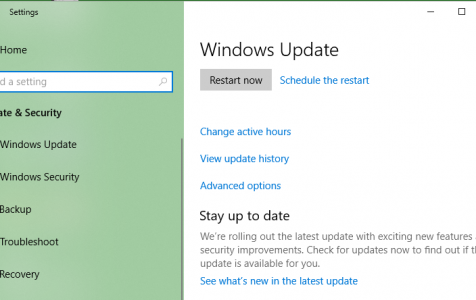
- Press the Windows key + 1 to open Settings
- Find and select the ‘Windows Update’ option.
- Select and Run the troubleshooter.
- Wait as Windows diagnoses the error and reports back. It may fix the error for you.
Perform a Clean Boot and then run Windows Update
You can use the Clean Boot State to diagnose and troubleshoot advanced Windows problems. A computer on Clean Boot state boots uses a minimal set of pre-selected drivers and programs. This helps eliminate any software conflicts that may be the reason the update isn’t installing. Follow the steps below to perform a clean boot:
Expert Tip: For smoother PC performance, consider using a PC optimization tool. It handles junk files, incorrect settings, and harmful apps. Make sure it's right for your system, and always check the EULA and Privacy Policy.
Special offer. About Outbyte, uninstall instructions, EULA, Privacy Policy.
- To open the System Configuration Utility, type ‘MSConfig’ into the start search field and hit Enter.
- Once it opens, click the General tab. On it, select ‘Selective Startup.’ Tick the box next to ‘Load System Services’ and untick the box next to ‘Load Startup Items.’ Before you press Apply, make sure that the box next to ‘Use original Boot configuration’ box is also checked.
- Go to the ‘Services’ tab. Tick the box next to ‘Hide all Microsoft services’ then press the Disable all button.
- Click ‘Apply’ or ‘OK,’ then reboot the computer. It should boot into Clean Boot State.
- Install the update in this state.
- Once installed, follow steps 1-3, but this time enable all.
Update Windows using Microsoft Update catalog
If the two steps above don’t work, try this:
- Go to Microsoft Update Catalog and search for the update that is refusing to install.
- Download and install it.
Download and install the .Net Framework
If the .Net Framework is the reason your updates keep getting stuck, consider installing it separately. Once installed, try downloading the Windows Update again.
Restart Windows Update Components
If your Windows Update Components have problems, you can restart them manually to fix the problem. Here’s how to restart them:
- Into the Start search field, type ‘CMD’ or ‘Command Prompt.’
- Right-click on the topmost option and select Run as administrator. Click ‘Yes’ on the popup.
- Type these commands into the Command Prompt window
net stop wuauserv
net stop cryptSvc
net stop bits
net stop msiserver
ren C:WindowsSoftwareDistribution SoftwareDistribution.old
ren C:WindowsSystem32catroot2 Catroot2.old
net start wuauserv
net start cryptSvc
net start bits
net start msiserver - Reboot windows and see if the error is gone.
Check your drivers
Corrupted drivers may be the cause of the error. To check if you have corrupted drivers, follow these steps:
- Search for Device Manager in the start menu and click it to open it.
- Look for any devices with a yellow exclamation mark and uninstall them.
- Restart the computer.
- Launch Device Manager.
- Click on ‘scan for hardware changes’ at the top of the window.
- Wait for Windows to install the new drivers.
- Attempt to install the Windows update.
Restart Windows Update Services
Restarting Windows services is another way you can resolve the Windows 10 error code 0x800703f1. Here’s how to restart Windows Update Services:
- Simultaneously press the Windows key + R to open the Run utility.
- Type in ‘services.msc’ then click the ‘OK’ button or press Enter.
- Scroll down on the Services window and find ‘Windows Update.’
- Right-click it, then select ‘restart.’
- Confirm that ‘Windows Update,’ ‘RPC Endpoint Mapper’, and ‘DCOM Server Process Launcher’ on the Services window are all running.
- Reboot your computer.
Reinstall Windows
If all else fails, you may need to reinstall your Windows operating system with the latest version.
Before you do this, back up your data first. Different reinstalling methods restore different things. Here are five reinstalling options available to you.
- Use the Windows 10 feature ‘Reset This PC.’ This option does not require any downloads. You also get to choose whether you want to retain your files or not.
- Reinstall Windows directly from an ISO file without a CD or USB. You can choose what you want to keep.
- Reinstall Windows 10 from a partition containing the ISO file. You may lose all your data.
- Reinstall Windows 10 with a CD or USB. This option will delete all your data.
- Reinstall Windows 10 using a System Image. This will restore all your data and apps.
Reinstalling your Windows is a last resort to fix error 0x800703F1. Try these and other options online before you do it.