Windows Update serves as the central hub for system and app updates. It automatically downloads updates in the background, allowing manual installation or scheduled installation. Although Microsoft has made improvements, the Windows Update feature is still not flawless.
It is common to encounter update errors, such as error code 0x80070424, when installing updates on Windows 10/11. These errors usually prevent updates from being successfully installed on your computer. And if they do get installed, the system suffers from various problems, such as programs crashing, apps freezing, sluggishness, unresponsive interface, and even bootup issues.
This article will discuss what you need to do when updates are not loading and the 0x80070424 error is shown.
What Is the Error Code 0x80070424?
The 0x80070424 error is a Windows Update issue that prevents the operating system from loading available updates and downloading them to the computer. This is an old error that was also common in the older versions of the Windows operating system, such as Windows 7 and 8.
Expert Tip: For smoother PC performance, consider using a PC optimization tool. It handles junk files, incorrect settings, and harmful apps. Make sure it's right for your system, and always check the EULA and Privacy Policy.
Special offer. About Outbyte, uninstall instructions, EULA, Privacy Policy.
This error usually occurs when the required system files are not registered, preventing users from getting their system updated. Some Windows users reported encountering the error when using the Windows Update Standalone Installer (Wusa.exe), but the error can also appear when changing Firewall settings.
The error code 0x80070424 on Windows 10/11 is usually accompanied with any of the following messages:
- Windows Update Standalone Installer
Installer encountered an error: 0x80070424
The specified service does not exist as an installed service.
- Windows Update
There were some problems installing updates, but we’ll try again later. If you keep seeing this and want to search the web or contact support for information, this may help: (0x80070424)
What Causes the Error Code 0x80070424 on Windows 10/11?
The error code 0x80070424 can occur due to various reasons, but the main culprit is usually a missing system file required to run during the update. A missing Windows Update file or a Windows system file will prevent updates from being loaded and installed on your system.
Another likely culprit is the Windows Module Installer. The Windows Module Installer is a key service that enables the modification, installation, and removal of Windows updates and all other components. If this service is disabled or the binary is corrupted, the installation of updates will fail.
Aside from these factors, the error code 0x80070424 can also be caused by faulty Windows Update components, incomplete or corrupted update files, corrupted system processes, or malware. But since the error code 0x80070424 is not a new Windows 10/11 issue, finding out the perfect solution for this problem is easy. You only need to figure out what caused the error and apply the appropriate fix, or work your way down our list below if you’re not sure what caused it.
How to Fix the Error Code 0x80070424
Before we apply any of the complicated solutions before, let’s try these basic troubleshooting steps first:
- Disable your antivirus and Firewall temporarily. Some updates have trouble running because they conflict with these security services, so try to disable them first before installing your updates.
- Delete junk files on your system by running Outbyte PC Repair. It deletes old downloads, cached data, and other unnecessary files that are cluttering your computer and causing problems, such as the error 0x80070424.
- Restart your computer. Refreshing your operating system is the easiest way to resolve errors caused by a temporary glitch or bug.
If these steps don’t work, then it’s time to bring out the big guns to deal with this error 0x80070424.
Solution #1: Run the Windows Update Troubleshooter.
Whenever you encounter an error when using Windows Update, the first thing you need to do is run the troubleshooter. This tool is designed to handle common problems associated with Windows Update and should be your first shot at resolving the error 0x80070424.
To run the Windows Update troubleshooter, follow the steps below:
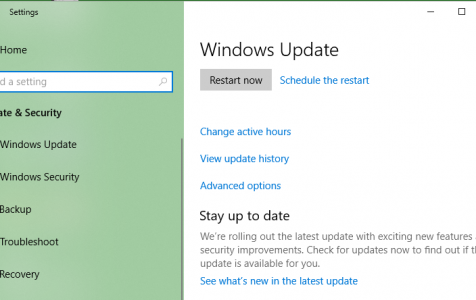
- Press the Windows + I keys to launch the Settings app.
- Click Update & Security.
- Click Troubleshoot from the left menu and locate Windows Update.
- Click on Windows Update to highlight it, then hit the Run Troubleshooter button.
The troubleshooter should run on its own, but you need to follow on-screen instructions to resolve any issues detected. Once the troubleshooter has done its job, restart your computer and try running Windows Update again.
Solution #2: Enable the Windows Update Services.
One of the reasons why Windows Update is not working and giving you an error is because one of its components is not running. To make sure all the Windows Update services are running, follow the instructions below:
- Open the Run utility by pressing Windows + R.
- Type in services.msc in the dialog box.
- Look for the following services and make sure their status is running:
- Windows Update
- Background Intelligent Transfer Service
- Workstation
- If any of these services has a Stopped status, right-click on it and select Start.
- Make sure the services are also set to Automatic.
Reboot your computer and launch Windows Update to check if the error has been fixed.
Solution #3: Reset the Windows Update Services.
Whenever you launch Windows Update, the service uses its update components to load, download, save, and install all the available updates. But if one of these components is not operating properly, errors, such as 0x80070424, occur.
To fix this error, you need to reset the Windows Update components by following the steps outlined below:
- Press Windows + X, then choose Windows Powershell (Admin) to open an elevated PowerShell command prompt.
- Copy and paste the following following commands one by one, then press Enter after each line:
- net stop wuauserv
- net stop cryptSvc
- net stop bits
- net stop msiserver
- Ren C:\Windows\SoftwareDistribution SoftwareDistribution.old
- Ren C:\Windows\System32\catroot2 Catroot2.old
- net start wuauserv
- net start cryptSvc
- net start bits
- net start msiserver
That should reboot your Windows Update services and resolve any issues you are experiencing.
Solution #4: Enable Windows Update via Registry.
Another reason why you’re having problems with Windows Update is because it is probably disabled in the Windows Registry. To fix this, you need to edit the registry entry by following the steps below:
- Press Windows + R to open the Run dialog.
- Type in regedit then press Enter.
- Copy and paste the following path in the address bar: \HKEY_LOCAL_MACHINE\SOFTWARE\Policies\Microsoft\Windows\WindowsUpdate
- In the right pane, search for the DisableWindowsUpdateAccess DWORD.
- Double-click it and set the value to 0.
Restart your computer for the changes to take effect, then re-launch Windows Update to see if it is now running properly.
Solution #5:Rename the CBS Log.
The CBS log is where all information about Windows Update is stored. If the file gets corrupted, the Windows Update will not run properly and you’ll most probably encounter an error, such as the error code 0x80070424. Renaming the CBS log file should easily fix the problem.
To do this:
- Click Start and paste the following in the search box: %systemroot%\Logs\CBS.
- Hit Enter.
- Right-click on the CBS.Log file and change the name to something else.
If, for some reason, it doesn’t allow you to rename the file, do the following instead:
- Type services in the search box.
- Click Services and scroll down to look for the Windows Modules Installer service.
- Double-click on it and set its startup type to Manual.
- Restart your computer.
- Go to C:\Windows\Logs\CBS and rename the CBS.Log file.
- Reboot your computer, then go back to the Services list.
- Set Windows Modules Installer Service back to Automatic.
Once the CBS.Log has been renamed, check Windows Update i f the error code 0x80070424 has been fixed.
Summary
As Microsoft continues to improve the Windows Update service, it is not surprising to encounter issues, such as error code 0x80070424. This error prevents updates from loading and being installed on the computer, opening the system to a lot of vulnerabilities. To resolve this error, simply follow the fixes listed above to get Windows Update running properly and your operating system updated once again.