
Are you experiencing mouse issues on your Mac? Wired mice rarely malfunction, while wireless mice like the Magic Mouse and Logitech mice can disconnect unexpectedly. Some users have reported problems with scrolling or multi-touch gestures. Running a system scan can help detect underlying issues like performance problems, junk files, harmful apps, or security threats that could slow down your Mac.
Tip: If you’re hearing loud clicks while using your Magic Mouse, here’s the trick.
Below you’ll find several tips and fixes that should help your Mac’s mouse function properly again.
Pro Tip: Scan your Mac for performance issues, junk files, harmful apps, and security threats
that can cause system issues or slow performance.
Special offer. About Outbyte, uninstall instructions, EULA, Privacy Policy.
Why Is Your Mouse Not Working on a Mac?
Most tasks in macOS and OS X rely heavily on the mouse cursor – whether you’re copying a file from your system to a disk, typing a URL into a browser address bar, or opening an application from your Dock. All of these actions become second nature, but what happens if the mouse cursor vanishes and cannot be found or if it freezes? Or what if the right click on a mouse is not working on a Mac?
If this happens, we usually find ourselves moving the mouse around quickly to see if it will start working again or moving it to a fixed point, such as a corner of the display, to ground our movement at that position as a means of locating the mouse. However, these actions are only useful if the cursor is active or the computer is able to recognize the input device. These methods will not work if the mouse is not working on a Mac.
Mac mouse issues are not uncommon, and they can occur due to application incompatibilities, because of a crash or freeze, or after updating or upgrading your system software, drivers or mouse control software.
If you encounter such a problem, make sure to first check for hardware flaws. A mouse can become stuck due to a faulty connection. On the other hand, if you start typing or playing a movie file, the cursor may become hidden by default and refuse to appear when you move the mouse. In these cases, reconnecting the device should result in a functional mouse/cursor.
If the mouse cursor is indeed missing, your mouse may still accept input but will not display where the input is directed on the screen. For example, while you can move the mouse to the top-left corner of the screen and click, you may see the menus activate, but tracking what happens next will be more difficult.
In these cases, you can resort to hard-resetting your Mac, but this is rather extreme, and you will most likely regain access to your system and get the mouse working again by using the keyboard.
Another tip that may be useful in situations where the mouse is not working on a Mac is to access the system menus via the keyboard, which can be done by pressing Control-F2 for system menus and Control-F9 for status menus (menu extras). You can also assign these options to custom hotkeys to make them more consistent and convenient to access.
Basic Troubleshooting If a Wired Mouse Is Not Working on a Mac
Before you try anything else, check out these basic troubleshooting steps that might be able to resolve your mouse issue. These fixes are simple to carry out. Check to see if you have fixed your issue after each step:
- Reboot your Mac. Restart the computer via the Apple menu.
- Check that your Mac is running the most recent version of macOS. To check, go to System Preferences > Software Update.
- Turn your Magic Mouse off and then on. On the bottom of your mouse, there is a switch.
- Turn off Bluetooth on your Mac, then turn it back on. In the Control Center or menu bar, click the Bluetooth status icon. Turn it off for one minute, then turn it back on.
- Using the Lightning cable, connect your mouse to your Mac. Maintain the connection for one minute. Then you can unplug it. It is also a good idea to check the battery level of your mouse. Check that the battery is fully charged. You can verify it by selecting the Bluetooth icon from the menu bar.
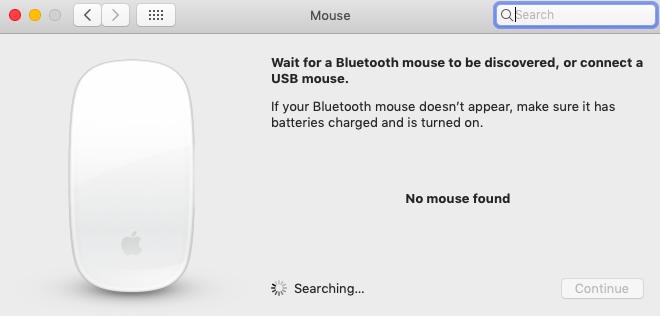
- Examine your mouse settings in System Preferences > Mouse.
- Start your Mac in Safe Mode and check to see if your mouse is functioning properly.
- Consider using a tool to delete junk files and optimize your Mac’s performance. One such tool is Outbyte macAries, but there are many others available depending on your specific needs.
What to Do If a Mouse Is Not Working on a Mac
If your Mac computer isn’t recognizing your mouse, first rule out any physical issues. The majority of the time, this issue happens to a USB mouse plugged into a faulty USB port or a wireless mouse running out of battery power. Troubleshooting the problem determines whether it is a simple physical issue or a symptom of a larger problem that necessitates a system restore or a mouse replacement.
Before you start working on this issue, make sure to enable Mouse Keys first.
Mouse Keys is an accessibility feature that allows you to navigate macOS using your keyboard. If you don’t have another input device (such as a trackpad), you might want to use one before proceeding with some of the fixes that follow.
To begin, press Command + Option + F5 to open the Accessibility shortcuts menu. Then, repeatedly press the Tab key to highlight the Mouse Keys option. To select it, press Space, then Esc to save your changes.
With Mouse Keys enabled, move the cursor around by pressing the 7, 8, 9, U, O, J, K, and L keys (or the 7, 8, 9, 4, 6, 1, 2, and 3 keys on a numpad). To simulate a mouse click, press the I key (or the 5 key on the numpad).
Here are the solutions to common Mac mouse issues, such as the mouse not working on a Mac or the mouse scroll not working on a Mac. Let’s check them out.
Step 1. Check the battery status
First, turn the mouse over and make sure the on/off switch is green and not red. Assuming the switch is turned on, the Magic Mouse’s battery may have died. When the battery on your Mac runs low, it will notify you, but if it runs out overnight, you may not be aware.
Replace the batteries with new ones, but if you don’t have any, try an old TV remote trick: gently roll the batteries in their cradle with your fingertips. This can help to remove any corrosion that has accumulated in the contacts. If that doesn’t work, try swapping the battery positions and making sure the batteries are oriented correctly. Even intelligent adults make mistakes like this from time to time.
Replace the AA batteries if you have an older Magic Mouse. Otherwise, if it’s a newer Magic Mouse 2 with a built-in battery, charge it for a few minutes via its Lightning port before attempting to turn it back on. You’re in luck if it works. If not, double-check that the Magic Mouse is still connected to your Mac.
Step 2. Switch to a different surface
Try using the mouse on a different surface to fix a skipping mouse cursor. An even-toned mousepad is an ideal surface for a mouse, but most decent mice can track on most hard surfaces. Glass is an exception because it is a terrible surface for a laser mouse to track on. Even modern laser mice can be confused by multi-color surfaces, such as wood with a prominent dark grain.
Step 3. Toggle the mouse’s power switch
Try cycling the power on mice with power switches. Turn off the mouse, wait ten seconds, and then turn it back on. This will re-establish the wireless connection and allow the wireless mouse to establish a more stable communication channel.
Step 4. Improve your mouse’s connection
If your mouse, like many devices, has a USB receiver, make sure it is physically close to the mouse. Although a direct line of sight between the mouse and the receiver is not required for modern radio frequency mice, it can help reduce the number of obstacles that may interfere with wireless transmission.
Also, ensure that the mouse’s receiver is not connected to a USB hub. This is another of those things that don’t matter in most cases, but the hub doesn’t always handle mice correctly. Connect the USB receiver directly to the Mac to ensure this isn’t a problem.
If nothing else works, try a different receiver. While it is uncommon, damaged receivers are not unheard of. If the device isn’t getting enough power, it won’t be able to pick up the wireless connection reliably.
Step 5. Reboot your Bluetooth connection
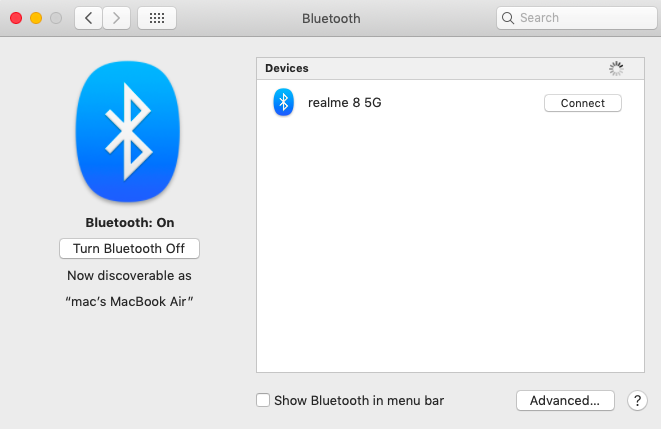
Sometimes all it takes to get a quick fix is to turn your Mac’s Bluetooth off and on again. This can be accomplished by restarting your computer or by accessing the Bluetooth status menu in your menu bar. Alternatively, you can open Control Center and expand the Bluetooth controls to find the Bluetooth settings. Locate the toggle or switch next to Bluetooth, wait a few seconds, and then turn the toggle back on. Everything should reconnect automatically, but just in case, disconnect and reconnect your mouse for a double dose of troubleshooting.
If all of the above fails to resolve your mouse problem, you can try resetting the Bluetooth module. Hold down the Shift and Option keys while clicking on the Bluetooth icon in the upper right corner of your screen. Reset the module by selecting Reset the Bluetooth module and pressing OK. Reconnect your mouse via Bluetooth and check to see if your problem has been resolved.
Step 6. Use third-party software
Because many Mac users rely on various third-party products to work with their Apple hardware, it’s beneficial to be aware of the third-party software available that can help with any lingering connectivity issues. The Logitech Options app, for example, ensures that you have all of the correct configuration settings.
Troubleshooting could be as simple as removing your mouse from the configuration utility, restarting the Mac, and then re-adding the mouse. Some mice also require driver updates to ensure smooth connectivity with current macOS hardware, so having this software installed can be extremely beneficial.
Step 7. Update your Mac
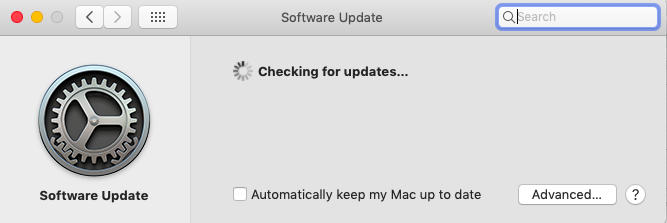
Updating macOS software is more likely to affect a third-party mouse than Apple’s Magic Mouse 2, but it’s equally important. Software updates can assist in resolving simple configuration issues for which the rest of the options on this list may not have a solution. To check for updates, open the Apple Menu in the top-left corner and select System Preferences. Next, locate the Software Update menu option and click on Update Now to check for updates. Install all available updates and see if it solves your mouse problem.
Step 8. Delete mouse plist files

Another method for repairing a broken mouse is to delete the Property List (PLIST) files that contain your mouse preferences and configuration settings. While it will not break anything, this is a more advanced fix. Therefore, it’s best to make a Time Machine backup before proceeding. When you’re ready to go, do the following:
- Select Go > Go to Folder from the Finder menu.
- Enter ~/Library/Preferences and press Enter.
- Select the following files and move them to the Trash:
- apple.AppleMultitouchMouse.plist
- apple.driver.AppleBluetoothMultitouch.mouse.plist
- apple.driver.AppleHIDMouse.plist
- Restart your Mac after that. It will then recreate the deleted PLIST files automatically.
If your mouse now works properly, go back to the Preferences pane (System Preferences > Mouse) and reconfigure it.
Step 9. Fix the scroll not working on your Mac mouse
Whereas previous versions of macOS provided more mouse configuration options, Big Sur focuses on adjusting tracking, scrolling, and double-clicking speeds. These are still very useful settings that can help with a variety of mouse-related issues. It is extremely simple to use this menu and make changes. Navigate to Apple Menu > System Preferences > Mouse. Once there, you can make changes to tracking, double-clicking, and scrolling speeds.
Step 10. Replace your mouse
It could be a hardware failure if your mouse is double-clicking, not sensing your clicks, or otherwise processing input incorrectly. Most devices will show signs of wear after about 100,000 clicks. This is typically manifested as erroneous double-clicks in the primary click button. If this is the case, you’ll need to replace the mouse entirely to resolve the issue.