For more than 15 years, Lucida Grande was the face of macOS. It had been the built-in typeface for the macOS interface until OS X Yosemite was released in 2014. When Yosemite was launched, Lucida Grande was replaced with Helvetica Neue. After more than a year, OS X El Capitan was released and brought with it a new interface using the San Francisco font.
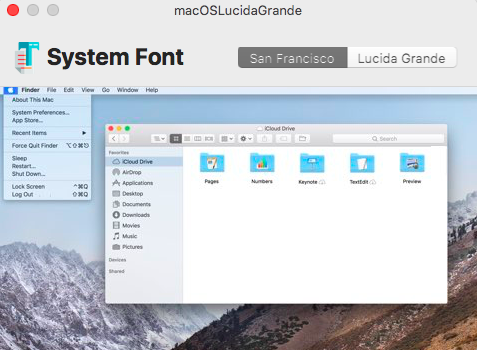
For those sentimental ones who want to bring back the old Mac look or those who want to use the system font they grew familiar with, we have some good news: you can actually switch back to the Lucida Grande font in macOS, using a nifty little tool called macOSLucidaGrande.
This tool was created by a developer named Luming Yin and has the simple function of changing the MacOS Mojave system font from San Francisco to Lucida Grande, which was the default system font for macOS for many years. It also works with the dark mode theme of macOS Mojave, so you don’t have to worry about not being able to use the new feature with this old font.
The macOSLucidaGrande tool, which can be downloaded from Github, can change the system font in Mac without making any modifications to the system files. However, you will need to restart your Mac after the installation of the new font for the changes to take effect.
Pro Tip: Scan your Mac for performance issues, junk files, harmful apps, and security threats
that can cause system issues or slow performance.
Special offer. About Outbyte, uninstall instructions, EULA, Privacy Policy.
The app is not perfect, so you can expect to encounter some glitches or a few font quirks in some of the apps and throughout macOS.
And here’s a warning: this tool is certainly not for everyone. If you’re a new Mac user, you won’t be able to appreciate the sentimental value of the Lucida Grande font because you might not be able to differentiate it from San Francisco or other fonts in the first place. But for those who grew up with Lucida Grande, this free tool makes a huge difference.
How to Change MacOS Mojave System Font
Please note that this tool only switches the system font from San Francisco or Helvetica Neue to Lucida Grande, so you can’t use any other font that you want. This tool can be used on macOS Mojave (10.14), High Sierra (10.13), Sierra (10.12), OS X El Capitan (10.11) and Yosemite (10.10)
To avoid any problems during the installation, delete all junk files on your computer first, using an app such as Mac repair app. Junk files can sometimes interfere with installation processes and cause failure or corruption. Once you have deleted all trash, you can proceed with the installation of the macOSLucidaGrande app by following the steps below:
- The first step is to download the macOSLucidaGrande app from Luming Yin’s Github page.

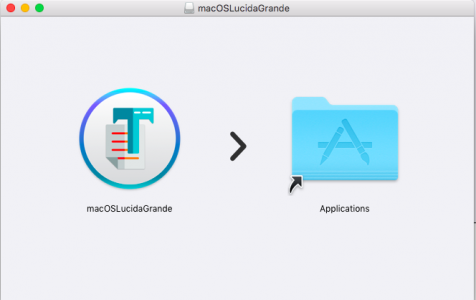
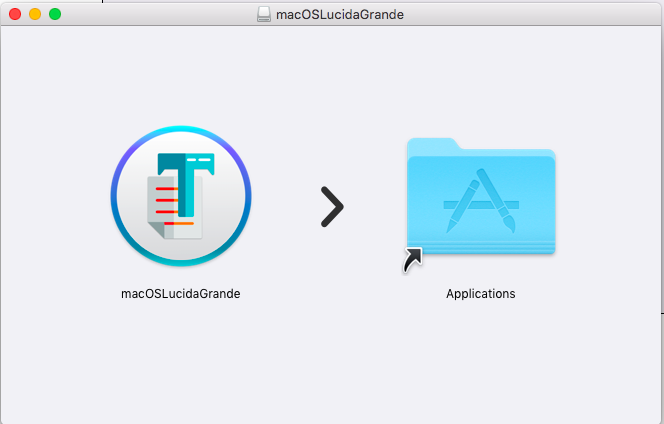
- Open the downloaded file and drag it to the Applications

- Launch the app and click the Lucida Grande tab beside the San Francisco tab.
- To install the system font on your Mac, click the green checkmark button at the bottom right of the window.
- Restart your computer to allow the changes to take effect.
After restarting, you will see Lucida Grande as the new system font for windows bars, title bars, menus, and throughout your macOS system.
How to Change Back to Default MacOS Mojave System Font
If you ever change your mind and you want to go back to your Mac’s default system font (San Francisco or Helvetica Neue), you can easily switch between the two fonts, using the same tool.
To switch back to your old font, follow these instructions:
- Launch the macOSLucidaGrande
- Click on the San Francisco tab this time.

- Click the green checkmark button at the bottom right of the screen to reset your system font.
- Reboot your Mac.
After restart, you should be able to see that the system font has been changed back to your macOS’ default font.
San Francisco vs Lucida Grande
There isn’t actually much difference between the two fonts, and many users might fail to notice any changes when using this tool. But if you’ve used an older Mac with a Lucida Grande system font before, you’ll see the subtle difference between the two fonts.
San Francisco is the first in-house font Cupertino has developed in more than 20 years, and it was designed for maximum legibility. It features subtle roundness, clean and compact shapes, as well as ample space between letters. Lucida Grande, on the other hand, has wider spacing or kerning and has wider letters.
The two fonts actually look almost the same, but some users argue that San Francisco looks better in Retina screens compared to Lucida Grande. The great thing about this app is that you can switch back and forth to the font that you like effortlessly.
Known Issues
The macOSLucidaGrande utility tool was released just two months ago and is still in the development phase. Luming Yin has identified two known issues when using the app to warn users of possible problems.
The first issue involves truncated text overlapping in web browsers such as Safari and Firefox. Users might notice that some letters, especially the thin ones, may not display correctly on these browsers. This problem is noticed not only on macOS Mojave but on High Sierra, Sierra and El Capitan as well.
The second issue involves the password input field. Previously, you’ll see * characters when you type in your password. But when you use the app to switch fonts, you’ll only see a blank field even when you enter your password, which makes you think that you have not entered anything at all. Don’t worry because your password is still typed in completely and will be accepted by the system.
This second issue only becomes a problem when you get lost in the middle of typing your password and can’t remember how many characters you’ve typed in. If this is the case, just completely delete all the characters you’ve typed and type your password again.
Summary
San Francisco is a clean and compact font designed for maximum readability, but those who are used to Lucida Grande will definitely appreciate this app. It is easy to install and allows users to easily switch between Lucida Grande and the macOS’ default system font.

