If you’ve just bought your first Mac and you’re switching from a Windows PC, congratulations!
Switching platforms doesn’t mean starting over: You can still use those old files. Apple makes it easy with a free utility called Windows Migration Assistant. Here’s how to transfer data from PC to Mac using the Windows Migration Assistant from Apple.
What is Migration Assistant?
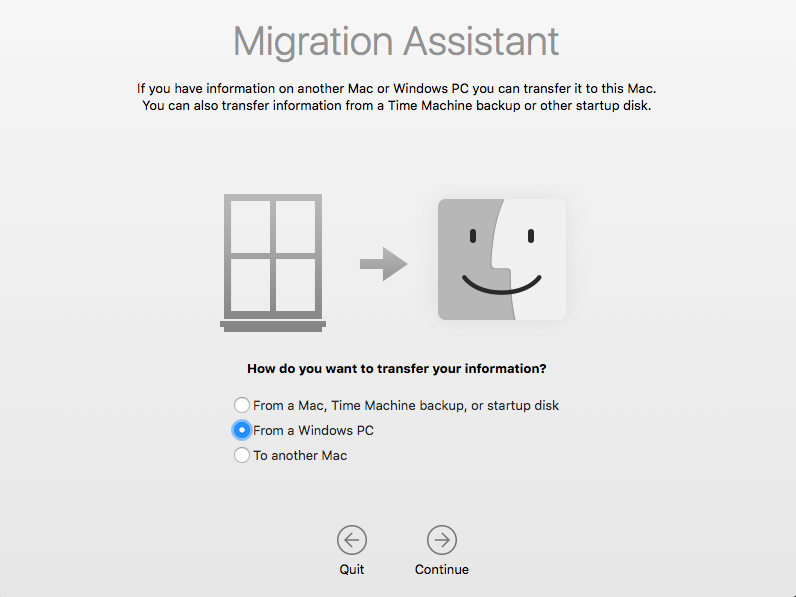
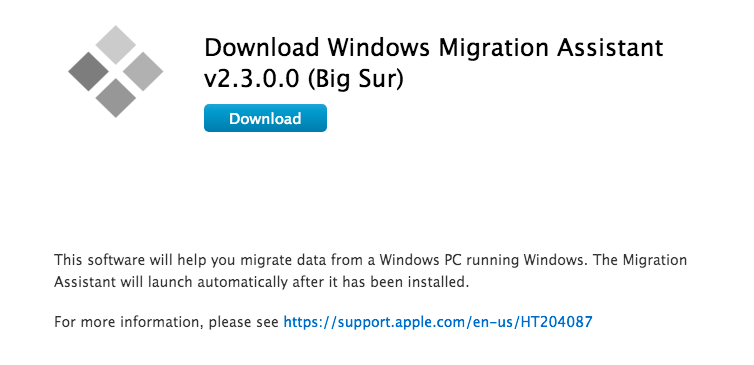
Migration Assistant is a utility Apple includes in the Utilities folder of every Mac. You’ll see it when you first start up your Mac when your Mac asks you if you want to transfer data over from another Mac, a Time Machine backup, or a PC. Apple makes the app freely available for download for transferring to your Mac. You’ll need specific software, depending on what macOS or OS X operating system you’re transferring to. You’ll need to download the Migration Assistant software to your PC before you begin. Below are the following software links, depending on the Mac operating system to which you’re migrating.
- Windows Migration Assistant for macOS Big Sur
- Windows Migration Assistant for macOS Mojave or later
- Windows Migration Assistant for macOS Sierra and High Sierra
- Windows Migration Assistant for OS X El Capitan or earlier
Migration Assistant will help you transfer files from a PC running Windows 7, Windows 8, or Windows 10/11 operating systems. The Mac and the PC both have to be running Migration Assistant.
Pro Tip: Scan your Mac for performance issues, junk files, harmful apps, and security threats
that can cause system issues or slow performance.
Special offer. About Outbyte, uninstall instructions, EULA, Privacy Policy.
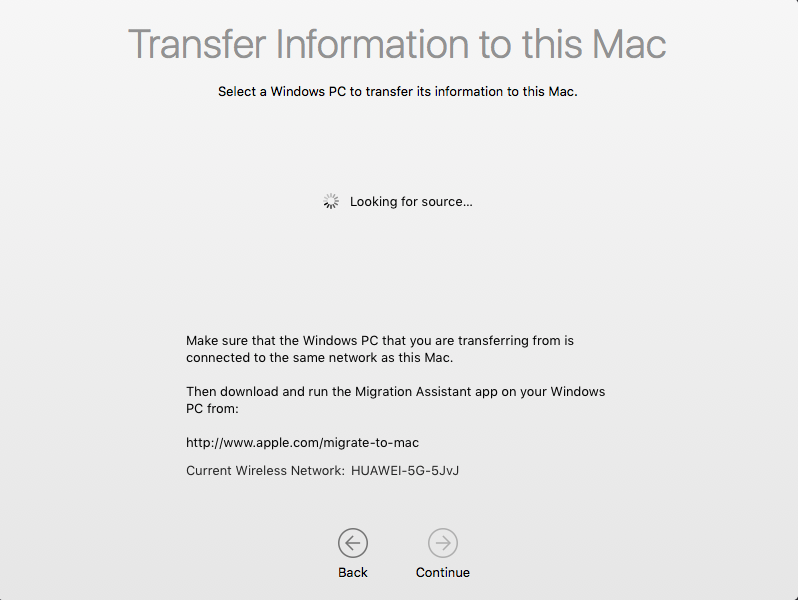
Both should be on the same network in order to find each other. The data migration may take several hours depending on what’s being transferred and what means are used: WiFi is slower, a wired Ethernet connection is faster. But one way or the other, your patience will be rewarded.
What actual data gets transferred will depend on which version of Windows you’re using and what programs created your data. Bookmarks from Internet Explorer and Firefox will be brought into Safari, for example. iTunes content and image files should make it over as well. System settings will get pulled over. You’ll be able to specify what other files you’d like to bring over, too.
Email, contacts, and calendar information are where it gets a bit tricky. The bottom line is that Migration Assistant will pull over your email account information, and if you’re using Microsoft Outlook, it should pull over your email messages, your contacts, and your calendars. Other programs may vary. Apple has posted a detailed chart of what gets migrated over to help you understand.
Even though you’re transferring all your Windows data to your Mac, it doesn’t mean you should only have the data on your computer. We highly suggest that people know how to back up their Macs and that they do so often. Plus, we also suggest that you invest in one of the best external hard drives for Mac, so you can have an extra copy of any of your important documents and files. Be data smart, y’all!
What You Need Before Transferring Data from Windows to Mac
Before you get too excited and try to start transferring your PC’s data to your new Mac, you’ll need to have a couple of things at the ready.
You must have the administrative username and password associated with the PC.
Both computers must be on the same network, either through WiFi or Ethernet.
You should perform a drive performance check before running Migration Assistant, or you may not be able to use the software properly.
- Click on Start on your PC.
- Click on Run.
- type cmd into the Run window.
- Press Enter.
- type chkdsk into the Command window.
- Press Enter.
If your drive performance check uncovers issues, you’ll need to run a drive repair process.
- Type chkdsk drive: /F (Change the name “drive” to whatever the name of your Windows startup disk is) into the Command window.
- Press Enter.
- Press Y when prompted.
- Restart your PC.
You will need to repeat the steps above until the drive performance check returns without any issues. You can then use Migration Assistant to move your data to your Mac.
Migrate Data from Windows to Mac Using Migration Assistant
First, connect your Mac to your PC either through Ethernet or by making sure both computers are on the same local Wi-Fi network.

On your new Mac:
- Launch a Finder window.
- Click on Applications in the sidebar.
- Double-click or control-click on the Utilities folder.
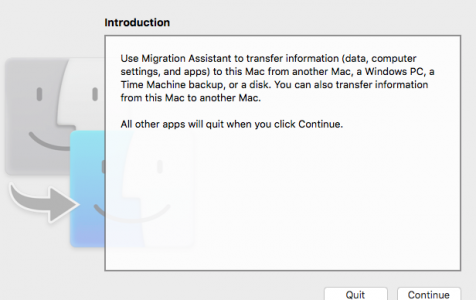
- Click on Migration Assistant.
- Click Continue.
- Click From a PC. when prompted to select how you want to transfer your information.
- Click Continue.

On your PC:
Make sure you’ve downloaded and installed Migration Assistant on your PC.

Launch Migration Assistant on your PC.
Launching Migration Assistant on the PC is a one-way trip: It’s only designed to transfer data from your PC to a new Mac. After launching it, Migration Assistant for Windows will try to connect to its Mac counterpart. A security code will display on the screen.
Confirm that the code on your PC is the same on your Mac.
Select the files, folders, and settings you want to transfer from your PC to your Mac.
Click continue.
There are other ways to move files between Macs and PCs. Thumb drives will work on both machines, so you can manually transfer whatever files you want to use, for example. But Migration Assistant provides an elegant, convenient, and absolutely free way of managing the transition to becoming a Mac user, as long as you have the time to use it.
Alternative Ways to Move Your Data from a Windows PC to Your Mac
Although using Migration Assistant can be helpful when transferring a large number of files and folders to your new Mac from a Windows-based PC, sometimes this process can be time-consuming (especially if you are just trying to send simple files such as music, photos, and videos or even individual documents). To avoid the time crunch, you can choose from one of the following options to complete your task.
Option 1: Transfer files from Windows to Mac using the cloud
To transfer your files using the cloud, first, you must make the decision on which cloud you want to use. With Apple products, iCloud is built into many of the systems applications. To access iCloud from a Windows computer, open your web browser and go to www.iCloud.com and upload your files here. You can also use other cloud services such as Dropbox, Google Drive, and Microsoft OneDrive to name a few.
Option 2: Turn on and use File Sharing to transfer PC files to Mac
Do the following to turn on and use File Sharing on Windows and Mac computers:
- On the Windows computer, open the Control Panel.
- For Windows 7 users and below, the Control Panel is found on the Start menu. For Windows 8 users, the Control Panel can be found in the Charm sidebar: Start off the right-hand edge of the screen and swipe one finger inward toward the center.
- Open the tab or button that says File Sharing and turn the feature on.
- Either choose the folders you want to be shareable or move files to the Public folder.
- Make your selections. You are finished with the Windows computer.
- From the Mac, open the System Preferences app located in the Finder’s Applications folder. (Usually located on the dock and within the Launchpad as well.)
- Locate the Preference option for Sharing and click on the blue folder icon that accompanies it.
- Within the sidebar of the Sharing Preferences screen, click on the box next to File Sharing to enable this feature.
- Note that directly to the right is a button labeled “Options.”
- Select the Options button and check the two boxes that say “Share files and folders using SMB” and “AFP” to make your computer visible to Windows’ systems and vice versa.
Navigate to the Windows shared folders from your Mac and copy the files to your hard drive. It’s that easy!
Option 3: Transfer files to an external memory module
To transfer files to an external memory module like a hard drive, SD memory card, or even an iPod set to disk mode, you plug the memory module into the computer, copy the files to the external source, and properly eject the drive by right-clicking and selecting Eject. Plug the memory module into the Mac and drag the files to your computer’s hard drive. To avoid data corruption, properly eject the drive by holding the Option key while clicking the Drive icon and selecting Eject.
To format new memory modules to work for both platforms, perform an erase/format action within Apple’s Disk Utility application found in the Finder’s Utilities folder. Select the drive you want to format and then select the Erase tab. A drop-down appears; choose the type of formatting you want to use and click the Erase button.
Option 4: Ad-Hoc (Wi-Fi direct connection) and Bluetooth file sharing
To transfer your files using an Ad-Hoc or Bluetooth connection, you first must pair the two devices with either your Wi-Fi signal or your Bluetooth signal.
To pair with Wi-Fi, you must set the Apple’s Wi-Fi signal to go out instead of in. Launch the OS X System Preferences app, select Sharing→Internet Sharing, and turn this feature on. Keep in mind that if you do not have a wired Internet connection, your device will disconnect from your network. After you turn Internet sharing on, configure your network by selecting Wi-Fi options.
Now you can connect your Wi-Fi from your PC to the Wi-Fi signal coming from your Mac. After you are connected, you will be presented with options to use the Internet through this connection as well as share files.
To pair the two computers with a Bluetooth connection, you will need to open the Bluetooth settings from both computers. On either one of the computers set the Bluetooth to visible status, and from the other computer attempt to connect to that visible signal. After the two computers have been paired, you can use the Apple Bluetooth File Sharing application to move files as needed.
Option 5: Direct file transfer using Firewire or USB connection from PC to Mac
If no network is available, one of the computers lacks Wi-Fi and/or Bluetooth, and you have no external memory modules, then a direct connection using a USB or Firewire cable may be the most feasible route for you to take.
Connect the two computers with a Firewire, USB, or Firewire-to-USB cable. The Windows computer, if powered on, will now show up on the Mac as an external hard drive. Simply locate the files you want to transfer and drag-and-drop them to the location of your choice.
