
What is PopStop Search Redirect?
Cybercriminals become smarter and smarter as days pass. They always seek to exploit opportunities, particularly attacking those unknowing users. One method they practice involves the use of viruses such as the PopStop Search. What’s alarming about these entities is that you wouldn’t realize their presence until you start seeing loads of pop-ups and ads on your PC.
PopStop is a browser hijacker that triggers unwanted changes on a user’s browser. It operates as an extension on Google Chrome Web Store. It is triggered by potentially unwanted programs (PUPs) that run in the background of your PC. You would notice its presence when your searches are constantly being redirected to Search-7.com.
What Does PopStop Search Do?
PopStop stealthily infiltrates a computer system and makes adverse changes in the browser search engine and default start page. The purpose of PopStop Search is to push ads and pop-ups, and monitor a user’s online habits.
Here are other things that the PopStop virus does:
- It changes the browser settings and makes Search-7.com the default search engine.
- It redirects search results to Search-7.com.
- It bombards your searches and computer with dubious ads, banners, and pop-ups.
- It redirects searches to scam, porn, shady, questionable, or third parties’ websites.
- It tricks users to download or install potentially unwanted applications (PUAs).
- It spreads adware in your computer.
- It corrupts major genuine applications and functions of your computer.
- It steals sensitive information and shares them with criminals and ad companies.
How Did PopStop Search Get into Your PC?
PopStop Search and other malware browser hijackers (or PUPs) get into PCs through dubious means, including:
- Bundled freeware
- Deceptive advertisement
- Promoted by adware
- Dubious links and websites
Furthermore, they block any attempt to be seen on the PC and prevent users from checking related details. PopStop does not have any known file information and has no visible icon, meaning that users who installed it will have a hard time identifying it. Also, the extension might be saved through a different name to evade detection.
If you suspect that your system has this PopStop Search malware, you should try to remove it from the PC immediately.
How to Remove PopStop Search
You can use two methods to remove PopStop Search:
- Remove PopStop Search automatically, using a quality, reliable antivirus software.
- Remove PopStop Search manually from your system and browser.
Note:
We recommend using an antivirus to remove PopStop Search because the process is easy and simple. An antivirus program can quickly identify and remove other hidden, dangerous programs on your PC and other bad browser extensions. You can also use it to conduct a full system scan and achieve better results. Lastly, it can be used to check various parts of the PC and eliminate any malicious files.
Manual PopStop Search Removal Instructions
Here are the steps to take to remove the PopStop Search browser extension from your system and your browser:
- Remove PopStop Search from OS-installed apps (Windows)
- Right-click on the Windows Start button.
- Locate and select “Apps and Features.” It is the first item on the list. Clicking this takes you directly to the installed app and programs.
- Navigate through Programs and Features to locate PopStop Search. Check for recently installed or suspicious apps.
- If you find one (or other suspicious apps), click > then select uninstall. After that, follow the on-screen instructions to proceed.
- Remove PopStop Search from OS-installed apps (macOS)
- Click ‘Go’ at the top left of your screen.
- Select Applications.
- Under Applications, locate PopStop Search or any other suspicious recently installed applications.
- Right-click on the application, then select Move to Trash. Do the same for all the suspicious or recently installed suspicious applications.
Once done, restart your machine for the changes to take effect.
- Remove PopStop Search from browser shortcuts
- Right-click on the browser’s shortcut.
- Select Properties (the last item listed on the window).
- Go to the Shortcut tab.
- Check the Target field for any extended URL code.
- Delete the malicious URL (if any) that is related to PopStop Search.
- Check all other locations of these shortcuts, including Taskbar, Start Menu, Desktop, etc. and do the same.
- Remove PopStop Search extension from the browsers (Chrome/Safari/Firefox/Edge/Internet Explorer)
How to Remove PopStop Search Redirect from Google Chrome
To completely remove PopStop Search Redirect from your computer, you need to reverse all of the changes on Google Chrome, uninstall suspicious extensions, plug-ins, and add-ons that were added without your permission.
Follow the instructions below to remove PopStop Search Redirect from Google Chrome:
1. Delete malicious plugins.
Launch the Google Chrome app, then click on the menu icon at the upper-right corner. Choose More Tools > Extensions. Look for PopStop Search Redirect and other malicious extensions. Highlight these extensions you want to uninstall, then click Remove to delete them.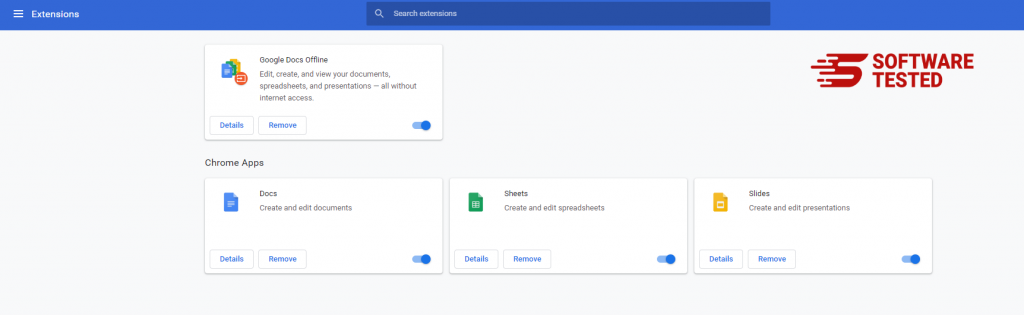
2. Revert changes to your homepage and default search engine.
Click on Chrome's menu icon and select Settings. Click On Startup, then tick off Open a specific page or set of pages. You can either set up a new page or use existing pages as your homepage.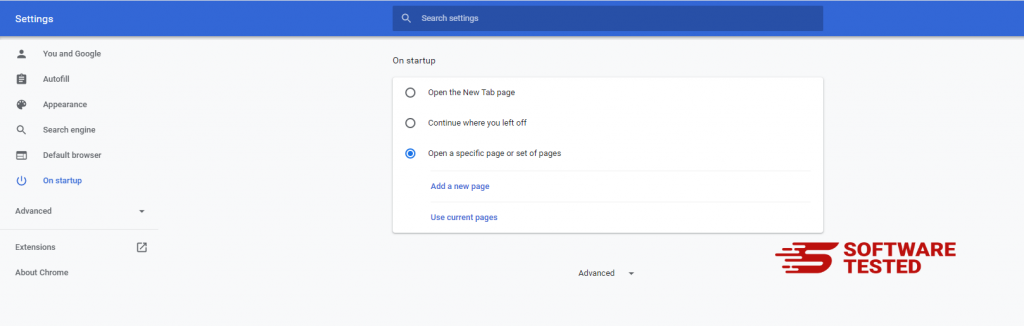
Go back to Google Chrome's menu icon and choose Settings > Search engine, then click Manage search engines. You'll see a list of default search engines that are available for Chrome. Delete any search engine that you think is suspicious. Click the three-dot menu beside the search engine and click Remove from list.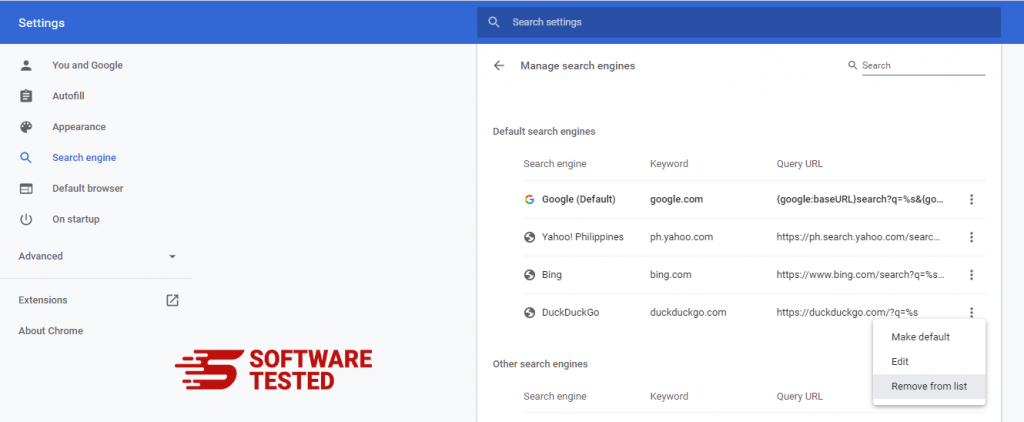
3. Reset Google Chrome.
Click on the menu icon located at the top right of your browser, and choose Settings. Scroll down to the bottom of the page, then click on Restore settings to their original defaults under Reset and clean up. Click on the Reset Settings button to confirm the action.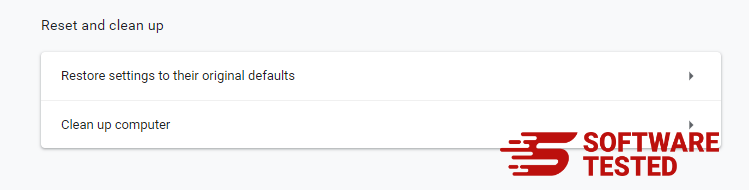
This step will reset your startup page, new tab, search engines, pinned tabs, and extensions. However, your bookmarks, browser history, and saved passwords will be saved.
How to Delete PopStop Search Redirect from Mozilla Firefox
Just like other browsers, malware tries to change the settings of Mozilla Firefox. You need to undo these changes to remove all traces of PopStop Search Redirect. Follow the steps below to completely delete PopStop Search Redirect from Firefox:
1. Uninstall dangerous or unfamiliar extensions.
Check Firefox for any unfamiliar extensions that you don't remember installing. There is a huge chance that these extensions were installed by the malware. To do this, launch Mozilla Firefox, click on the menu icon at the top-right corner, then select Add-ons > Extensions.
In the Extensions window, choose PopStop Search Redirect and other suspicious plugins. Click the three-dot menu beside the extension, then choose Remove to delete these extensions.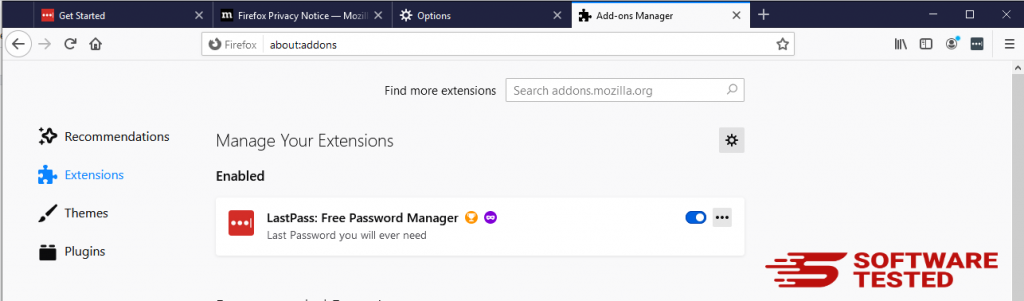
2. Change your homepage back to default if it was affected by malware.
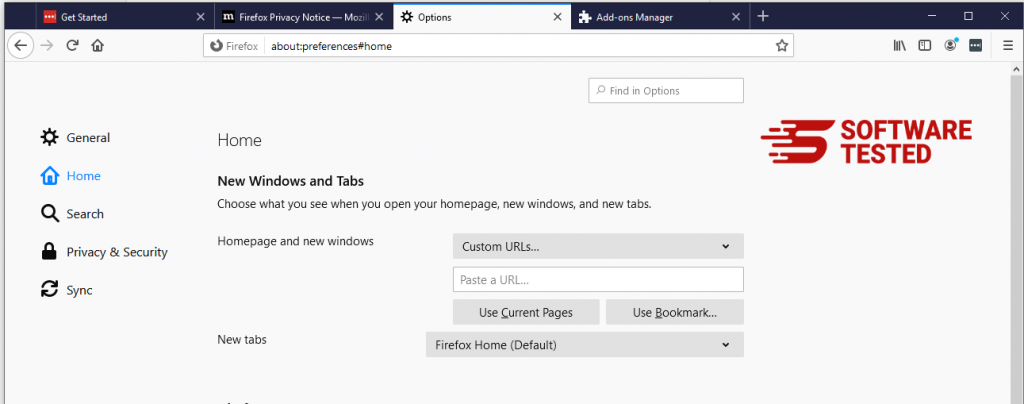
Click on the Firefox menu at the upper-right corner of the browser, then choose Options > General. Delete the malicious homepage and type in your preferred URL. Or you can click Restore to change to the default homepage. Click OK to save the new settings.
3. Reset Mozilla Firefox.
Go to the Firefox menu, then click on the question mark (Help). Choose Troubleshooting Information. Hit the Refresh Firefox button to give your browser a fresh start.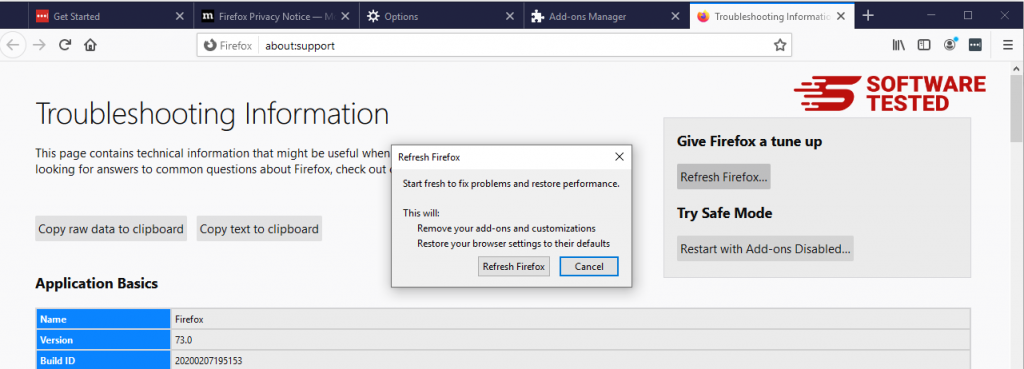
Once you’ve completed the steps above, PopStop Search Redirect will be completely gone from your Mozilla Firefox browser.
How to Get Rid of PopStop Search Redirect from Internet Explorer
To ensure that the malware that hacked your browser is completely gone and that all unauthorized changes are reversed on Internet Explorer, follow the steps provided below:
1. Get rid of dangerous add-ons.
When malware hijacks your browser, one of the obvious signs is when you see add-ons or toolbars that suddenly appear on Internet Explorer without your knowledge. To uninstall these add-ons, launch Internet Explorer, click on the gear icon at the top-right corner of the browser to open the menu, then choose Manage Add-ons.
When you see the Manage Add-ons window, look for (name of malware) and other suspicious plugins/add-ons. You can disable these plugins/add-ons by clicking Disable.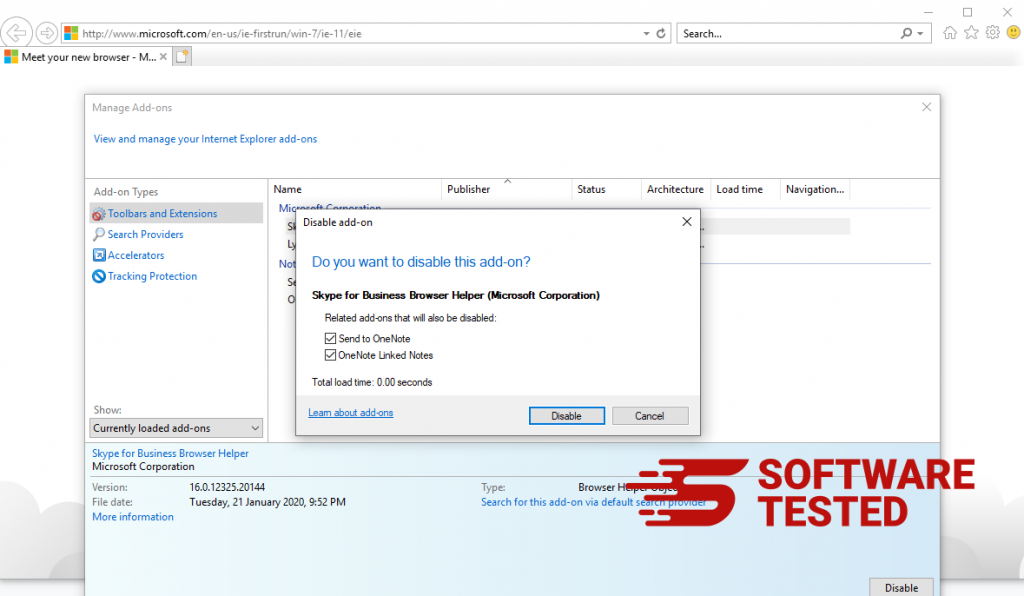
2. Reverse any changes to your homepage caused by the malware.
If you suddenly have a different start page or your default search engine has been changed, you can change it back through the Internet Explorer's settings. To do this, click on the gear icon at the upper-right corner of the browser, then choose Internet Options.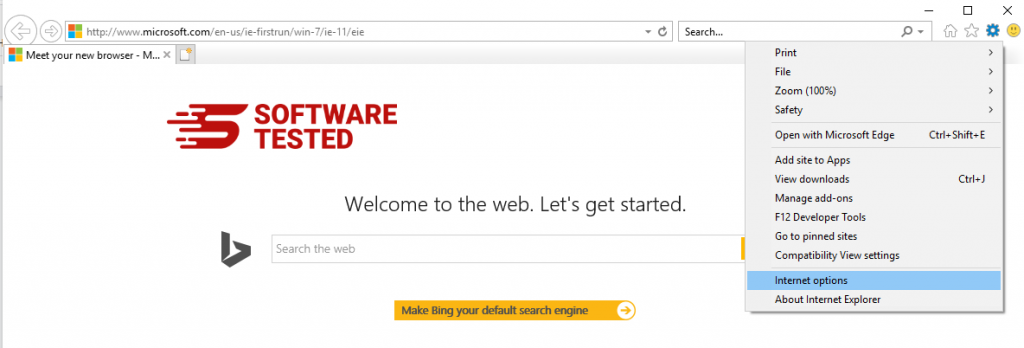
Under the General tab, delete the homepage URL and enter your preferred homepage. Click Apply to save the new settings.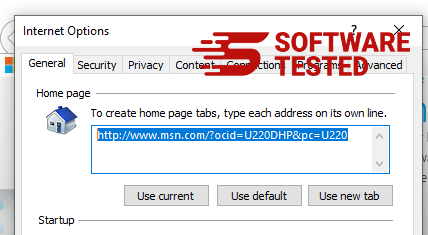
3. Reset Internet Explorer.
From the Internet Explorer menu (gear icon at the top), choose Internet Options. Click on the Advanced tab, then select Reset.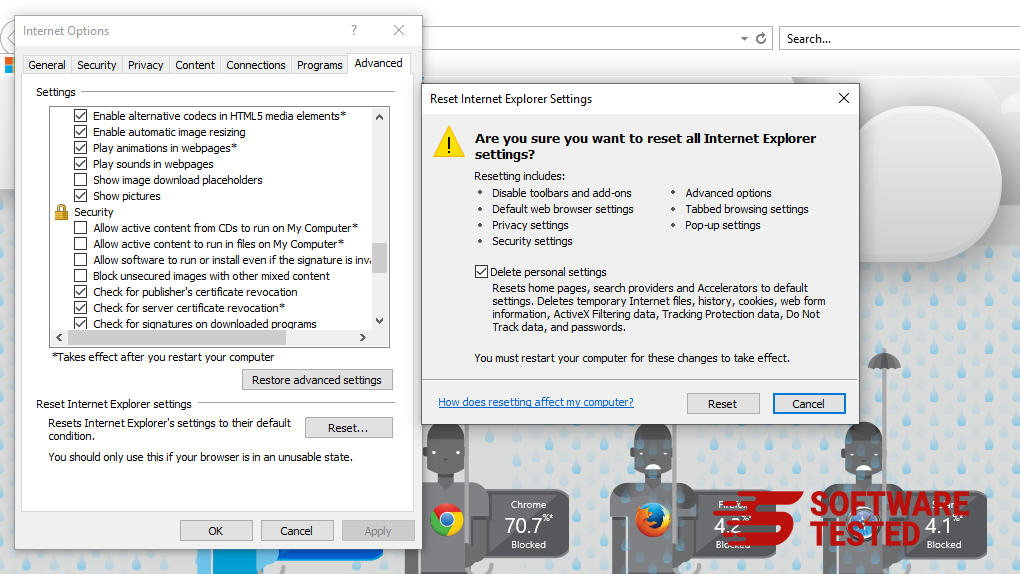
In the Reset window, tick off Delete personal settings and click the Reset button once again to confirm the action.
How to Uninstall PopStop Search Redirect on Microsoft Edge
If you suspect your computer to have been infected by malware and you think that your Microsoft Edge browser has been affected, the best thing to do is to reset your browser.
There are two ways to reset your Microsoft Edge settings to completely remove all the traces of malware on your computer. Refer to the instructions below for more information.
Method 1: Resetting via Edge Settings
- Open the Microsoft Edge app and click More or the three-dot menu located at the upper-right corner of the screen.
- Click Settings to reveal more options.
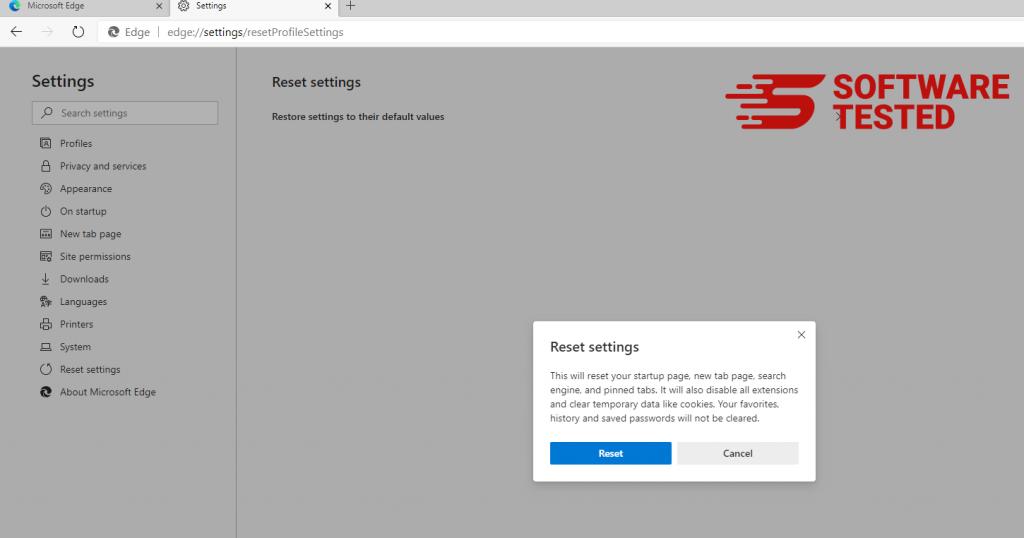
- In the Settings window, click Restore settings to their default values under Reset settings. Click the Reset button to confirm. This action will reset your browser’s startup page, the new tab page, default search engine, and pinned tabs. Your extensions will also be disabled and all temporary data like cookies will be deleted.
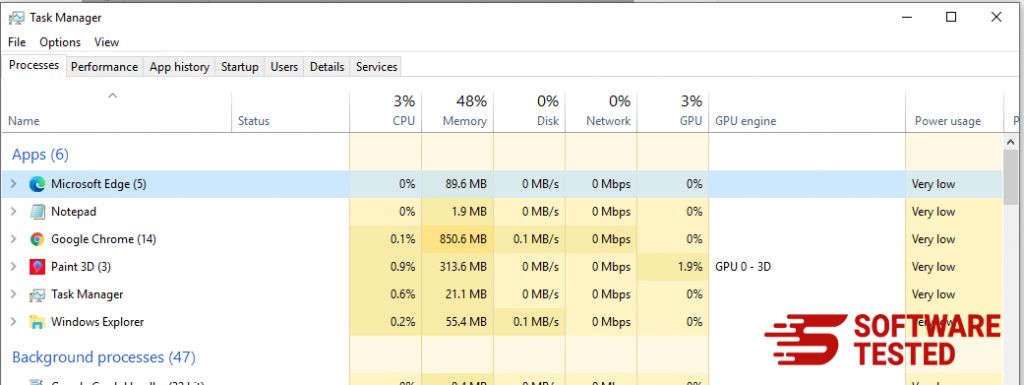
- Afterwards, right-click on the Start menu or the Windows logo, then select Task Manager.
- Click on the Processes tab and search for Microsoft Edge.
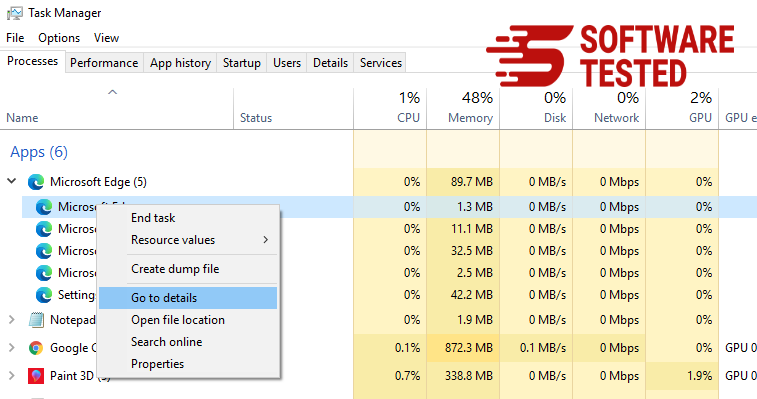
- Right-click on the Microsoft Edge process and select Go to details. If you don't see the Go to details option, click More details instead.
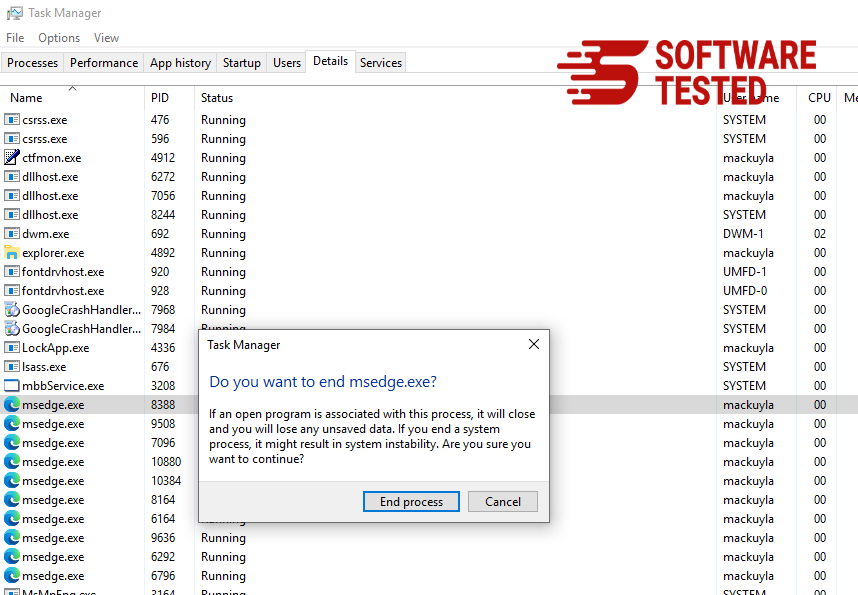
- Under the Details tab, look for all the entries with Microsoft Edge in their name. Right-click on each of these entries and choose End Task to quit those processes.
- Once you have quit all those processes, open Microsoft Edge once again and you'll notice that all the previous settings have been reset.
Method 2: Resetting via Command
Another way to reset Microsoft Edge is by using commands. This is an advanced method that is extremely useful if your Microsoft Edge app keeps crashing or won't open at all. Make sure to back up your important data before using this method.
Here are the steps to do this:
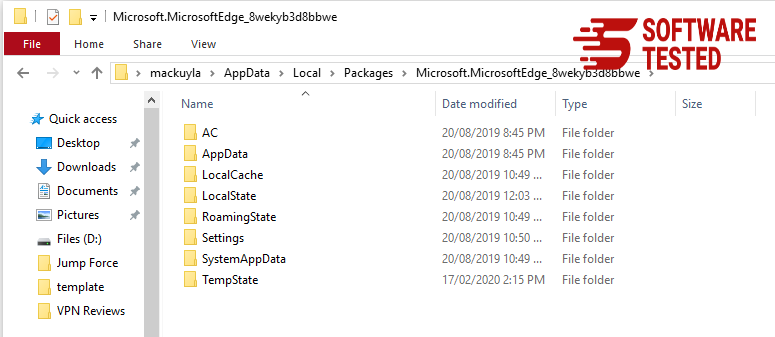
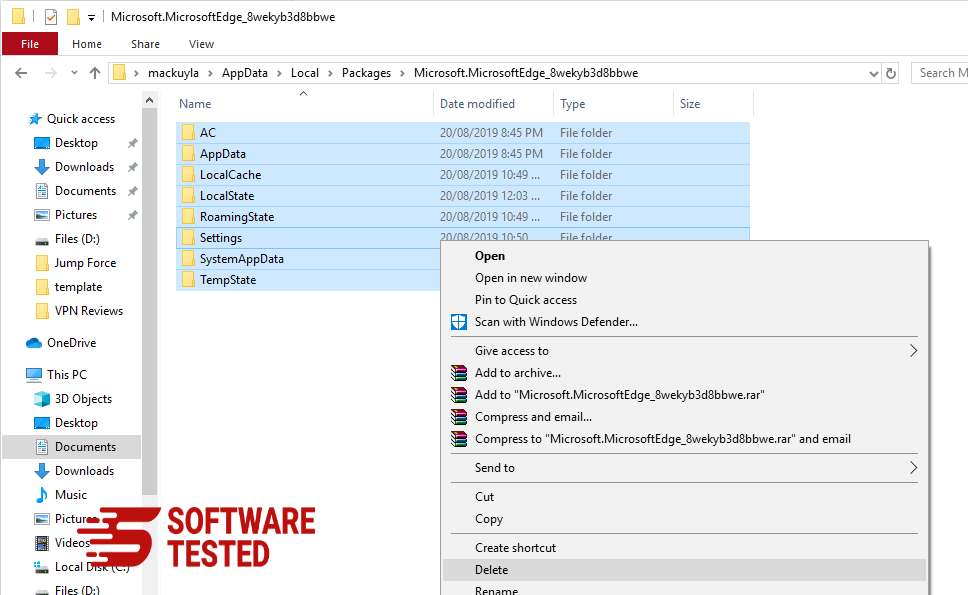
- Navigate to this folder on your computer: C:\Users\%username%\AppData\Local\Packages\Microsoft.MicrosoftEdge_8wekyb3d8bbwe.
- Select everything inside the folder, right-click on the highlighted files, then click Delete from the options.
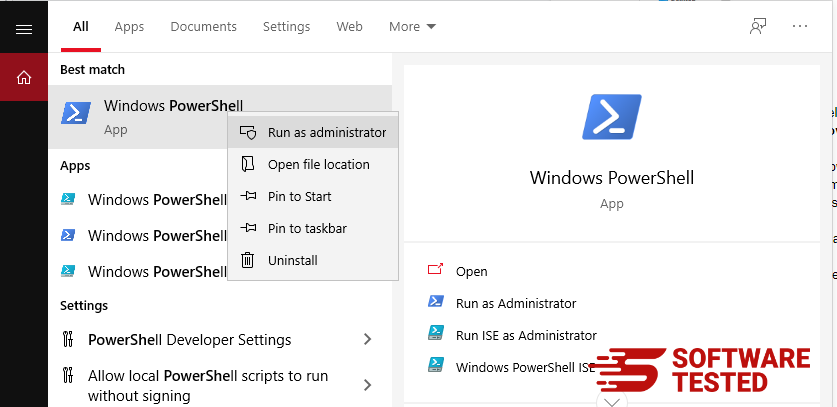
- Search for Windows PowerShell using the search box beside the Start menu.
- Right-click on the Windows PowerShell entry, then choose Run as administrator.
- In the Windows PowerShell window, type in this command:
Get-AppXPackage -AllUsers -Name Microsoft.MicrosoftEdge | Foreach {Add-AppxPackage -DisableDevelopmentMode -Register $($_.InstallLocation)\AppXManifest.xml -Verbose}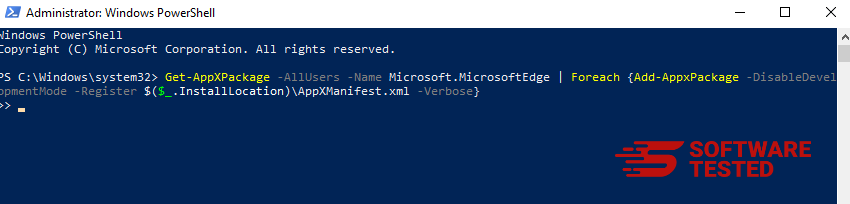
- Press Enter to execute the command.
- Once the reset process has been completed, PopStop Search Redirect should be completely deleted from your Microsoft Edge browser.
How to Get Rid of PopStop Search Redirect from Safari
The computer’s browser is one of the major targets of malware — changing settings, adding new extensions, and changing the default search engine. So if you suspect your Safari to be infected with PopStop Search Redirect, these are the steps you can take:
1. Delete suspicious extensions
Launch the Safari web browser and click on Safari from the top menu. Click Preferences from the drop-down menu.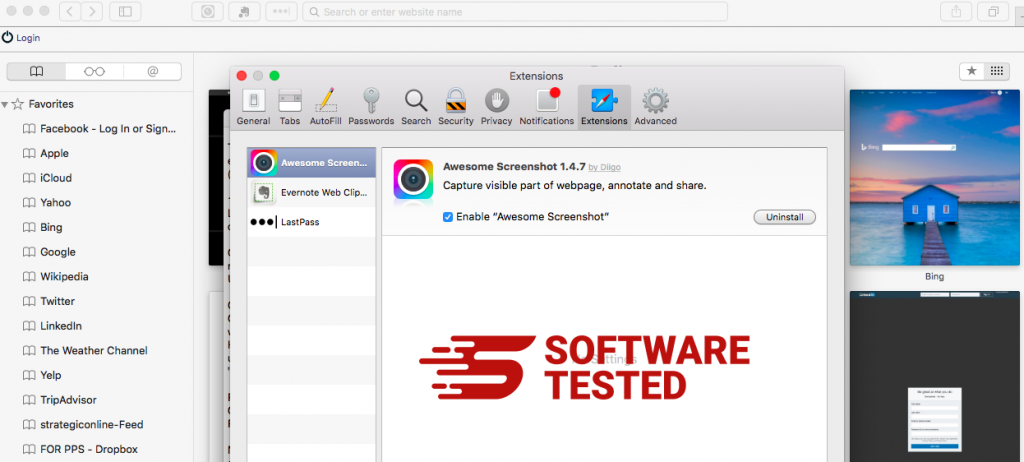
Click on the Extensions tab at the top, then view the list of currently installed extensions on the left menu. Look for PopStop Search Redirect or other extensions you don’t remember installing. Click the Uninstall button to remove the extension. Do this for all your suspected malicious extensions.
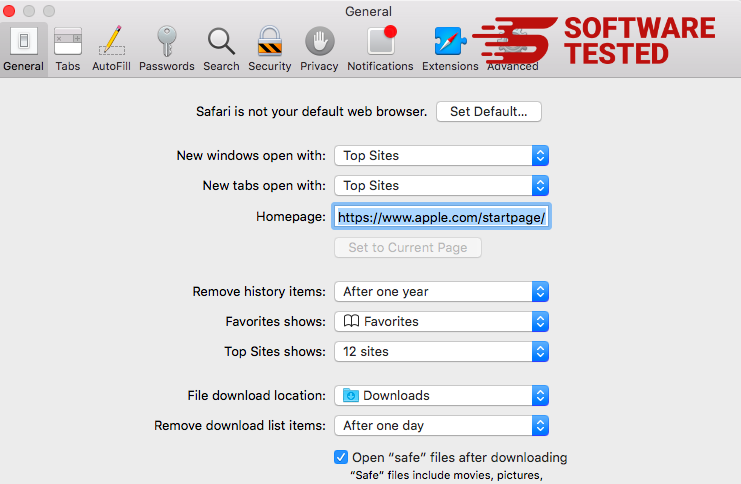
2. Revert changes to your homepage
Open Safari, then click Safari > Preferences. Click on General. Check out the Homepage field and see if this has been edited. If your homepage was changed by PopStop Search Redirect, delete the URL and type in the homepage you want to use. Make sure to include the http:// before the address of the webpage.
3. Reset Safari
Open the Safari app and click on Safari from the menu at the upper-left of the screen. Click on Reset Safari. A dialog window will open where you can choose which elements you want to reset. Next, click the Reset button to complete the action.
Note:
Once all these processes are done, refresh your browser(s), and restart your system.
Final Thoughts
Removing PopStop Search extension malware from your machine is not enough. Your system remains vulnerable to numerous online threats if you don’t take precautionary protection measures. Ensure that you have an activated and updated antivirus installed on your PC to block the installation of malware and other PUPs. Avoid freeware, but if you have to install them, choose the advanced or custom installation option over the recommended installation. This will help you avoid installing bundled malware programs.