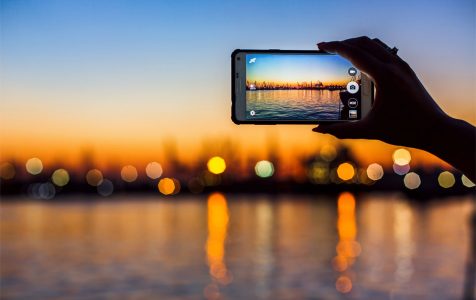
Since the 4th of July is coming up, you’d want to make sure that you bring out the best of your Android device’s camera for those beautiful nighttime fireworks and city lights. Although the camera of Android devices varies in quality, there are generally applicable tricks you can use to take beautiful and high-quality photos even in a low-light environment. But before we teach you these tricks, you need to understand the two primary factors that affect the quality of images: ISO and shutter speed.
ISO is the electronic sensitivity of a camera’s light sensor to light. With a higher ISO, you can brighten images without making changes in the shutter speed. Shutter speed, on the other hand, is the amount of time the shutter is left open to catch as much light as possible. The longer the time the shutter is open, the brighter an image will be.
Now that you know the basics let’s start. Below are some useful tips on taking photos at night using your Android camera:
1. Keep the camera steady.
If you’ve been using the Android night mode for quite some time now, you probably are aware that taking photos in this mode often results in blurry shots. Low light can be a reason, but a shaky camera may also be another. So, as much as possible, try to keep your device steady when taking photos at night. To take perfect and sharp shots, use a tripod. It’s your best option. However, if a tripod is not available, try to position your camera on a wall or top of a solid surface and use the timer button.
2. Choose an area with good lights.
When taking photos at night, choose an area where there is at least some light, to focus on as a subject. Just make sure that the subject has enough light for it to be seen. Of course, you can use the flash of your Android device, but it does not always make for good shots. To be safe, find an area that is well-lit.
3. Go manual.
Sure, you can directly use your Android device’s default camera app, but that won’t always give you the results you desire. If you wish to capture better photos, you have to learn how to adjust the advanced settings of your device’s camera manually. These settings can be convenient for night photography as long as you know how to use it. Starting now, explore your camera settings. The options there might help you take good photos at night.
4. Take advantage of black and white filters.
One of the biggest challenges in low-light photography is the accuracy of colors. Because of the lack of lights, our Android devices struggle to pick the right colors. In situations like this, the black and white filter comes in handy. If you are not happy or contented with the colors in your photos, convert them to black and white.
5. Switch to HDR mode.
HDR or high dynamic range is a camera mode that recognizes various light intensities inside a frame and tries to balance everything out. In a low-light setting, this mode can be used to capture great shots. When this mode is enabled, your device will take three shots under different exposures, and then it will give you the best one. To enable HDR mode, open your device’s default camera app. Go to Mode and select HDR. Once activated, you can already start taking better photos at night.
6. Increase the ISO level.
ISO is a feature present in most camera apps. By increasing the ISO level, the sensitivity of the camera sensor increases, forcing it to capture more light and details in a poorly-lit condition.
The higher the ISO level, the brighter the image will be. But, take note that higher is not always the best choice. If you set it too high, your shot will come out blurry and grainy. For cameras that have ISO settings, set it to 400. That way, you can capture beautiful shots without having to use the flash. To adjust the ISO, open your device’s default camera app. Go to Mode > Pro > ISO. Use the slider to make adjustments in the ISO level. If ever the ISO setting is grayed out, perhaps the HDR mode is on. Turn off HDR mode first, and you should be fine.
8. Do not zoom.
As much as possible, do not zoom your camera at night. If you insist on doing that, consider your camera’s potential first. In most cases, the digital zoom of Android devices is entirely useless as they only ruin the entire mobile photography experience. If you need to zoom, move the device itself closer to the subject.
9. Use self-timer.
If you want to take photos at night or day, the self-timer is always a useful feature to help you take pictures. You can set it to take shots in a 2, 5, or 10-second countdown. Once enabled, find the best angle for taking photos. After that, press the shutter and move to a spot within the frame. Stay still until your time is up.
With the self-timer enabled, you can free your hand and make a better pose. It can also prevent shaking issues, which result in blurry images.
10. Switch off the flash.
The flash may add light to photos, but it can also mess up with them, especially if you are taking a selfie in front of a mirror. The flash will only reflect the light back to the camera, resulting in too much brightness. The best solution for this is to use whatever source of light is at your disposal. Move close to it and find an angle where you can take full advantage of the light.
11. Use additional tools and gadgets.
Nowadays, there are a lot of camera add-ons you can buy to improve the quality of images your default camera produces. You can choose from OTG dispersers, portable lights and flashes, and add-on lenses. Some of them are available online, while others can be purchased in local stores.
12. Use image editing apps.
If all else fails, the use of image editing apps is your last resort. Sometimes, your Android camera can capture the tiniest details even in a low-light condition. But because of your device’s poor image processing technology, the details don’t always come visible and sharp. As a solution to that, the use of image editing apps is recommended.
13. Opt for a better camera app.
Camera apps available on Google Play Store have different image processing abilities. They also detect subjects in various ways. So, choose the best camera app for night photography. With it, you can take great shots in one click.
Conclusion
Now, it’s really up to you how you use our tips to improve the quality of photos taken by your Android device at night. Just remember that with the right setting, it is possible to take excellent shots, be it night or day.
Here is another useful tip. Download and install Android cleaner tool on your device. Although it does not have a direct impact on the quality of the photos you capture at night, it will undoubtedly improve your Android device’s performance, keeping your device running at its best, while you continue taking amazing shots.