One of the major concerns of smartphone users today is online security and privacy. With several major cases of data leak s and other security issues that plagued the mobile industry this year, users have become more aware of the importance of having sufficient security features for all their devices — big and small.
However, what majority of smartphone users fail to realize is that the standard DNS used by their devices may not be the safest option. These default DNS servers, usually provided by carriers, are not encrypted. This means that anyone with a bit of technical know-how can intercept the traffic that’s going in and out of these devices.
Some users, on the other hand, prefer to use third-party DNS servers such as Google DNS or OpenDNS instead of their providers’ DNS servers. These options , though, are in no way better than default DNS servers because they are also not encrypted.
Fortunately, Android 9.0 Pie introduced a private DNS feature for devices running the latest version. Android P rolled out the implementation of DNS over TLS and DNS over HTTPS using a third-party DNS resolver such as CloudFlare. With this CloudFlare DNS for Android, all DNS queries are now encrypted and secure.
What Is Cloudflare DNS for Android P?
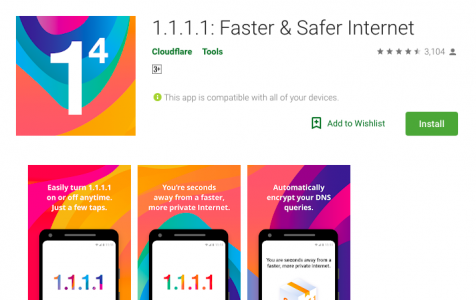
Cloudflare DNS, also known as 1.1.1.1, provides a faster and safer way for smartphone users to browse the internet. According to the company’s website, it is “the Internet’s fastest, privacy-first consumer DNS service.” 1.1.1.1 DNS was released last April 1, 2018 and is available for mobile devices running Android 9 Pie.
The 1.1.1.1 public DNS resolver claims that it can speed up and secure web browsing better than other DNS resolvers out there. 1.1.1.1 is just one of the achievements of internet company Cloudflare, which became popular for its content delivery network (CDN) and for resolving Distributed Denial of Service (DDoS) attacks.
Take note, however, that you won’t be able to run another VPN client while you’re using Cloudflare 1.1.1.1. This tool re-routes your DNS traffic through Cloudflare’s own server via local VPN , so using another VPN will not work. Some apps also have their own, built-in private DNS, which means that they probably will not use another private DNS setting like Cloudflare. So if you need to use an app with its own DNS mechanisms or you need to connect to your work servers using a specific VPN, you should first turn off the Cloudflare DNS to avoid conflict.
Why Use Cloudflare DNS?
Cloudflare is just one of the popular DNS resolvers in the market today, but its commitment to protecting its users’ privacy has made it the preferred private DNS among users. It neither collect s your browsing data to sell to marketers to target ads, nor does it record your IP addresses. Instead, Cloudflare wipes all DNS data within 24 hours to protect its users’ privacy. Even your ISP provider won’t be able to track your activities.
Olafur Gudmundsson, Cloudflare’s director of engineering, also claims that Cloudflare 1.1.1.1 will be faster than their competitors because they have already built data centers all over the world, reducing the distance between the users and the content.
How to Use Cloudflare DNS for Android
There are two ways to install Cloudfare 1.1.1.1 on Android devices. You can do it manually, which involves enabling DNS over TLS on your device and entering your hostname, or you can simply download and install the 1.1.1.1 app.
Before you set up Cloudflare 1.1.1.1 on your Android device, it is necessary to remove all junk files first to prevent them from messing with the installation. You can use an app such as Android cleaning tool to get rid of all your device’s trash and optimize your system along the way.
Configuring 1.1.1.1 Manually on Android Pie
When you configure Cloudflare DNS as your private DNS, keep in mind that this service only works on Android 9.0. If your device is running a version older than Android Pie, this configuration will not work.
To configure Cloudflare DNS, follow the steps below:
- On your Android device, launch Settings and tap on Network & Internet.
- Tap Advanced. The Private DNS entry will show.
- Tap the Private DNS entry and choose the Private DNS provider hostname option.
- Type in 1dot1dot1dot1.cloudflare-dns.com, then tap Save.
- Go to 1.1.1.1/help to confirm that DNS over TLS has been enabled.
Installing the 1.1.1.1 App
To make the configuration process faster, easier, and simpler for users, Cloudflare released the app version of 1.1.1.1 just recently. It is available for Android as well as iOS devices, Macs, and Windows computers.
To install the app on Android Pie, follow the instructions below:
- Download the app from Google Play Store.
- Tap Install after downloading the app.
- Wait for the installation to finish.
Launch the app from your home screen or App Drawer after installation. Just tap the green slider on the screen to enable 1.1.1.1 and the device will automatically reroute its traffic through the Cloudflare DNS servers. When you see a key icon in the notification bar of your phone, this means that 1.1.1.1 is already running. To turn off the service, just toggle it off in the app’s home screen.
To access the advanced features, tap the menu button, then hit Advanced. Here you can choose your preferred Encryption Mode, check the status of your connection, view logs, attach logs to bug reports, and review the initial setup.
Summary
Cloudflare 1.1.1.1 is redefining your internet experience by focusing on speed and security. With Cloudflare DNS, smartphone users no longer have to worry about their data getting leaked or their browsing history being tracked and sold to advertisers. Plus, the app just made it easier for users to install and manage Cloudflare DNS.