There are many reasons why you would want to switch from iOS to Android. It could be because you want better and more options when it comes to devices, or maybe you want to save money while still covering the basics. Another reason could be the varied customization options offered by Android – or perhaps you’re tired of Apple products.
Whatever the reason is, you have to understand that the move from iOS to Android is a monumental task. It’s like moving house – you need to pack up your things, then sort them out and arrange them in your new space. Plus, you need time to get used to your new platform.
Here’s the good news: this article can help make the transition more comfortable for you. You’ll learn how to transfer essential data like contacts and email, which apps you can and can’t replace, and how to move your music from iOS to Android.
Here are the steps on how to switch from iOS to Android
But before you do the switch, clean out your junk first, so you don’t carry them over to your new device. It’s a waste of space (and effort) to transfer junk files like unwanted photos and videos. You can use Android cleaning tool to scan your phone or tablet and flush out data that you don’t need.
Take advantage of Google Drive
This cloud storage platform makes it easier to transfer your contacts, photos, videos, and calendar from iOS to Android.
- On your iOS device, launch the Google Drive app by tapping the icon. Go to Settings > Backup.

- Determine which items you want to back up and click Start Backup. Make sure your device is plugged into its charger because the backup might take longer depending on the size of your files.
- Don’t close the app or fiddle with your phone while the backup is ongoing unless you want to do it all over again.
There are a lot of apps you can use to transfer your data, however, using Google Drive is probably the simplest and easiest way to do it. All you need is a Google Account. So, when you’re on your new Android device, all you have to do is sign in with your Google Account, and everything that you backed up using Google Drive will be there for you to retrieve quickly.
Convert your contacts
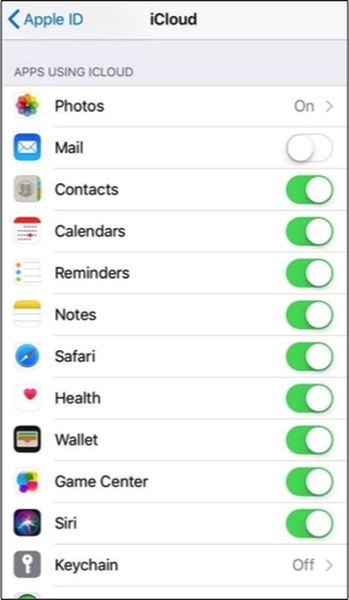
If you don’t want to use Google Drive to transfer your Contacts and Calendar, you can do it manually instead. Apple and Google both have their contact management system, but they mainly work the same way. iOS has iCloud, and Android has Google. To transfer your contacts from iOS to Android, all you have to do is export the contacts from iCloud and import them into your Google Account. Make sure you have iCloud sync enabled on your iOS device.
- To do this, go to Settings > Name > iCloud or Settings > iCloud for devices on iOS 10.2 or earlier. Switch on the items you want to back up like Contacts and Calendars.
- Once you’ve switched them on, wait for a while while the iCloud syncs your data. Then, log into your iCloud account using your computer.
- To export your Contacts, click on the gear icon in the lower left of the window and choose Select All > Export vCard. It will export all your contacts in a VCard format as a .vcf file.
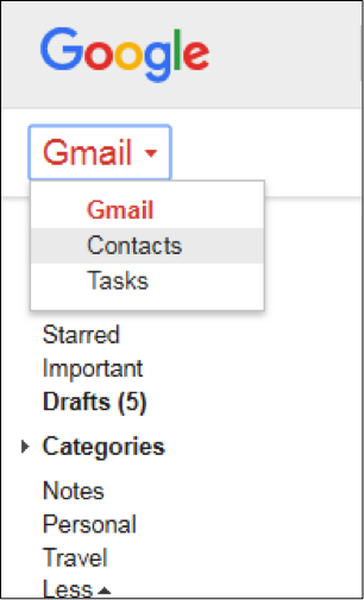
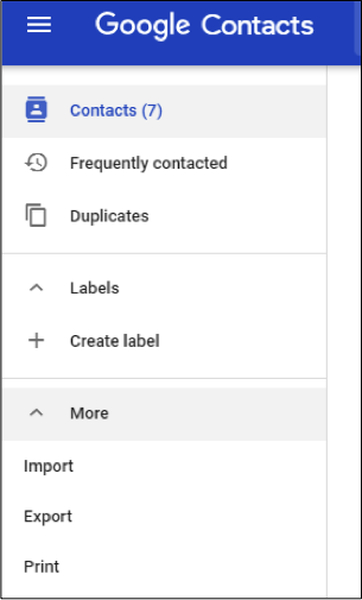
- The next step is to log into your Gmail on your computer, then change the drop-down on the top left from Gmail to Contacts. A new tab will open showing all your contacts on Google. To import your contacts from iOS, click More, and then Import.
- Choose the .vcf file that you’ve downloaded from iCloud, and your contacts are imported in a flash. In the Google Contacts window, you can fix duplicates, create labels and organize your contacts.
Choose the right apps
It is the most troublesome part when switching platforms because you can’t just move apps across like what you do with contacts and other content.
If you purchased apps before, then you’ll have to buy again or search for a more affordable alternative. Most apps have both iOS and Android versions. But for those that were designed for iOS only or those that have no Android version, your only option is to look for an alternative app. It can be time-consuming and frustrating because you need to undergo several trial-and-error until you find the alternative that works for you.
The good thing is, Google Play Store has a massive database of apps for you to choose from.
Move your music
There are three things you need to consider when transferring music from iOS to Android.
- First is the music on your device. All you have to do is connect your iOS device to your computer and copy-paste the music files to your computer, then copy it to the Music folder on your Android device.
- For music that is stored in the Cloud, it is safer to download your files from the cloud to your computer before copying it to your Android device.
- Music that is on music apps like Spotify is more accessible to transfer because you can download the Android version of these apps.
Upload your photos
Uploading photos come more naturally compared to transferring music files. All you have to do is download Google Photos on your iPhone, sign in to your Google Account, and backup all of your photos to the cloud.
You only get 15GB of free storage room on Google Drive, but you can expand the storage by upgrading for a minimal fee. Or, you can sacrifice a bit of your resolution so that you can store more photos online. It’s your choice.
Change your calendar
There are two ways to transfer your calendar –download SmoothSync, which is a paid app or sync your calendar manually. To sync your iPhone calendar to your Android device, do the following:
- On your iOS device, go to Settings.
- Select Calendar, then tap Default Calendar.
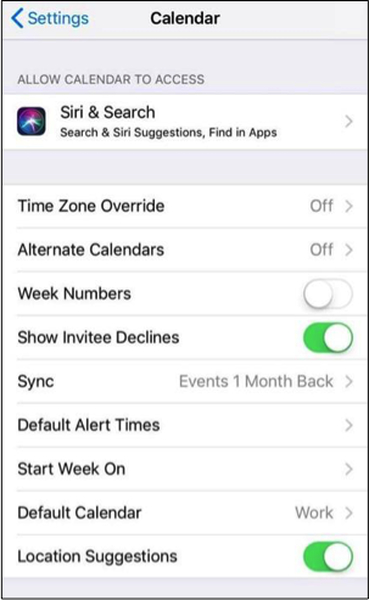
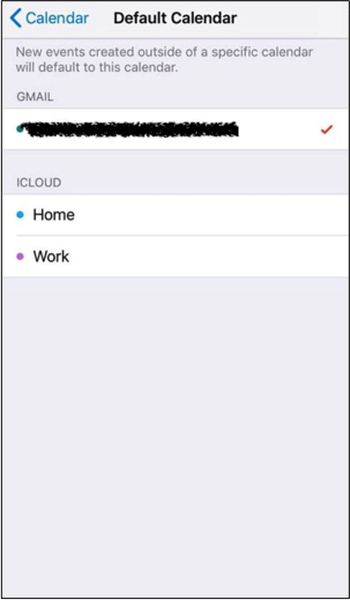
- Choose your Google Account or add it if you don’t have it yet on your device.
- Once you’ve chosen your default calendar, wait for it to sync and you’re good to go.
Sync your bookmarks
If you’re using Chrome on your iPhone and syncs it to your desktop, then you don’t have to do anything else. Your bookmarks are carried over when you install Chrome on your Android.
If you’re using a Safari browser, sign into your iCloud account on your computer and click Safari. Go to File > Export Bookmarks to create an HTML file containing all your bookmarks. Next, you have to import this HTML file to Google Chrome on your computer where it will sync with your Chrome on your Android device.
Erase your iOS device
The last step will be to ensure that all your data has been removed from your iOS device before disposing or selling it.
- First, disable your Find My Phone by going to Settings > Your Name > iCloud or Settings > iCloud on older iOS versions.
- Once Find My Phone has been disabled, then you can reset your iOS device. Go to Settings > General > Reset > Erase All Content and Settings to reboot your iOS device and have it ready for the next user.
Although it might take some time to get used to the new platform, you’ll find out that switching has its benefits –knowing the best of both worlds, for one. Switching from iOS to Android becomes more comfortable and smoother when you follow the above tutorial.