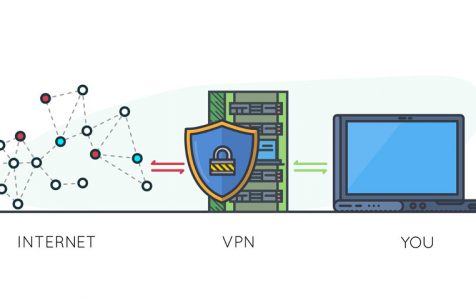
Using a VPN or virtual private network is quite useful, especially when you need to access geo-restricted content or when you need to stream videos that might prompt your ISP provider to throttle your Internet connection. Using a VPN has a lot of benefits, not to mention the security and protection it offers against online threats. However, did you know that you don’t have to have a VPN subscription to be able to enjoy these benefits? You heard that right—you can host your own VPN server at home so you don’t need to pay monthly subscription fees.
The number one requirement in setting up a VPN at home is your Internet connection’s upload speed. If you noticed, most Internet providers offer lower upload bandwidth compared to download bandwidth. But if you have limited upload bandwidth, subscribing to a professional third-party VPN provider such as Outbyte VPN is the best choice for you.
However, if your upload bandwidth can handle the requirement of a home VPN setup, then just follow this guide to find out the steps to setting up a VPN at home.
Benefits of a Home VPN Setup
Setting up a VPN at home provides you with a secure way to use public Wi-Fi, access your home network safely from anywhere, and also give access to other people to the servers you are hosting. Setting up your own home VPN server also allows you to access location-restricted services from outside the country, regardless of the device you are using.
VPNs are also important when connecting to services during your travels. For example, you can access US Netflix through a VPN even if you’re outside the US.
Disadvantages of Setting Up a VPN at Home
As mentioned above, one of the requirements of a home VPN setup is a huge upload bandwidth. So if you have slow upload speed or limited upload bandwidth due to data capping, setting up a VPN using your Internet connection will be impossible. Plus, you need to make sure that your home VPN is patched regularly to avoid security loopholes.
One of the major reasons why we use VPNs is to hide your location, either by masking your IP address or shifting your geographical location to somewhere else to be able to bypass location-based restrictions or for privacy reasons. If this is one of your reasons for setting up a VPN, then a home VPN server won’t work for you. You’ll be connecting from your home area so your location will be fixed. If this is your reason for using a VPN, then you’re better off with a third-party VPN service that lets you enjoy the fastest speeds, geo-shifting benefits, and location-masking. You’ll have to pay a monthly subscription fee, though.
If you made it to this part and you decided you want to go ahead and set up your home VPN, choose from the options below and follow the instructions closely.
Method 1: Switch to a Router with Router Capabilities
This is probably the easiest method of setting up a VPN at home. Instead of setting everything up by yourself, you can get a router with a built-in VPN solution. Modern and high-end home routers are usually equipped with built-in VPN servers, so all you have to do is find a wireless router that offers VPN server support. Then, you just need to use your new router’s web interface to set up and configure your VPN server. When you choose your router, make sure to pick one that supports your VPN service provider and the protocol you want to use.
Method 2: Get a Router that Supports Third-Party Firmware
Routers are actually mini-computers with their own operating system. Custom router firmware, such as DD-WRT and OpenWRT, are third-party firmware that you can ‘flash’ onto your router, replacing the manufacture-provided firmware with something that has additional features.
If you have an existing router, check first if it is supported by DD-WRT. If it’s not supported, choose one that supports third-party router firmware and flash your custom firmware on it to get more features such as VPN server support. Custom router firmware lets you host a VPN server even if your router does not have built-in VPN server software. All you need to do is flash your third-party firmware and enable the VPN server.
Method 3: Create Your Own Dedicated VPN Server
The third option is to use VPN server software on one of your computers or devices. However, the computer or device you’re going to use for your VPN server should be on all the time. This means that you can’t shut it down because the server will be turned off as well.
Windows offers a way to host VPNs, using Microsoft’s built-in VPN server, while Apple’s macOS Server app also lets you configure a VPN service. These VPN servers, however, are not the most powerful and secure options for a home VPN. They are also quite complicated to set up.
The better option is to install a third-party VPN server that is compatible with your operating system. There are several options—both free and paid, for Windows, Mac, Linux and other operating systems. You need to make sure that the third-party VPN server you have chosen is compatible with your operating system. Once you’ve picked out your preferred VPN service provider, you just need to manually forward the appropriate port to the computer or device where your server is installed.
Here’s a tip: When setting up a VPN at home, it is important to set up a dynamic DNS on your router. A dynamic DNS allows you to give your home network an easy-to-remember address so you can easily access your VPN even if your IP address changes.
There are many ways to set up a VPN server at home. But before you do, make sure you understand the advantages and disadvantages of a home VPN setup so you know whether it will work for you or you need to get a third-party VPN instead.