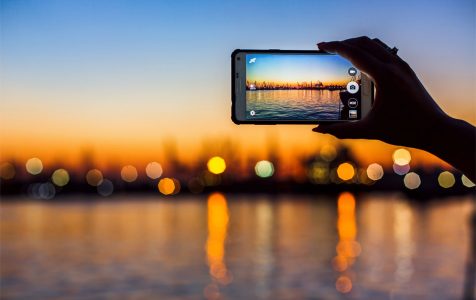
Every smartphone nowadays is equipped with a camera, and these cameras are getting more complex and sophisticated in their capabilities. Some phones, such as Samsung Galaxy A9, have a quad camera setup while Nokia 9 has a penta lens camera system.
It’s no wonder that millions of photos are being uploaded online every day, particularly in social media. It has become effortless to snap a picture and upload it instantly to Facebook or Instagram. In fact, a recent Facebook white paper revealed that there are more than 350 million photos uploaded on the platform every day, while Instagram has a daily average of 60 million photo uploads. That’s a lot!
In a sea of millions of photos, how do you make yours stand out? Taking nice images means more than just having a good phone with a good camera. You need to understand the basics of photography to make the most out of the increasingly powerful camera technology being integrated into smartphones.
Read on for some useful tips and tricks to take good pictures with your Android phone. Whether you want to document your baby’s personal development, take good photos during events, or create a foodie blog, there are a few things you have to keep in mind to improve your phone photography skills.
Tip #1: Keep Your Camera Lens Clean and Clear.
Nothing ruins a good picture better than a dusty or oily fingerprint. We don’t often pay attention to the physical aspect of the camera because we are so focused on what we see on the screen. Yet we have to remember that the dirt, oil, or dust on the lens can diffuse and diffract the light entering the lens, distorting our images.
So if you notice that the picture looks a bit blurry or cloudy, try wiping the lens and see if it makes any difference. You can use a microfiber cloth, a clean cloth, or the dirt-free area of your shirt to wipe the lens clean. But make sure to wipe gently so as not to scratch or damage the lens.
Tip #2: Follow the ‘Rule of Thirds.’
The “rule of thirds” is a popular guideline in painting and photography, an important way to get a decent composition for your subject matter. Imagine dividing your screen area in three parts horizontally and vertically. That will be your blueprint if you want to take good photos with your phone.
Your images will look more interesting and balanced when you align the elements with the imaginary lines that divide that picture in thirds. Photos with the subject matter placed in the center look unnatural, while subjects placed off-center provide a sense of space and motion.
If you can’t imagine the lines, you can use an app that divides your screen into three-by-three grids.
Tip #3: Don’t Forget Proper Lighting.
One of the most important aspects of photography, whether professional or mobile, is lighting. The strength, direction, and color of the light can have a huge impact on the resulting image. This is why professional photographers use tools like reflectors and strobes to manipulate lighting and achieve the dramatic effect that they want.
If you’re taking pictures with your phone, manipulating light is out of the question. You can only take advantage of the available light source and proper angling to get the best results. As a general rule, the source of light should be shining on the subject of the image. Take photos from different angles to see which direction provides the best photo.
Be creative and don’t forget to experiment. Take advantage of dramatic lighting scenarios, such as sunrise and sunset, to add more flair to your photos.
Tip #4: Use Flash Sparingly.
Flash might be useful when taking photos in low-light situations, but it actually makes photos look worse in general. When you use flash, you might notice unwanted effects, such as glowing red eyes, overly lit skin, or an excessively bright overall picture. This can happen regardless of how good the camera on your smartphone is.
There are times when using flash is necessary, but most of the time, natural light is enough. If you need a light source, try using a bulb or a LED lamp instead.
Tip #5: Do Not Zoom In.
Zooming in on a subject using a smartphone is different from zooming in using a professional camera. A camera with an optical zoom automatically adjusts its inner elements, allowing it to adjust the focal length. Zooming in using your smartphone’s camera, on the other hand, is just cropping in the image, making it appear closer. This affects the quality of the photo, especially if the subject is too far away.
If you want to take a picture of something in the distance using your smartphone, the only way to do it is to actually get closer to it.
Bonus Tip: Take Advantage of Editing Apps.
If you’re not satisfied with the photos you have taken, you can use third-party editing apps to improve your photos. You can add filters, use effects, and incorporate other creative enhancements to make your photos look better.
There are many criticisms against photo-editing tools because the end product usually no longer looks natural. However, you should remember that photography is an art and using tools to enhance your work is not a crime, as long as you don’t overdo it.
Most cameras have their built-in photo-editing features, but if you want more options, you can download third-party apps on your Android device. But before you do, clean out your phone’s junk and optimize its performance using a tool such as Android cleaning tool.
Summary
To take good pictures with your Android phone, you need to merge the technological prowess of your smartphone and the unwritten rules of photography. Whether you’re taking personal pictures or you’re documenting an important event, knowing these tips and tricks can help you take better photos that you would definitely be proud of.
