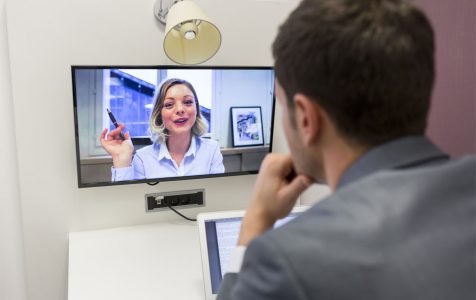
Skype, a reliable companion for video calling, offers seamless video calls and conferences worldwide. However, what if you encounter a situation where your camera stops working while using Skype? Let’s explore the possible solutions for this issue.
You might have experienced it before: you can use your desktop or laptop camera all right with Facebook, Zoom, and every other app you have tried it with. On the other hand, it wouldn’t seem to work with Skype. The popular Microsoft-backed messaging app cannot seem to detect your camera and make video calls work.
If your Skype camera is not working in Windows 10/11, there are a few handy solutions you can try. Here are some of them:
Perform Basic Troubleshooting
Sometimes going back to basics makes the most sense in solving a problem. First, make sure Skype has the permission to use your camera. Click the Windows + I keys. Go to Privacy > Camera. Make sure that the Let apps use my camera hardware option is turned on. Down below, ensure that Choose apps that can use your camera is switched on for Skype.
Expert Tip: For smoother PC performance, consider using a PC optimization tool. It handles junk files, incorrect settings, and harmful apps. Make sure it's right for your system, and always check the EULA and Privacy Policy.
Special offer. About Outbyte, uninstall instructions, EULA, Privacy Policy.
A quick reset of the app program is also worth exploring. To reset Skype, follow these instructions:
- Click the Windows + I keys.
- Go to Apps > Locate Skype > Advanced Options. Hit Reset.
- Visit Microsoft Store and click the three horizontal dots found on top right.
- Click Downloads and Updates and check any update for the app.
- If there is an available update, go for it.
Have you tried isolating the issue? Do this by making a video call using Web Skype or Classic Skype.
There are times when junk files that have accumulated over time interfere with your systems and processes. If you suspect this is what’s happening, use a reliable third-party PC repair tool. This will clean out junk and optimize your system’s speed and performance.
Check for Webcam Compatibility with Skype
Not all desktop or laptop cameras work well with Skype. Older models, for instance, might have trouble being compatible with the app. Visit this page for a list of compatible Skype webcams. You can also look for your camera in the list of non-working cameras.
Uninstall and Reinstall Skype
At one point, you might have turned off automatic updates in Skype. This might be causing your camera woes, so simply update the app to its latest version. Note that by doing so, you won’t really lose any Skype data.
Here are the steps to follow:
- Go to the Skype download page.
- Click Get Skype for Windows to get your hands on the updated version. You may also go to the Skype app and choose Help > Check for Updates.
Check Webcam Configurations Further
Make sure that your webcam is properly configured for Skype. Go through these steps carefully:
- Open the Skype app. From there, choose Tools > Options to get into its settings.
- Click Video settings to diagnose webcam configuration. If it states that Skype couldn’t find a webcam, then the program hasn’t recognized your camera.
- If so, open your webcam software. Switch the camera on. You can also do this via a hardware switch.
- Restart Skype.
- Hit Tools > Options > Video settings again to check. You should be able to see your image there.
- Choose Webcam settings if the image is very dark.
- Go to Video Capture Filter Properties > Camera Control tab.
- Choose Low Light Compensation to lighten the video image.
- Hit Apply and OK.
Update the Webcam Drivers
The latest drivers for your webcam can be the key to solving the Skype video not working problem. They might contain updates that deal properly with how Skype accesses camera video streams. Check and update those drivers with these steps:
- Press the Windows + X keys. Choose Device Manager.
- Click Imaging devices. You should be able to find your webcam listed here.
- Right-click on your webcam. Next, choose Update Driver Software from the menu.
- A new window opens. From there, choose Search automatically for updated driver software.
- You could also chose Uninstall and reboot your computer. Windows will then automatically install the most recent webcam drivers.
Run Troubleshooter in Windows
Check the Windows 10/11 Camera app to see if the webcam is working properly. If not, here’s where you will need the Device Troubleshooter. Follow these steps:
- Input troubleshooter in the Cortana search box. Choose Troubleshooting Control Panel.
- Click Hardware and Sound found on the Troubleshooting tab.
- Choose Hardware and Devices.
- To set the troubleshooter in motion, hit the Next button. It might then offer a fix for the webcam.
- Reboot your computer if the troubleshooter successfully detected and fixed an issue.
Final Notes
It can be a total bummer when you’re so ready to have your Skype video call, and suddenly the camera refuses to cooperate. Try the fixes we provided above to address the Skype camera not working in Windows 10/11 problem.
On a related note, here is what to do when Skype freezes on a call or when using Camera in Mojave.
Do you know of other helpful solutions to this issue? Let us know in the comments!
