If you are an avid PC gamer, you probably understand the importance of NVIDIA driver updates. Not only does installing these updates can improve your device’s performance and fix reported issues. A driver update can also add new features that improve gaming quality.
Not convinced? An experiment that tested an old NVIDIA GTX 480 found a 10% increase in performance. After a few more updates were rolled out, a 30% increase was then recorded.
So, if you are a gamer, you want to maximize your gaming experience by making sure to install all available NVIDIA GeForce drivers update.
In the sections below, we’ll take things step-by-step. We will discuss what an NVIDIA driver is and its role in the Windows 10/11 environment. We will also try to help Windows 10/11 users who can’t update NVIDIA drivers on Windows 10/11 by providing them with other ways to update them.
Expert Tip: For smoother PC performance, consider using a PC optimization tool. It handles junk files, incorrect settings, and harmful apps. Make sure it's right for your system, and always check the EULA and Privacy Policy.
Special offer. About Outbyte, uninstall instructions, EULA, Privacy Policy.
An Overview of NVIDIA Drivers
A driver is a software program that allows the Windows 10/11 operating system to communicate with devices or hardware components. This means that the NVIDIA graphics driver enables the Windows OS to communicate with your video card, making sure that it works properly.
As with the Windows operating system and other apps and programs that run on it, NVIDIA drivers receive regular updates for performance improvements and new features. These updates need to be installed to avoid issues like random crashes, graphic glitches, poor frame rates, and stuttering.
The Role of NVIDIA Drivers
Having the latest NVIDIA drivers allows you to do a lot of things. However, at the most basic, it updates your display drivers alongside other features and add-ons, such as PhysX drivers and GeForce Experience.
Most often, NVIDIA rolls out driver updates to improve the driver’s performance, especially when playing games. Thus, gamers can play with smooth frames, improved graphics, and stable performance.
How to Update NVIDIA Drivers on Windows 10/11
There are many ways to update NVIDIA drivers. We’ll discuss each method to update Windows drivers below.
Method #1: Update NVIDIA Drivers Manually by Downloading Them on NVIDIA’S Website
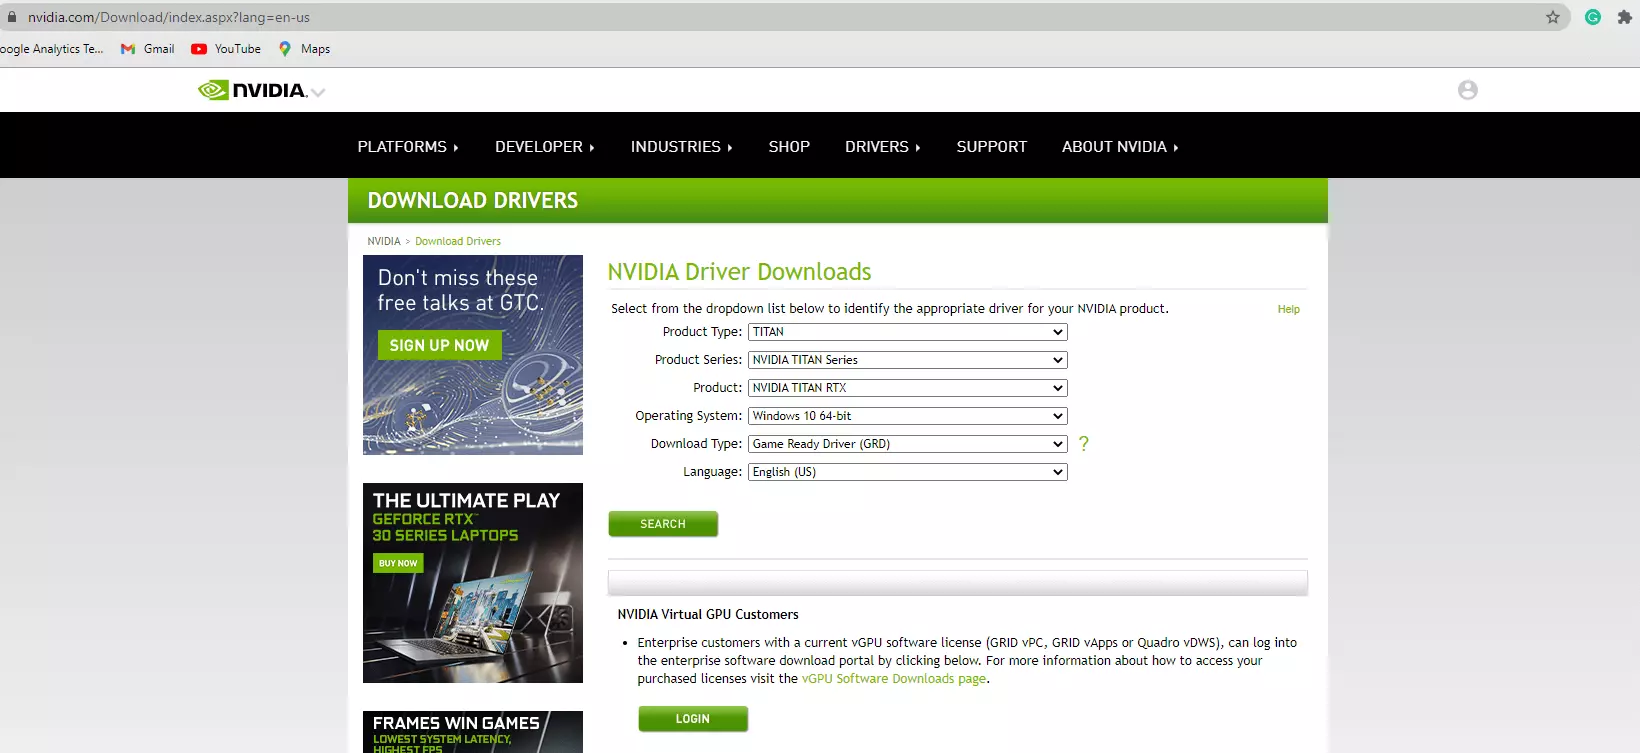
NVIDIA releases driver updates from time to time. And you can get these updates from the official NVIDIA website. Once you are on the website, find the drivers that are compatible with your device and graphics card.
However, aside from being tedious, the manual method requires a bit of technical knowledge. But if you just follow the steps properly, you should be all good. Here’s how you do it:
- First, we need to identify what Windows version you are running as well as the graphics card model you are using. For this, we will use the DirectX Diagnostic tool. Press the Windows + R keys to launch the Run utility. Type dxdiag into the text field. You should now see your Windows version under the System tab. Next, check the graphics card model and click Display Now. Navigate to the Chip Type section to find what graphics card model you are using.
- After getting the information you need, visit the official NVIDIA website. Find and download NVIDIA display drivers that are compatible with your Windows version and your graphics card model. Download it.

- Double-click on the driver file and follow the on-screen prompts.
- Restart Windows.
Method #2: Update NVIDIA Drivers Using the NVIDIA Update Software
NVIDIA Update is a tool that keeps your NVIDIA drivers up-to-date. When a new driver is available, it will direct you to the download page on nvidia.com. It also provides automatic updates for program and game files.
It is worth noting, though, that you can only use this method if you have the NVIDIA Update software installed on your PC. So, if you don’t have it, install it first or try another method.
You can configure this tool by yourself and there are two ways to do so. First, open the NVIDIA Control Panel itself by clicking the main Windows menu, selecting NVIDIA Control Panel, and navigating to the Help menu. Finally, click Updates.
Another method to configure NVIDIA Update is via the Windows system tray. Right-click on NVIDIA’s logo and select Update Preferences.
On NVIDIA Update’s control panel, you will notice two main tabs: Preferences and Updates. On the Preferences tab, you can do the following:
- Enable or disable any NVIDIA update. To do that, simply tick or untick the Automatically check for updates option.
- Tweak how often Windows will check for driver updates. Just choose your desired time from the drop-down menu and save your changes.
- Enable or disable system tray balloon notifications. If you wish to disable it, untick the Notify me when graphics driver updates are available option.
- Enable or disable beta driver notifications. If you don’t want to be included in beta updates, make sure to uncheck the Include Beta updates option.
- Enable or disable automatic program and game profiles. To enable this option, tick the Game and Program Files option.
On the Updates tab, you can view any available or installed driver updates. You can also manually search for the latest driver update.
Method #3: Install Windows Updates

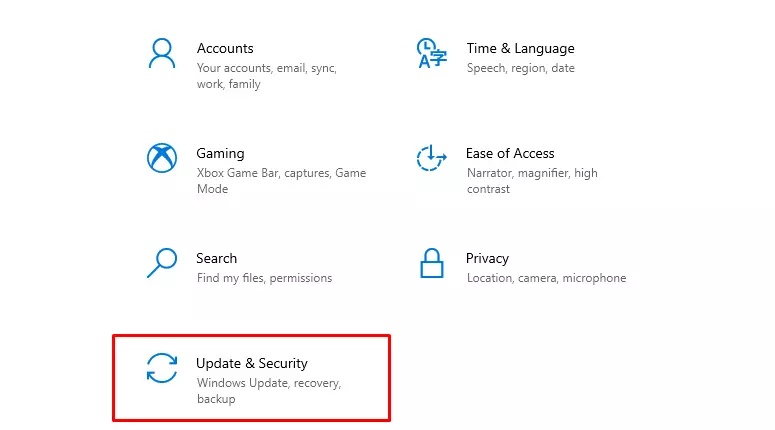
Sometimes, installing Windows updates may also lead to the automatic installation of NVIDIA driver updates. To install Windows updates, click the Start button and go to Settings. Click Update and Security and hit the Windows Update button. If there is an available Windows update, Windows will install it for you. Wait for the installation process to complete before restarting your PC.
Method #4: Use Device Manager
Although you can’t see the same exact management and configuration options like with the NVIDIA Update software, you can still update your NVIDIA drivers using the Device Manager utility. Here’s how:
- Press the Windows + X keys to launch the Quick Link menu.
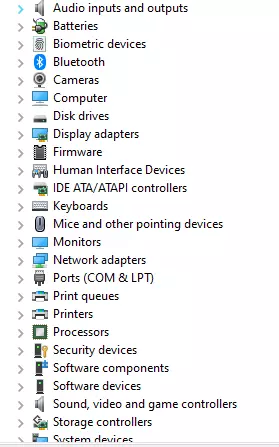
- Select Device Manager by clicking on it or by pressing the M key.
- A list of hardware components will be shown on your screen. Choose Display Adapters.

- Right-click on your NVIDIA graphics card and select Update Driver.
- You have the option to automatically search for drivers or take the manual route.
Method #5: Update NVIDIA Drivers Automatically Using a Driver Updater Tool
If you don’t want to stress yourself in the process of updating NVIDIA drivers, then this is the option for you. Download a driver updater tool and let it update your NVIDIA graphics card. In just a few clicks, you can already update your graphics card. It’s faster than the manual method!
To use, simply download and install your preferred driver updater tool. Once ready, launch the tool and let it do its job for you. A list of recommended drivers will be displayed on your screen. Make a choice and install it!
Should I Update NVIDIA Drivers Automatically?
Learning how to update NVIDIA drivers on Windows 10/11 can be challenging. First, you need to manually check what specific drivers need to be updated. And then, you have to find a reliable download site, download the installer, and install the driver update. Sounds like a lot, right? For that reason, experts highly recommend taking the automatic route.
As we all know, even tech enthusiasts and true-blue gamers hate the process of searching for driver updates and dealing with possible issues in the process. As a result, they often end up not updating their drivers. That is why to get past these challenges, they prefer updating their drivers automatically.
So, why do you entrust all these updates to a driver updater tool? Here’s why?
Reason #1: No Need to Regularly Check for Available Updates
An average computer has many in-built components. That includes drivers. And all these drivers regularly receive updates. Checking on each one of them on a daily can be very time-consuming. Not to mention, it can be risky. With a driver updater tool, you are guaranteed to have the safest and latest NVIDIA driver version for your computer.
Reason #2: Find the Drivers You Need in an Instant
Driver updater tools can find updated driver versions for you so you don’t have to. This is especially handy for hard-to-find updates.
Reason #3: Improved Reliability
Third-party driver updater tools scan for malware, virus, and reliability before installing a Nvidia driver. The drivers are sourced from official manufacturers’ websites to avoid compatibility issues.
Reason #4: Easy Roll-Back
In the event that an update does not work, most driver updater tools have this backup feature that allows you to easily revert to an earlier working version.
In Conclusion
NVIDIA drivers play an essential role in your gaming experience. If you don’t update them, then it is likely that you will suffer the consequences. You don’t just experience a sluggish Windows performance, but you also experience random Windows errors that can be daunting to deal with.
Fortunately, updating NVIDIA drivers is easy. You can use any of the five methods we have provided or follow a comprehensive guide on how to update drivers on Windows 10 to reap the perks that come with an updated NVIDIA driver.
Take note, though. Since updating graphics card drivers may cause your PC to restart a couple of times, it is best that you make a backup of Windows first. You can use a third-party backup software program for this.
Did this article help you update your NVIDIA drivers? Let us know your thoughts in the comments.


You shouldn’t update drivers unless you’re having issues.