
Error 0xC1900101 – 0x20017 is a Windows 10/11 installation error that occurs when an upgrade or installation attempt fails. This error can also arise during the upgrade from Windows 7 to Windows 8. After exploring numerous methods to address this issue, we recommend specific solutions that have proven effective and may resolve the problem for you.
What Is the Windows 10/11 Error 0xc1900101-0x20017?
When Windows users attempt to upgrade to Windows 10/11 but fail to complete the installation process, they may encounter the error 0xc1900101 – 0x20017. This Windows error code can be caused by a third-party antivirus program malfunctioning or problems with a driver or hardware. When this happens, the user receives an error message, and their device automatically reverts to its original operating system.
Generally, the error 0x1900101 – 0x20017 occurs when a user attempts to upgrade their Windows 7 PC to Windows 10/11. However, this problem does not appear to be limited to Windows 7, as it can also occur on Windows 8 and Windows 8.1 PCs.
The error 0x1900101 – 0x20017 often shows up when a user runs the Windows 10/11 installation process using the Media Creation Tool. The process completes to 100%, and when Windows tries to reboot, it becomes stuck on the Windows logo screen with no progress or the computer reboots with the previous Windows version and the 0XC190010 – 0x20017 error, indicating that the installation failed.
Expert Tip: For smoother PC performance, consider using a PC optimization tool. It handles junk files, incorrect settings, and harmful apps. Make sure it's right for your system, and always check the EULA and Privacy Policy.
Special offer. About Outbyte, uninstall instructions, EULA, Privacy Policy.
The error message usually says:
The installation failed in the SAFE_OS phase with an error during BOOT operation.
This is a frustrating problem, but fortunately, there are a few fixes for it that work.
Windows 10/11 installation errors are fairly common, and users have reported the following issues while attempting to install Windows 10/11:
- 0xc1900101 – 0x20017 Creators Update – This error has been reported by many users while trying to install the Creators Update.
- 0xc1900101 – 0x20017 Windows 10/11 Anniversary – This error can also occur when installing the Windows 10/11 Anniversary Update.
- Install error 0xc1900101 – 0x30018 – This is a variant of this error, and it should be fixable with one of our solutions.
- 0xc1900101 – 0x20017 1709 – This error message may appear during the installation of Windows 10/11 build 1709.
What Causes the Windows 10/11 Error 0xc1900101 – 0x20017?
Like many other errors affecting Windows 10/11 users, 0xC1900101-0x20017 can occur due to a variety of reasons. Users who attempt to upgrade their operating system but have incompatible drivers, hardware or antivirus or other security tools are frequently affected by it. If this error is not resolved, it may result in the appearance of other errors.
How to Fix the 0xc1900101 – 0x20017 Safe_OS Error
If you see this or any of the error codes mentioned above, try the steps below first. If none of these steps work, see the specific solutions that follow.
Here is what you should do:
- Check to see if your device has enough storage. To upgrade a 32-bit OS, you’ll need at least 16 GB of free space, and for a 64-bit OS, you’ll need at least 20 GB.
- Make sure you have a stable internet connection. You won’t be able to download the installation files completely if your Wi-Fi is spotty.
- Run Windows Update a few times. Download and install any available updates, including software updates, hardware updates, and third-party drivers. To fix Windows Update errors, use the Windows Update Troubleshooter.
- Run a PC repair tool like Outbyte Driver Updater to get rid of junk files that might be causing the Windows Update error. It also ensures that you have enough storage space for the installation files.
- Check for updates to third-party drivers and download them. The manufacturer’s website has drivers and installation instructions for any hardware you’ve added to your device.
- Remove any unnecessary hardware. Disconnect any external storage devices and drives, docks, and other hardware that isn’t required for your device’s basic functionality.No success? Here’s what you should do next:
Fix #1: Uninstall the Wireless Adapter and Bluetooth Device Drivers
Broadcom drivers aren’t always compatible with Windows 10/11, according to reports, so if you’re using them, you might want to uninstall them before upgrading to Windows 10/11.
Open the Run dialog by holding down the Windows key and pressing R, then type hdwwiz.cpl and press Enter.
You’ll be taken to the Device Manager. Uninstall the drivers for your wireless adapter and Bluetooth device.
You must also locate and uninstall your Bluetooth adapter. When you select the Uninstall device option, you may be asked whether you want to remove the corresponding driver package as well. Simply select “Uninstall” to keep the original driver.
Your drivers will be reinstalled automatically after restarting your PC, or in the worst-case scenario, you will have to download them from the manufacturer’s site.
Fix #2: Disable Your Wireless Adapter and Bluetooth From the BIOS
If uninstalling the Bluetooth driver doesn’t work, you can try disabling your wireless devices from the BIOS. Here’s what you’ll need to do:
Restart the computer in BIOS mode. During the reboot, you’ll see the option to enter the BIOS; it’ll only be available for a few seconds on the POST screen, so you’ll have to press the appropriate key quickly to get into the BIOS. F2 is the key for entering the BIOS on most systems.
Using the left/right arrow keys, navigate to the Advanced tab in the BIOS. Then proceed to the Wireless section. Disable your wireless and Bluetooth devices. Press Esc to return to the main screen, ensure you choose to save the changes before exiting. Go to the BIOS to re-enable your devices after the upgrade.
Fix #3: Update or Uninstall Corrupted Drivers

There are several ways to update your Windows drivers, and we’ll go over these methods one by one.
Update drivers manually
- Go to C: Windows.
- Open the Panther folder.
- To find the problematic drivers, open the Setuperr.log and Setupact.log files.
- Keep in mind that in order to access those files, you may need to take ownership of them.
- Remove the corrupted drivers from your computer.
Update drivers via Device Manager
- In the Search box, type Device Manager and select the first result.
- Expand categories until you see a device with a yellow exclamation mark next to it. This symbol will most likely appear next to the device that is causing the error 0xC1900101.
- To install the latest driver updates, right-click the problematic device and select Update driver.
Update drivers automatically
If this method does not work or you do not have the necessary computer skills to manually update/fix your drivers, we strongly recommend using Outbyte Driver Updater to get the job done automatically. It is far easier than using any of the methods listed above because all you have to do is run the program, and your drivers will be updated and fixed in no time.
The Driver Updater is almost fully automated, it downloads and installs the necessary drivers automatically. After this, all you need to do is restart your computer to apply the changes.
It’s lightweight, and you can even set it to remind you to check for newer drivers in the background. The issue should be completely resolved after updating or uninstalling the problematic drivers, and you should be able to upgrade without any issues.
Fix #4: Delete the SoftwareDistribution Folder
The location where Windows updates are stored is “C:WindowsSoftwareDistribution.” This folder is frequently corrupted, and in such a case, you must recreate it in order to download and install updates from scratch. Follow the steps below to recreate the “SoftwareDistribution” folder:
- Turn off Windows Update. To do so, go to Control Panel > Services > Windows Services and disable the service.
- To open the Run command box, press the Win + R shortcut.
- Type services.msc into the Search box and hit Enter.
- Locate the Windows Update service in the Services control panel.
- Select Stop from the context menu of the Windows Update service.
- Navigate to the C:Windows folder in File Explorer.
- Locate the SoftwareDistribution folder and delete it.
- Start the Windows Update service in the Services window.
- Select Start from the context menu of the Windows Update service.
- Check for Windows 10/11 updates and install them. Click Check for Updates under Settings -> Update and Security.
Fix #5: Remove the Additional RAM/Network Card
Extra RAM can sometimes cause the 0XC190010 – 0x20017 error, so you may need to remove one RAM module and reinstall Windows 10/11.
Several users reported that removing their wireless adapter from their computer had solved the problem.
Some Broadcom wireless adapters aren’t compatible with Windows 10/11, according to users, and you may have to remove the adapter from your PC to install it.
To do so, simply turn off your computer and disconnect all cables, then open the computer case and carefully remove the wireless adapter.
Keep in mind that doing so will void your warranty, so if your PC is still under warranty, you should take it to an authorized repair facility.
You should be able to install Windows 10/11 without any problems after removing the wireless adapter. Several users have reported that after installing Windows 10/11, they had to replace their Broadcom wireless adapter, so you may have to do the same.
Fix #6: Update Your BIOS
Your BIOS might be causing the Windows 10/11 installation errors. It’s critical to update your BIOS to the most recent version to prevent and resolve such issues.
To do so, go to the website of your motherboard’s manufacturer and download the most recent BIOS for your motherboard.
Keep in mind that updating the BIOS can be a potentially dangerous procedure, so proceed with caution.
Check your motherboard manual for detailed instructions on how to properly update your BIOS.
If you’re having trouble installing Windows 10/11 because of the 0xC1900101-0x20017 error, check your BIOS settings as well. Some users claim that changing the AHCI mode to IDE mode solved the problem for them.
Once these changes are made, the problem should be resolved, enabling you to install Windows 10/11 without any issues.
Fix #7: Edit the Registry
If you’re getting the Windows 10/11 installation error 0xC1900101 or 0x20017, the problem could be related to your registry.
To resolve the issue, make the following changes to your registry:
- Enter regedit after pressing Win + R. To continue, press Enter or click OK.
- Because modifying the registry can be dangerous, it’s a good idea to back up your registry before making any changes. Go to File > Export to do so.
- Select All as Export range and type in the file name you want. Select a secure location and click Save.
- You’ll have a backup of your registry on your PC after exporting it. You can easily restore your registry to a previous state using this backup if something goes wrong after you modify the registry. Simply double-click the exported file to bring your registry back to its previous state.
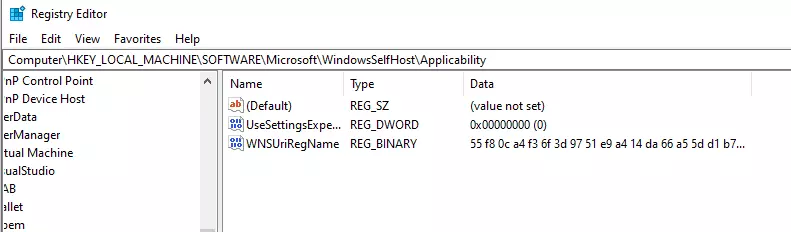
- Navigate to this path: HKEY_LOCAL_MACHINE\SOFTWARE\Microsoft\WindowsSelfHost\Applicability
Now edit the following values:
- Ring: WIF
- RingBackup: WIS or Enabled
- EnablePreviewBuilds: 2
- BranchName: TH1
- UserPreferredBranchName: TH1
Close the Registry Editor and restart your computer after making these changes.
Keep in mind that this solution may only work for Insider builds, so if you don’t have these keys in your registry, you should probably skip it.
Conclusion
The 0xC1900101 error is serious, and it can prevent you from installing certain updates, but one of our solutions should be able to fix it. If you’re having trouble executing any of the fixes above, try booting into Safe Mode first and apply the fixes there. This should prevent third-party apps and processes from interfering with the troubleshooting.