One common problem with Android devices is they tend to become slow over time. When they’re used straight from the box, you are sure to enjoy its best performance. But as days pass, files, photos, apps, and videos start to accumulate and use up your device’s resources, which results in slower performance. That is what we are trying to avoid.
Although apps like Android cleaner tool can resolve slowing down issues on Android devices by getting rid of apps and programs that run without permission in the background and clearing app cache and junk files, nothing compares to the effects that freeing up storage space can have on your Android device’s performance.
There are three common ways to free up and increase your Android device’s storage space. First, move files to an SD card. Second, move apps to an SD card. Last but not the least, change the camera’s default storage to SD card.
Before we teach you how to perform these three methods, we’d like to emphasize that there is no definite or set amount of internal storage space you should make available on your Android device to make it perform faster. However, you can never go wrong with having more space. After all, more is better.
How to Move Files to an SD Card
Files are considered one of the reasons why you don’t have enough storage space on your device. These files take the form of documents, PDFs, images, and the like. Instead of saving them on your device storage, why not transfer them to an SD card?
The Quick and Effective Method

In this method, you can move all your selected file types into your chosen destination folder. It applies to all Android devices. Here’s how you do it:
- Tap the Launcher button to open the App Drawer. A list of all the apps available on your Android device should be displayed.
- Scroll down the list and select File Manager. Depending on your device’s model and brand, this could be called File Explorer, Files, Explorer, My Files, or something similar. If you don’t have a File Manager, you can download one from Google Play Store.
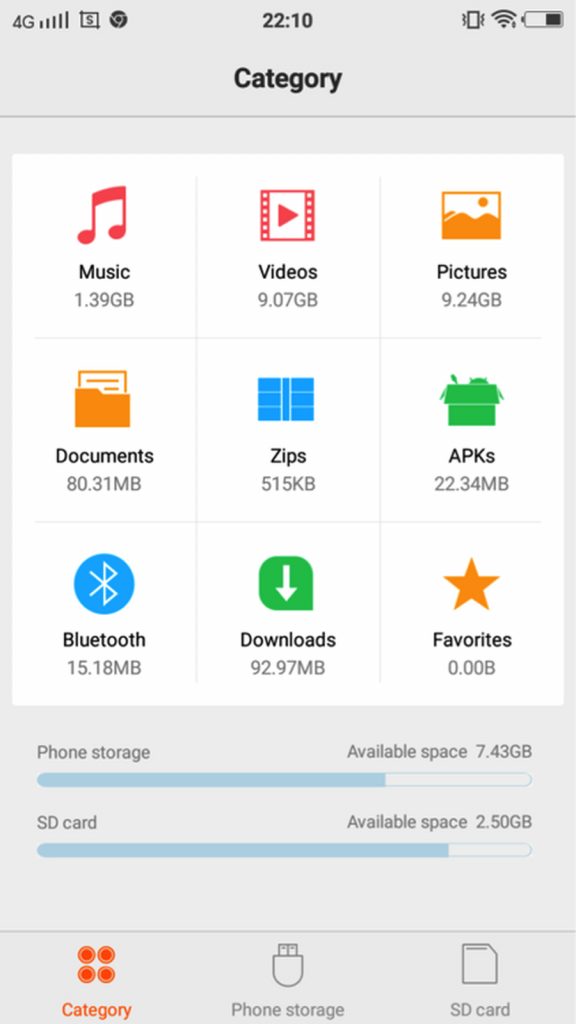
- Under Category, tap the folder of the file type you want to move. You can select to move Music, Videos, Pictures, Documents, Zips, APKs, Bluetooth, Downloads, and Favorites.
- Press the Menu icon, which is usually found in the upper-right corner of the screen to see a list of actions you can perform.
- Tap Select All or Select from the list of actions. After tapping it, an empty checkbox will appear at the top. It is often labeled Select All or 0 Selected.
- Tick the checkbox to Select All.
- Again, tap the Menu icon to display the list of actions you can perform.
Select Move. - Navigate through the folders and select a destination folder in your SD card. If the folder does not exist, you can create a new one by tapping Create Folder at the bottom of your screen or from the drop-down menu. Tap to select the folder.
- From the drop-down menu, press Move Here. In case you want to stop moving the files or you changed your mind, tap Cancel.
- Wait until your device has finished moving all your files.
- If you want to move other file types, repeat steps 1 to 11.
The Deliberately Organized Method

This method helps keep your folders and files as organized as possible. That is how it’s done:
- Tap the Launcher button to launch the app drawer.
- Scroll through the app list and select File Manager. Depending on the model and brand of your device, File Manager could be labeled as File Explorer, Files, Explorer, My Files, or something similar. If your device does not have a File Manager, you can download one from Google Play Store.
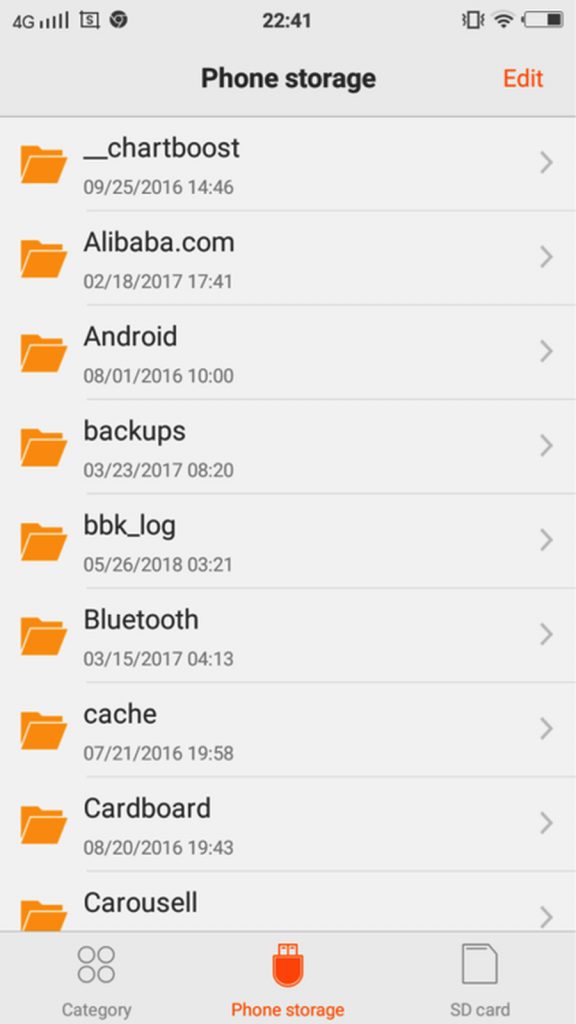
- Tap Local Storage. On other devices, this is labeled Phone Storage, Internal Memory or Device Storage.
- Keep scrolling until you find the files and folders you wish to transfer.
- Press the Menu icon to display a list of actions you can perform.
- Tap Select from the list. You should then see empty check boxes next to the files and folders and one empty checkbox at the top that is often labeled Select All or 0 Selected.
- Select the file or folder you want to move. Merely tap the empty check boxes next to them. You can also tick the checkbox at the top of your screen that is labeled Select All.
- Press the Menu icon to display a list of actions. Select Move.
- Navigate around until you find the destination folder on your SD card. If you haven’t created a folder yet, make one by tapping Create Folder from the Menu. Tap the destination folder to select it.
- From the Menu, select Move Here.
- Wait until your device has completely moved your selected files and folders.
- Repeat steps 1 to 11 to move other files and folders from your device to the SD card.
How to Move Apps to an SD Card

A few Android apps won’t require huge storage space, but if you download lots of them, the storage space requirements may add up. Luckily, Android OS allows you to transfer or move apps from your device’s storage to an SD card and vice versa. Take note, though. Some apps cannot be saved externally, including the system and pre-loaded apps. Hence, they should stay as is. Follow the steps below to move your apps to an SD card:
- Tap the Launcher button to open the App Drawer and display a list of apps installed on your device.
- Go to Settings. Select Application Manager or Applications. A list of apps available on your device will then show up in alphabetical order.
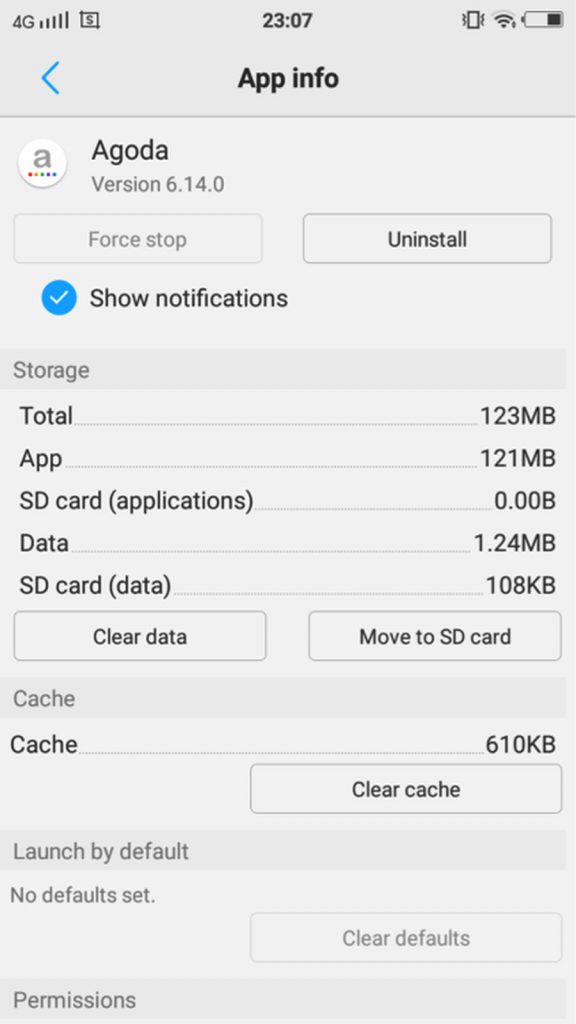
- Go over the list of apps and select the one you wish to move. At this point, you will be presented with actions and details about the app.
- Press the Move to SD Card button. If the button is already grayed out, then it only means the app cannot be transferred. If the Move to Device Storage is there instead of the Move to SD Card button, then the app is already saved on the SD card.
- Follow any instructions that appear.
- Wait until your device finishes moving the app.
- Repeat steps 1 to 6 to move other apps from your device’s storage to an SD card.
How to Change Your Camera’s Default Storage to the SD Card
Do you usually take plenty of photos using your Android device that you find it tedious and time-consuming to move the images every single time? Fear not. The best solution for you is to change your camera’s default storage to SD card. To change your camera’s default storage, follow the steps below:
- Launch the default Camera app on your device.
- Tap the Menu or Settings icon to open the camera settings.
- Select Storage Location.
- Press Memory Card. Sometimes, this option is called SD Card or External Storage.
- The next time you take photos, you know they will be saved automatically to the SD card.
More Tips for Long-Term Storage Efficiency
In the long run, your SD card will run out of space regardless which device you use it for, such as an SD card for dash cam. To prevent that from happening, you may regularly transfer your files and apps from the SD card to your computer using a memory card reader. From there, you can conveniently move or upload your files to a more reliable storage solution, such as an external hard drive or an online storage service like Google Drive and Dropbox.
Well, if budget permits or you don’t feel like opening your PC, you can also buy more SD cards for your Android device. But note that this is not a practical and economical option.
