
The Windows update error 80072efe is a common issue that arises during the installation of patches and system updates on any Windows operating system. This specific error is directly associated with the Windows Update Service.
You might find different error messages accompanying the code, which includes:
- Some updates were not installed: ## Error(s) found: Code 80072EFE
- Windows update encountered an unknown error
The error messages may vary but the connotations behind the issue remain the same. There is also no specific time or process that triggers the error. Users may encounter it when starting or shutting down the computer, when reinstalling the operating system, when updating an app or a device driver, or when installing Microsoft-related software. The appearance of error 80072efe can be very stressful because of the negative consequences it causes. Aside from the failed installation of the update(s), your computer will most likely slow down, freeze, or cause apps to crash.
Error 80072EFE is generally triggered when there are problems with the internet connection. It could be on a client side or on the windows server. If it is on the server side, we can’t do anything about it so we’re left with troubleshooting the client side only.
Expert Tip: For smoother PC performance, consider using a PC optimization tool. It handles junk files, incorrect settings, and harmful apps. Make sure it's right for your system, and always check the EULA and Privacy Policy.
Special offer. About Outbyte, uninstall instructions, EULA, Privacy Policy.
What Is Windows Update Error 80072EFE?
The 80072EFE error is basically a Windows Vista and Windows 7 issue. However, it is also known to occur on Windows 10/11, often caused by malware belonging to the rootkit family. If you read the original error message, this error code hints towards an internet connection problem. This could mean a flaky line or a cable issue, but it can also raise a red flag warning you that a malicious rootkit might be interfering with your internet connection.
This issue can also be triggered by third-party firewalls or antivirus suites that are overly protective when managing or monitoring your data exchanges. Another potential culprit is corruption in the Windows system files responsible for updating your operating system.
The accompanying error messages could be:
- ERROR_INTERNET_CONNECTION_ABORTED – The connection with the server has been terminated.
- WININET_E_CONNECTION_ABORTED – The connection with the server was terminated abnormally
- ERROR_WINHTTP_CONNECTION_ABORTED – The connection with the server was terminated abnormally.
If you have only discovered this problem, you should begin your troubleshooting efforts by ensuring that your internet connection is functioning properly. If it is, wait a couple of hours and try to install the update again. While you’re waiting, it is a good idea to restart your router/modem to force it to re-assign your DNS settings. If the cause was indeed server-side or a faulty network misconfiguration, this should automatically fix the problem and the update should install successfully.
Once you’re sure that the issue is not on the server side, there are several steps you can follow to get rid of the 80072EFE error. Follow the solutions below in order until you find a method that works for you.
Note: If you encountered the 80072EFE Windows Update error when installing an OS update on Windows phones, the problem is either server-side or maybe a faulty network setting. If this happens, wait for a couple of hours and try again to see if the update is able to complete. If the problem persists, try using a proxy server or a VPN to parse your internet connection through it. If the update still doesn’t install completely, perform a hard reset and try again.
What Causes Windows Update Error 80072EFE?
Several issues can lead to the occurrence of error 80072efe. While some are minor, others can be complicated. They include;
- Unreliable/unsteady Internet connection
- Accumulated junk files
- Downloading a program when the computer is installing the update(s)
- Virus/malware infection
- Installed anti-virus/malware program
- Incorrect network configuration
- Corrupt Windows registry files
- Damaged/outdated system drivers
How to Fix Windows Update Error 80072EFE
Before you try to fix this error, here are some basic troubleshooting steps you can take.
- Check your internet connection or try another connection. It is necessary for the internet connection to work for Windows updates to download. While working offline and trying to update Windows manually, you might not notice the status of the internet connection. In such a case, try opening websites on your browser to check your internet connection.
- Clean up your computer. Delete junk files and resolve issues that might be triggering this error. You can use Outbyte PC Repair to optimize your computer and hopefully resolve this problem you are facing.
If these housekeeping steps didn’t do the trick, you can proceed to the solutions listed below.
Fix #1: Run the Network Adapter Troubleshooter.
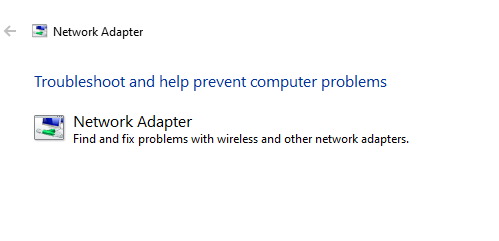
Even if the internet is working fine, the network might be facing other issues thus preventing the Windows Update and causing the error in the discussion. In such a case, we can run the Network troubleshooter to resolve the problem. The procedure to run the Network troubleshooter is as follows:
- Click on the Start button and then on the gear-like symbol to open the Settings menu.
- Go to Updates and Security > Troubleshoot.
- Select the Network Adapter Troubleshooter from the list and run it.
- Run the Network Adapter troubleshooter
- Restart the system once you are done.
Fix #2: Run the Windows Update Troubleshooter.
The Windows Updates Troubleshooter is a powerful tool that checks for every possible problem with Windows updates and fixes it if possible. The simple procedure to run a Windows updates troubleshooter is as follows:
- Open the Troubleshoot menu as in the previous solution.
- Select the Windows Updates troubleshooter from the list and run it.
- Restart the computer once you are done.
Fix #3: Empty the SoftwareDistribution Folder.
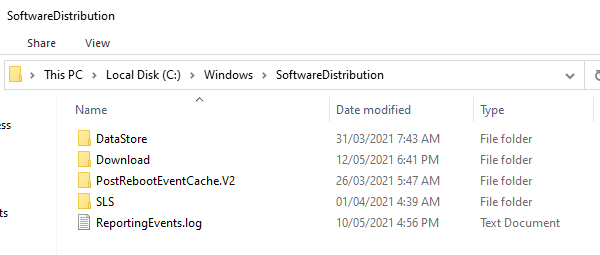
Every Windows 10/11 operating system has a Software Distribution folder located in the Windows directory. This is where files required to install Windows Updates are temporarily stored.
In this solution, you may have to delete the contents of this folder and retry the update process.
Here’s how:
- Click the Start menu.
- Into the search field, input cmd and right-click on the most relevant search result. Select Run as Administrator.
- Once the Command Prompt opens, input these commands into the command line:
- net stop wuauserv
- net stop bits
- Hit Enter.
- Now, use the Windows + R keys to launch the Run utility.
- Browse this path: C:Windows\SoftwareDistribution.
- Select all the contents and hit the Delete button to remove them.
- Go back to the Command Prompt and input this command: net start wuauserv. Hit Enter.
- And then, start the Background Intelligent Transfer Service by entering this command: net start bits. Hit Enter.
- At this point, you should have successfully cleared the contents of the SoftwareDistribution folder.
Fix #4: Delete the Windows Update Temporary Cache
Temporary files are stored in the Windows Software Distribution folder located in the Windows directory. If there are corrupted temporary files in the Software Distribution folder, they may affect Windows Update and cause the Windows Update error 80072EFE .
To clear the Windows Update temporary cache:
- Press Win-key + R.
- In the dialogue box, type %windir%\SoftwareDistribution\DataStore and press Enter.
- Delete all content of the Windows Explorer folder. Hint: Use Ctrl + A to select all files and folders then press ‘delete’.
- This process should clear all the contents of the Software Distribution folder. If they were the cause of the error, it should resolve the issue.
Fix #5: Use Tdsskiller.exe to Remove Rootkit Files.
Since malware interference can do a lot more damage than preventing you to update, we’ll start with it. The 80072EFE error is often linked with a family rootkit malware belonging to the win.32 TDDS family. This rootkit is known to prevent security updates from getting through and will also severely limit the reactionary capabilities of Windows Defender.
Luckily, removing the malicious rootkit files is extremely easy. Kaspersky Labs released an executable that will remove the rootkit files with a few simple clicks. Here’s a quick guide to using tdsskiler.exe:
Note: Running the tdsskiller executable on systems without malware problems will not have a negative effect on your computer. Even if you believe your system is not infected, it’s recommended that you don’t skip this first method.
- Download tdsskiller.exe from Kaspersky.
- Run the executable and click on Start Scan.
If TDSSKiller finds any threats, it will automatically proceed to kill them. Once the process is complete, restart your system. Check for updates again in Windows update and see if they manage to install correctly.
Fix #6: Disable Firewalls and Antiviruses.
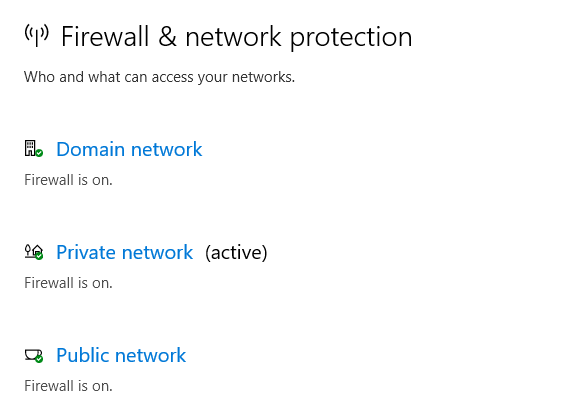
If you used tdsskiller.exe without results, let’s determine if your 3rd party antivirus suite or firewall is acting up. Third party firewalls or antivirus suites can malfunction and determine that the Windows update connection is unsafe. This will end up preventing your Windows OS from applying the necessary updates. There are a lot of conflicts between Windows Defender and 3rd party security solutions that will produce the 80072EFE error. Here’s a list of firewalls that are known to cause this issue:
- Norton Internet Security
- Panda Firewall
- Zone Alarm Firewall
- McAfee firewall
- AVG firewall
If you have one of the above 3rd party firewalls, disable them, restart your system and try performing the update again. Even if you have a different firewall software, try disabling it before performing the Windows update.
Fix #7: Delete the CatRoot2 Folder.
The catroot2 folder is a Windows system folder required by the Windows Update process. Whenever you update through Windows update, the catroot2 folder is responsible for storing signatures of the Windows Update package. As it turns out, deleting the contents of the Catroot2 folder will remove corruption and fix several Windows update problems including the 80072EFE error. Deleting the catRoot2 folder should not cause any malfunctions to your system.
If you decide to follow this method, you’ll need to disable the Cryptographic service first since it uses a file located inside the CatRoot2 folder.
Here’s a quick guide to disabling the Cryptographic Services and deleting the CatRoot2 folder:
- Press Windows key + R to open a Run window. Type Services.msc and press Enter to open the Services panel.
- Scroll down and double-click on Cryptographic Services. Next, select the General tab in the Cryptographic Services Properties window. From there, click the Stop button to turn the service Off if it’s already enabled. If it’s disabled, you can move on to the next step.
- Navigate to C:\ Windows \ System32 and locate the Catroot2 folder. Right-click on it and select Delete.
- You will need administrator privileges in order to complete this operation. Keep in mind that your user account needs to be set up as admin in order to be able to delete Catroot2. If you are unable to delete the Catroot2 folder, try renaming it instead. You can use any given name. If that also fails, try rebooting in safe mode and attempt to delete the Catroot2 folder again.
- Return to the Cryptographic Services Properties window in the General tab and click the Start button to restart Cryptographic Services.
Restart your computer and attempt to apply the Windows update again.
Fix #8: Reset the Local Group Policy of Windows.
If you’re working with a custom Windows Group Policy, your settings might prevent Windows Update from performing the necessary updates. Some users have reported that resetting their local group policy settings eliminated the 80072EFE error and allowed Windows to update normally.
Here’s a quick guide on reverting the default local group policy:
- Press Windows key + R to open a Run window. Type gpedit.msc and hit Enter to open the Local Group Policy Editor.
- Browse to Local Computer Policy > Computer Configuration > Administrative Templates and click on All Settings to select it.
- Now, use the panel on the right-side to identify the entries that are either Enabled or Disabled. You can make it easier for yourself by clicking the State button at the top of the column. This will sort the entries and help you spot modified policies more easily.
- Double click every policy that is either Enabled or Disabled and set the state to Not configured. Make sure every entry is set to Not configured when you’re done.
- Once you’ve reverted to the default group policy, restart your machine and force the Windows Update again.
Fix #9: Troubleshoot Windows Update.
Troubleshooting Windows Update can go a long way in resolving error 80072efe and many other errors that interfere with smooth updating of your computer.
- Press the combination of Win + X keys.
- Click “Control Panel”.
- Type “Troubleshooting” in a search box.
- Click “View All”.
- Click “Windows Update” at the bottom.
- Follow the resultant on-screen instructions to the letter before accessing Windows Update again to see whether or not the error 80072EFE is resolved.
Fix #10: Remove Junk Files.
Using your computer over time leads to accumulation of junk files that end up causing internal conflicts in addition to overloading your computer’s hard disk. Removing such files can easily resolve error 0x80072efe.
- Press the combination of Win + X keys to open up the menu.
- Select “Command Prompt (Admin)” option.
- Click “Yes” to run the command prompt as an administrator.
- Type “cleanmgr” before hitting Enter.
- The tool will begin to run automatically. It calculates how much used space you can claim on the hard disk. Check all the dialogue boxes occupied by unnecessary files including the temporary files box.
- Click “OK” to let the tool remove all junk files. Revert to what you were doing before the error 80072EFE occurred to see whether or not it is resolved.
Fix #11: Update System Drivers.
Damaged/outdated system drivers can cause many errors including error 80072efe. Updating the same can be an easy way of resolving the error.
- Right-click on “My Computer” before selecting “Properties”.
- Select “Device Manager”.
- Navigate through all the devices listed while looking out for any device with a yellow exclamation mark.
- Right-click on any such device before choosing “Update Driver”.
- Restart your computer after the update.
If drivers were the real issues, doing these steps might solve error code 80072EFE on your system.
Fix #12: Run the System File Checker.
Running the built-in system file checker tool can be helpful in resolving the error. The tool scans and attempts to repair corrupt files that may be the cause of the error.
- Click “Start”.
- Type “cmd” in the “Search programs and files” box.
- Press the combination of CTRL + Shift + Enter before clicking “OK” to open command prompt.
- Type “chkdsk/f/r” into the prompt before hitting Enter.
- Type “Y” in response to the resultant notification.
Restart the computer to allow disk check to run. You need to give the tool time to complete before trying to do what you were doing before the error appeared to see whether or not the Windows Update error code 80072EFE is resolved.
Fix #13: Reset Windows Update using Command Prompt.
To reset Windows Update manually using Command Prompt on Windows 10/11, use these steps:
- Open Start.
- Search for Command Prompt, right-click the top result, and select the Run as administrator option.
- Type the following commands to stop the Background Intelligent Transfer Service (BITS), Windows Update service, and Cryptographic service, and press Enter on each line:
- net stop bits
- net stop wuauserv
- net stop appidsvc
- net stop cryptsvc
- You may need to run the command more than once until you see the message that the service has stopped successfully.
- Type the following command to delete all the qmgr*.dat files created by BITS from your PC. and press Enter: Del “%ALLUSERSPROFILE%\Application Data\Microsoft\Network\Downloader\*.*”
- Type Y to confirm the deletion.
- Type the following commands to clear the Windows Update cache to allow Windows 10/11 to re-download the updates, instead of using the files already downloaded on your system that might be damaged and press Enter on each line:
- rmdir %systemroot%\SoftwareDistribution /S /Q
- rmdir %systemroot%\system32\catroot2 /S /Q
- Quick tip: We are using the remove directory rmdir command with the /S option to delete the specified directory and all subdirectories within the main folder, and the option /Q is used to delete directories quietly without confirmation. If you get the message “The process cannot access the file because it is being used by another process,” then repeat step No. 1 and try again, as one of the services might have restarted unexpectedly.
- Type the following commands to reset the BITS and Windows Update services to their default security descriptor, and press Enter on each line:
- sc.exe sdset bits D:(A;;CCLCSWRPWPDTLOCRRC;;;SY)(A;;CCDCLCSWRPWPDTLOCRSDRCWDWO;;;BA)(A;;CCLCSWLOCRRC;;;AU)(A;;CCLCSWRPWPDTLOCRRC;;;PU)
- sc.exe sdset wuauserv D:(A;;CCLCSWRPWPDTLOCRRC;;;SY)(A;;CCDCLCSWRPWPDTLOCRSDRCWDWO;;;BA)(A;;CCLCSWLOCRRC;;;AU)(A;;CCLCSWRPWPDTLOCRRC;;;PU)
- Type the following command to move to the System32 folder and press Enter: cd /d %windir%\system32
- Type the following commands to register all the corresponding BITS, and Windows Update DLL files on the Registry and press Enter on each line:
- regsvr32.exe /s atl.dll
- regsvr32.exe /s urlmon.dll
- regsvr32.exe /s mshtml.dll
- regsvr32.exe /s shdocvw.dll
- regsvr32.exe /s browseui.dll
- regsvr32.exe /s jscript.dll
- regsvr32.exe /s vbscript.dll
- regsvr32.exe /s scrrun.dll
- regsvr32.exe /s msxml.dll
- regsvr32.exe /s msxml3.dll
- regsvr32.exe /s msxml6.dll
- regsvr32.exe /s actxprxy.dll
- regsvr32.exe /s softpub.dll
- regsvr32.exe /s wintrust.dll
- regsvr32.exe /s dssenh.dll
- regsvr32.exe /s rsaenh.dll
- regsvr32.exe /s gpkcsp.dll
- regsvr32.exe /s sccbase.dll
- regsvr32.exe /s slbcsp.dll
- regsvr32.exe /s cryptdlg.dll
- regsvr32.exe /s oleaut32.dll
- regsvr32.exe /s ole32.dll
- regsvr32.exe /s shell32.dll
- regsvr32.exe /s initpki.dll
- regsvr32.exe /s wuapi.dll
- regsvr32.exe /s wuaueng.dll
- regsvr32.exe /s wuaueng1.dll
- regsvr32.exe /s wucltui.dll
- regsvr32.exe /s wups.dll
- regsvr32.exe /s wups2.dll
- regsvr32.exe /s wuweb.dll
- regsvr32.exe /s qmgr.dll
- regsvr32.exe /s qmgrprxy.dll
- regsvr32.exe /s wucltux.dll
- regsvr32.exe /s muweb.dll
- regsvr32.exe /s wuwebv.dll
- Quick note: regsvr32 is a command-line tool that will help you to register .DLL files as command components in the registry, and we’re using the /S option to specify the tool to run the command silently without prompting additional messages.
- Type the following commands to reset the network configurations that might be part of the problem (but do not restart your computer just yet), and press Enter on each line:
- netsh winsock reset
- netsh winsock reset proxy
- Type the following commands to restart the BITS, Windows Update, and Cryptographic services, and press Enter on each line:
- net start bits
- net start wuauserv
- net start appidsvc
- net start cryptsvc
- Restart the computer.
Once you complete the steps, Windows Update should have reset, and it should be working again on your Windows 10/11 device.
Fix #14: Use System Restore.
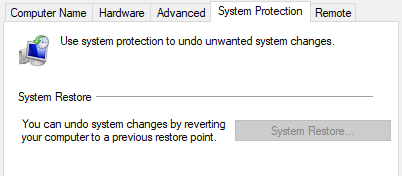
Restoring your computer to an earlier date when it worked without any issue will be necessary in case all the above methods fail.
- Press the combination of Win + Q keys.
- Click on “Settings”.
- Choose “Recovery” icon.
- Select “System Restore” from the resultant open window.
- Choose an earlier date when your computer worked without any issues.
- The tool should start to run before shutting down the computer and restarting it again.
Try accessing Windows Update again to see whether or not the windows 10 update error code 80072EFE is resolved.
Fix #15: Fresh OS Installation
Failure by any of the above methods to resolve error 80072EFE may mean that the error is caused by a combination of various issues. Re-installing the OS may be your last option in resolving the error.
It is very important to point out that a persistent code 80072EFE after fresh OS installation will mean that the error is hardware-related. You may be encountering the error because of a damaged hardware or a recently installed hardware.
Summary
We certainly hope that the methods above have been successful in helping you get past the 80072EFE error and update your Windows. If you’re still having this issue on a valid Windows license, you should contact a Microsoft Customer care representative. Some users have reported that this particular error code (80072EFE) was fixed after Microsoft rectified their Product Code.
If a Microsoft technician confirms that your license code is valid, you should turn your attention towards your hardware. As stated above, the error message signals a network interruption. This could very well mean a faulty internet adapter or a bad cable. If you have a dynamic IP, you can also try to call your ISP and ask them to set up a static IP for your machine.
I’ve got this problem with my second-hand laptop. It’s a Toshiba Satellite Pro L500 running Windows 7 Enterprise. It won’t update after re-installing Win 7. Any advice would be greatly appreciated. I’m wondering if there’s a place where I can update the drivers to a more recent date.
Kind regards,
Russell