People update their Windows devices for different reasons such as trying out new features, fixing issues, or being forced to upgrade due to an unsupported version. Running an outdated operating system exposes it to security risks and vulnerabilities.
So, how do you perform a Windows upgrade? Simply do the following:
- Click the Start menu.
- Go to Microsoft System Center and click Software Center.
- Navigate to the Updates section.
- Hit the Install All button.
- Once the updates are installed, restart your computer.
While the steps are pretty easy, unfortunately, not all Windows users can smoothly perform an upgrade. Some of them are reportedly receiving Windows upgrade errors like the 0x8007025D-0x2000C Windows upgrade error. What is this error, what causes it, and how do you fix it? We’ll answer all these questions in the succeeding sections.
What Is 0x8007025D-0x2000C Error on Windows 10/11?
The 0x8007025D-0x2000C Windows upgrade error on Windows 10/11 is often accompanied by the error message, “We couldn’t install Windows 10/11. We’ve set your PC back to the way it was right before you started installing Windows 10/11.”
Expert Tip: For smoother PC performance, consider using a PC optimization tool. It handles junk files, incorrect settings, and harmful apps. Make sure it's right for your system, and always check the EULA and Privacy Policy.
Special offer. About Outbyte, uninstall instructions, EULA, Privacy Policy.
As you can see, there is not enough information included in the error message, so this could be very difficult to deal with for ordinary Windows users. In order to fix the Windows upgrade error, they first identify what’s causing it to show.
So, what triggers the 0x8007025D-0x2000C error?
What Causes 0x8007025D-0x2000C Windows Upgrade Error?
Issues associated with Windows upgrades may be caused by many different things. However, the most common triggers include the following:
- An overly protective antivirus suite – Sometimes, an overly protective antivirus software keeps you from installing a Windows upgrade. The program may flag the update as a threat, that is why it is throwing the error message. To fix this, you may need to temporarily disable the antivirus program before installing the upgrade.
- An insufficient hard drive space – Windows upgrades have certain requirements to meet. One is storage space. If you do not have enough hard drive space needed to install the upgrade, then you may encounter issues like the 0x8007025D-0x2000C error. In this case, you need to free up your hard drive space by deleting junk and other unnecessary files.
- Corrupted or damaged Windows files – Damaged and corrupted Windows system files may trigger error messages to show. For this, you need to fix the files using Windows’ built-in utilities.
- Broken hardware components – If you have broken hardware components, there is a chance that you will encounter the 0x8007025D-0x2000C Windows upgrade error. To fix this, you need to repair the damaged hardware components by taking your device to the nearest computer shop.
- Virus or malware infection – Viruses and malware entities can affect system processes or corrupt system files, which are required during the upgrade process. In this case, error messages like the 0x8007025D-0x2000C error may appear. To resolve this, you have to get rid of the virus first and fix whatever damage it has caused.
Now that we have pinpointed all the possible reasons why the 0x8007025D-0x2000C Windows upgrade error appears, it’s high time to know how to fix it.
6 Ways to Fix the 0x8007025D-0x2000C Windows Upgrade Error
Below are some fixes that will help you resolve this annoying problem.
Fix #1: Run the Disk Cleanup Tool
 If you suspect that an insufficient storage space is causing the error message, then you may use the Disk Cleanup tool. This will allow you to free up relevant space on your hard drive.
Take note that you will need at least 32 GB of free space to install a Windows 10/11 upgrade. Although you can easily increase your drive space by using an SSD or by buying a new hard drive, the Disk Cleanup utility will make for a temporary fix.
To use it, follow these steps: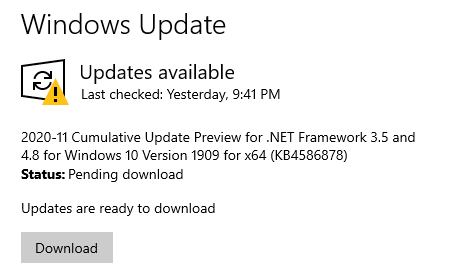
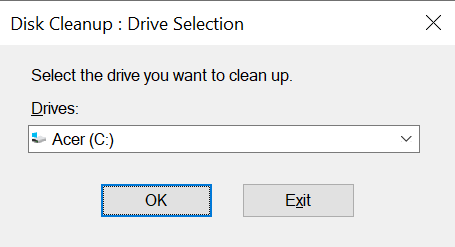
- Into the Windows search field, input disk cleanup and hit Enter.
- Select your main drive.
- Choose Temp Files from the list.
- After that, click the Cleanup system files option.
- Now, select your primary drive and click the system files you want to get rid of. You may go to the Windows Update section first because this often takes the largest amount of space.
- Once done, hit OK.
- Wait for the tool to finish the deletion process.
- Restart your computer and try installing the upgrade once again.
Fix #2: Temporarily Uninstall or Disable Any Third-Party Antivirus or Security Software
According to some affected Windows users, some antivirus and security software programs can block the Windows upgrade process, causing the 0x8007025D-0x2000C Windows upgrade error to show. They said that Norton products are notorious triggers to this error.
To fix this, try to temporarily uninstall or disable your third-party antivirus or security software. Just make sure that you reinstall the program or have Windows Defender up and running after performing the upgrade.
In case you don’t know, Windows Defender is an antivirus software program that is in-built on your Windows device. When it was initially launched, it was said to be ineffective and inefficient. But as the years passed, the tool improved. Now, it’s considered one of the best antivirus software programs to exist.
Here’s how to temporarily uninstall or disable your third-party antivirus software:
- Into the search field, type control panel.
- Click the most relevant search result.
- Go to Programs and select Programs and Features.
- Next, right-click the antivirus program you want to temporarily remove.
- Hit the Uninstall button.
- Follow the on-screen instructions to complete the uninstallation process.
- Restart your computer.
- Perform the update once again and check if the error persists.
If you are able to update Windows after trying this fix, be sure that you install your third-party antivirus software once again. This is to protect your device from potential threats.
Fix #3: Check Your System Files
If the Windows OS you installed is corrupted, then it is possible that you may not be able to install new files properly. This includes files related to your Windows Upgrade utility. To fix this, use the System File Checker utility to verify and check the status of your Windows system files.
Here’s how to use the System File Checker utility: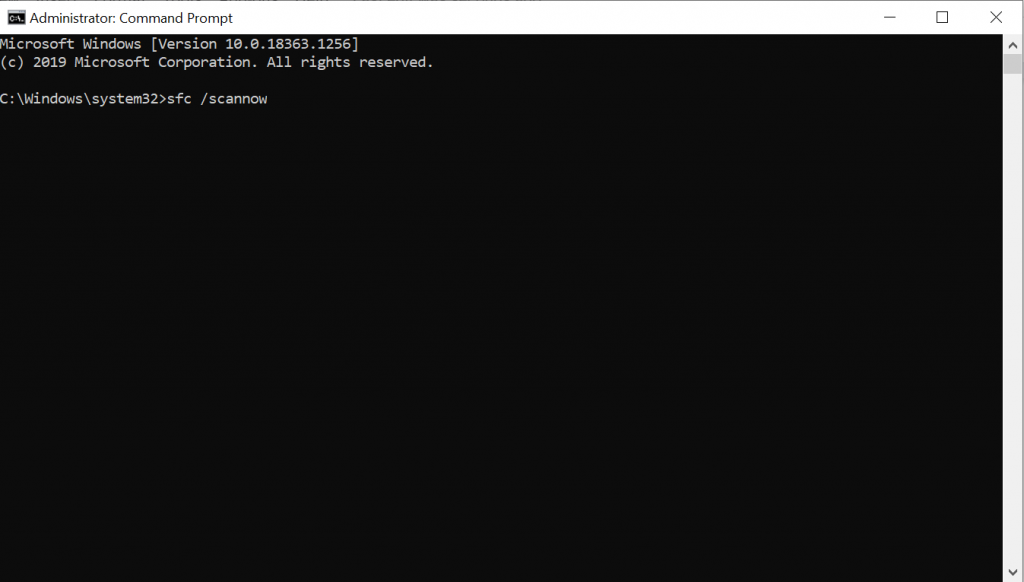
- Input cmd into the Windows search field.
- Right-click on Command Prompt and choose Run as Administrator.
- In the Command Prompt window, input the sfc /scannow command and hit Enter.
- Wait until the scan is complete. It will then show what needs to be repaired. If an error is returned, repair the broken Windows image files by entering the following commands:
- Dism /Online /Cleanup-Image /CheckHealth
- Dism /Online /Cleanup-Image /ScanHealth
- Dism /Online /Cleanup-Image /RestoreHealth
- Once done, restart your computer and try to update Windows once again.
Fix #4: Reset the Components of Windows Update
Resetting the components of Windows Update has worked for some affected Windows users. To do so, follow these steps:
- Launch Command Prompt with administrator rights.
- And then, run the commands below. Don’t forget to hit Enter after each command:
- net stop wuauserv
- net stop cryptSvc
- net stop bits
- net stop msiserver
- ren C:\\Windows\\SoftwareDistribution SoftwareDistribution.old
- ren C:\\Windows\\System32\\catroot2 Catroot2.old
- net start wuauserv
- net start cryptSvc
- net start bits
- net start msiserver
- Restart your computer and reinstall the update.
- Check if the error persists.
Fix #5: Use the Windows Media Creation Tool
Another reason why you are unsuccessful with your Windows upgrade is an incompatible version. In this case, you need to download the Windows installation media and perform a clean install of Windows 10/11.
To do so, refer to the instructions below:
- Download the Windows 10/11 installation media from Microsoft’s official website.
- After downloading the installation media, double-click the MediaCreationTool.exe file.
- Accept the Terms and Conditions.
- Hit Next.
- In the new window that appears, choose the Create installation media (USB flash drive, DVD, or ISO file) for another PC option.
- Click Next to proceed.
- Now, you can create an ISO image on a DVD disc or use a USB flash drive. We suggest choosing the latter option because it’s more straightforward.
- Insert an unused, empty flash drive.
- Hit Next.
- Once the USB is ready, start the Windows upgrade process.
- Restart your computer to begin the installation phase.
- Choose your preferred language, time, and keyboard preference.
- Press Next.
- Lastly, hit the Install Windows option and wait for the process to be complete.
- Try upgrading Windows once again.
Fix #6: Get Rid of Viruses and Malware Entities
As mentioned above, viruses and malware entities can trigger the error message to appear. So, to rule out the possibility of a malware infection, scan your system for any virus or malware using Windows Defender or your third-party antivirus solution.
Here’s how to perform a virus scan using Windows Defender:
- Right-click on the file or folder you want to scan.
- Select the Scan with Microsoft Defender option.
- Once the scan is done, you will be taken to the Scan Options page, which shows you the result of the scan.
- Apply the recommended actions and restart your computer.
- Try to install the update once again.
To perform a malware scan using a third-party anti-malware tool, download the installer first from the official manufacturer’s website. Install it onto your device. After that, launch the program and perform a complete scan. This will take quite some time to complete, depending on the size of files you have stored on your device. Make sure you don’t interrupt the scanning process to ensure better results.
In Summary
There are many ways to resolve the 0x8007025D-0x2000C Windows Upgrade error. You may try to temporarily disable your antivirus suite first or perform a complete virus scan. You may also use the Windows Media Creation Tool when performing an upgrade.
Now, if you are having the same problem as well, but are hesitant in trying the fixes because they seem too technical, do not hesitate to seek help from professionals. Better yet, contact Microsoft’s support team.
Did we miss an easy fix to the 0x8007025D-0x2000C Windows upgrade error? Let us know down below!