The motherboard is crucial to your computer but can be difficult to troubleshoot. Replacing it should be a last resort, as it connects to essential boot components. Rapidly changing technology may also mean finding an identical replacement is challenging, and any slight differences could require replacing multiple components.
But wait, what is a motherboard exactly?
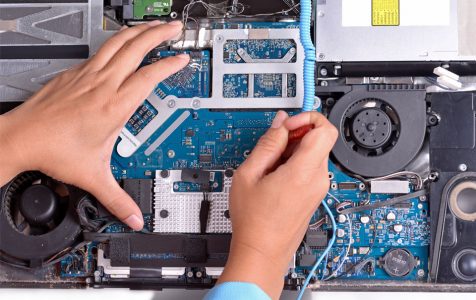
Motherboard: An Overview
The motherboard is a printed circuit board that serves as your computer’s foundation. Located inside the computer’s case, it allocates power to various computer components and allows communication between them.
There are different types of motherboard that come in varying sizes and types. Each of them is compatible with specific types of memory and processors. And below are some of the common components connected to the motherboard:
Expert Tip: For smoother PC performance, consider using a PC optimization tool. It handles junk files, incorrect settings, and harmful apps. Make sure it's right for your system, and always check the EULA and Privacy Policy.
Special offer. About Outbyte, uninstall instructions, EULA, Privacy Policy.
- BIOS
- Cache memory
- Chipset
- BUS
- Diode
- Electrolytic
- Fuse
- Internal speaker
- Game port
- Keyboard controller
- Resistor
- Serial port header
- RTC
- Solenoid
- Voltage regulator
Now, like other components of the computer, the motherboard is no stranger to error messages. One involves the error code 99 on Windows devices.
What Is the Motherboard Error Code 99 on Windows?
Some Windows users who are using MSI motherboards have reported that they were unable to boot up their computers because of the error code 99 that appears at the bottom-right portion of their screen. And what’s frustrating about this error is that it doesn’t go away no matter what changes users make on their hardware components. So, what causes the motherboard error code 99 on Windows?
Based on reports, there are different possible triggers to this error code. Below are some potential culprits:
- Corrupted or Damaged Kernel Temp Data – You can possibly see this error code if your low-level software components contain temp data that is damaged or corrupted. To fix this, you may have to remove the CMOS battery for a long period of time to let your system forget the temporary data.
- UEFI or BIOS Inconsistency – Some affected users say that the problem may appear when a setting related to the voltage is making the system unstable to the point that it can no longer startup. In this case, the most effective fix is to revert the UEFI or BIOS settings to their default values.
- Insufficient PSU – It is likely that you are seeing the error code 99 because you are using a low-end PSU, which is unable to supply sufficient power to every connected peripheral or component. To fix this, disconnect all non-essential peripherals or upgrade to a powerful PSU.
- Hardware Problems – In some circumstances, the error may surface if a short-circuit or other motherboard issues are causing your system to crash. The best way to resolve this is to bring your motherboard to a technician for repairs. Better yet, have your motherboard replaced if it is still under warranty.
- I/O Problem with USB Ports – If you are using an older computer model that has PS/2 ports for mouse and keyboard, then you have found another possible culprit. It could be a glitch that shows when USB-based peripherals are used. One effective workaround, in this case, is to connect all legacy peripherals and disconnect their USB equivalents.
What to Do About the Motherboard Error Code 99
If you are faced with the motherboard error code 99, you may try the solutions we recommended below.
Solution #1: Clear the CMOS battery
As mentioned above, one possible reason why you are seeing the motherboard error code 99 is an inconsistency with your BIOS or UEFI settings. And in this case, the quickest fix is to open your PC case and remove the CMOS battery temporarily to clear any information or data preserved when your computer boots.
For a step-by-step guide on how to clear the CMOS battery, do the following:
- Switch off your computer and disconnect it from the power source.
- Remove the case of your computer and wear a static wrist band to ground you to your computer’s frame. This is necessary to eliminate the possibility of a short circuit that can cause further damage to your computer’s internals.
- Next, have a look at your motherboard and find the CMOS battery. And then, use your fingernail or any conducive object to remove it from its slot.
- Wait for at least 15 seconds to ensure that the motherboard forgets from the CMOS battery.
- Now, return the CMOS battery to its original slot and put back the case of your CPU.
- Reconnect your computer to the power source and boot it up normally.
- Switch on your computer and check if the motherboard error code 99 still shows.
Solution #2: Reset the UEFI or BIOS values to their default
If the error code allows you to see the initial screen, you can fix it by simply resetting the UEFI or BIOS settings. But before you proceed with the steps below, take note that the reset instructions will be different for every low-level software.
To reset the BIOS settings to their default values, here’s a generic guide on what to do:
- Start your PC and press the Boot key right away. The boot key should be shown at the bottom of the screen.
- Once you’re in the BIOS settings screen, find the menu named Setup Defaults.
- After that, use the Load Setup Defaults option to restore the default values of your BIOS settings.
- Save the changes and wait for the startup completion.
To reset the UEFI settings to their default values, follow these steps:
- Boot into the Recovery menu by forcing three consecutive startup sequences. You can do this by turning off your computer while it’s booting up.
- Once you see the Recovery menu, navigate to Troubleshoot and select Advanced.
- Click UEFI Firmware Settings.
- Hit the Restart button to proceed.
- Now, your computer will boot into the UEFI settings.
- Find the Restore menu and select Restore Default.
- Once the prompt appears, confirm the reset of your UEFI settings.
Solution #3: Remove the peripherals of your computer
The error code is also sometimes associated with a failing USB device that is connected via any front-panel port. To fix the problem, try to disconnect your external HDD/SSD or your USB-powered headset.
In the event that your PSU is unable to supply sufficient power to every component connected to the motherboard, and you don’t want to upgrade it to a new one, then disconnect all unnecessary peripherals like printers and external speakers.
Solution #4: Check your time and date in BIOS
An incorrect time or date setting in the BIOS can also trigger the error code to appear. To fix this, follow these steps:
- Boot into the BIOS menu.
- At the Main menu, use the arrow keys to navigate to the Time and Date section.
- Next, check the time and date. Adjust if needed.
- Select Save, and then Exit.
- Now, try to boot your computer and check if the error persists.
Solution #5: Connect your keyboard and/or mouse via PS/2 ports
If you are still using an older MSI motherboard unit that has PS/2 slots, then the issue could be triggered by the peripherals connected via the USB ports. While it sounds weird, some affected users have successfully resolved the issue by disconnecting their keyboard and USB and connecting older components via the legacy PS/2 slot.
Solution #6: Change the Disk Controller mode to AHCI
If the HDD controller mode is currently set to RAID or IDE and your system does not have the right device drivers, it is possible that you may encounter the error code 99. To fix this, you should change the disk controller mode to AHCI. The proper instructions on how to do this should be found in the instruction manual provided by the motherboard manufacturer.
Before you switch to AHCI mode, run the bcdedit /set {current} safeboot minimal (ALT: bcdedit /set safeboot minimal) command in an elevated Command Prompt. And then, restart your PC. Next, run the bcdedit /deletevalue {current} safeboot (ALT: bcdedit /deletevalue safeboot) command and restart your PC once again.
Solution #7: Have it sent to a technician
If none of the above solutions has worked for you, consider the fact that you are dealing with a short circuit issue that is affecting your computer’s internal components.
To fix this, you have to send your motherboard or your entire PC to the manufacturer for a replacement, if it’s still under warranty. Otherwise, have a professional computer technician inspect your PC.
Wrapping Up
Fortunately, the motherboard error code 99 is relatively easy to fix. All you need is a bit of patience and this article. After which, there should be no problem.
Once you have resolved the motherboard error code 99, we suggest that you install a trusted PC repair software, as well as an antivirus solution to ensure that your computer runs in optimal performance and is free of malware entities that may affect other components.
Do you know other ways to resolve the motherboard error code 99? Share them in the comments.