Even the most reliable computers and hard drives fail at one point. Macs are considered to be among the most reliable computers ever built, but even these amazing products fail, too. The only way to ensure that your data is protected is to create backups. Fortunately, for Mac users, this won’t be a problem. With Time Machine on Mac, creating backup copies of your data can be completed with a few clicks of a button.
One small problem though is if you have multiple Macs and you wanted to create backups of all their hard drives on the same external drive. While you may be able to move the external drive around and manually create backups of each device, it would certainly be a tedious operation if you had to do this on a daily basis.
A good solution though would be to purchase an Apple AirPort Time Capsule so that you can network your devices and create backups of your data seamlessly. That’s if you had a few hundred dollars to spare, though. Another downside is that Time Capsules usually have a rather limited hard drive. Those that have larger capacity drives are expectedly more expensive.
Fortunately, there is a cheaper solution, which will still require the use of Time Machine. But this time, you will create a Time Machine Server using one of your Macs. With this option, you’ll be able to save a couple hundred dollars. Word of caution, though: setting it up can be a bit complicated.
Pro Tip: Scan your Mac for performance issues, junk files, harmful apps, and security threats
that can cause system issues or slow performance.
Special offer. About Outbyte, uninstall instructions, EULA, Privacy Policy.
However, if you follow this step-by-step guide, you’ll have your Time Machine server up and running in no time.
Before we go through all the intricacies of setting up a Time Machine server, let’s make sure your familiar with what the software is and how it’s used. If you’ve already used Time Machine on Mac before and you’re well aware of how it works, feel free to skip this section and move directly to the step-by-step guide. Otherwise, read on.
What is Time Machine?
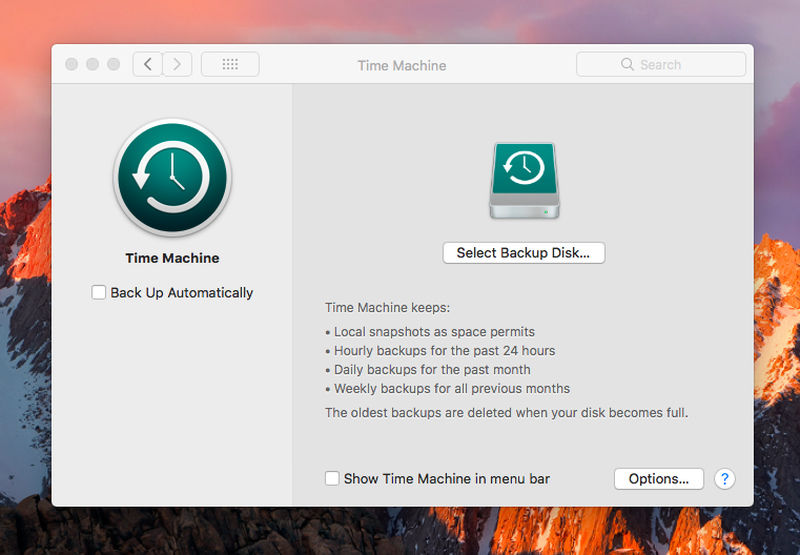
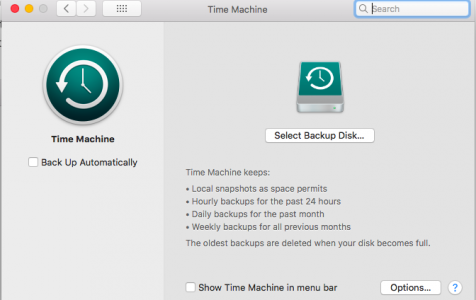
Time Machine on Mac is a unique backup app in a sense that the software captures an hourly snapshot of the data on your device and saves it on an external drive. It will continue taking snapshots of your data until the drive is filled up. At this time, the app deletes the oldest files on the drive and replaces them with the latest snapshots.
In the event of an internal drive failure, you can recover data of the entire device from the external drive, making it easy to replace any lost files.
What You’ll Need to Make Time Machine Work
Time Machine is already installed on your Mac, so all you’ll need is an external drive, which you can purchase at reasonable prices.
When purchasing an external drive, it’s best to ensure that it’s formatted using the GPT (GUID Partition Table) or the APM (Apple Partition Map) formats. Drives formatted using the Master Boot Record (MBR) format will also work, but there’s a good chance that some of the partitions may not be available for use. To maximize the use of your external drive, have it formatted using the recommended partition formats.
Time Machine works on any Mac device, so even if you have an old Mac lying around, you can still use the app on it as long as it’s working fine. In fact, if you’re hardly using your old device, it would be an excellent idea to use this as your Time Machine server.
As mentioned earlier, Time Machine app on Mac also works on a Time Capsule network backup device. This device is what Mac recommends you use if you’re planning to backup multiple devices on a network.
Another important requirement is a reliable internet connection. Wi-Fi can be used to backup data on your Time Machine server, but if you’re looking for faster data transfer, it’s best to use Ethernet option instead of relying on Wi-Fi.
How to Set Up Your Time Machine Server: A Step-by-Step Guide
Step 1. If you’re going to use an old Mac, which would be recommended because the device should be dedicated as a Time Machine Server and nothing else, then the first step is to update the device to make sure that it is running the latest macOS version.
Step 2. Since you’ll be using your Mac as a server, you’ll need the Mac Server app. This app costs less than $20 and can easily be downloaded from the Apple App Store.
Step 3. Purchase an external drive if you don’t already have one. Yes, your old Mac should already have an internal drive, but we don’t recommend you use that. It’s best to use an external drive with a GPT or APM partition. The external drive can be connected through USB, Firewire, or the Thunderbolt port.
Step 4. Make sure that the Mac is connected to the internet, preferably via Ethernet. Your modem or router should have more than enough Ethernet ports to connect all your devices. If not, then you should consider purchasing a Hub or a Switch so you can connect more devices to the network.
Step 5. Download the server app onto the Mac you’re using for your Time Machine server.
Step 6. Configure the server app. Once you open the server app, let it run through the initial setup. On the list of services on the left-hand side of the screen, select Time Machine.
Step 7. Connect your external drive to the Mac if you haven’t done so already.
Step 8. On the Time Machine screen, use the [+] button to select the external drive as the backup destination. The server app will ask you to click on Create. After doing so, it will display a message to Disable Ignore Ownership of this Volume. Simply click on Disable.
Step 9. On the top right-hand side of the screen, you’ll find a switch that will activate Time Machine. Toggle this switch to the ON position and it will automatically configure the device for file sharing.
Step 10. Configure your users. On the left-hand side of the screen, click on the Users option and then the [+] button. You’re probably thinking that since only you will be using the device, you’ll create almost identical usernames for your devices and use a similar password. While you can certainly do this, think about what would happen if for some reason one of your devices were compromised. It would certainly mean that all your devices are at risk as well since they all have the same passwords.
If you’re not good at remembering passwords, list them down somewhere and keep the passwords in a secure but easily accessible location.
Once you’ve configured the users, click on one user, and then the gear icon. You’ll need to select the Edit Access to Services button, then File Sharing, and then Time Machine.
Congratulations! You have now configured your Time Machine server. All you need to do now is to connect your other devices to the network and make sure that the Time Machine backup on Mac is working. Fortunately, this procedure is a whole lot easier than setting up the Time Machine server.
Connecting Users to the Time Machine Server
This procedure is rather simple, but you’ll need to repeat it for every device you intend to connect to the Time Machine server.
Step 1. Open the Mac you wish to connect and proceed to the System Preferences. On this screen, select Time Machine.
Step 2. On the Time Machine Screen, select the Backup Disks button.
Step 3. You will then be presented with a list containing the Time Machine server you just set up. Select the server and choose whether you want the data to be encrypted or not. If you choose encryption, you’ll need to enter a password.
Step 4. Before you can click on Connect, you’ll need to enter the username and password of the device. Enter the username and password you created when setting up the users on the Time Machine server.
Step 5. Well done! Your backups should begin automatically in a short while. In the meantime, you can select the data that you want to be backed up. If you want to backup everything, that’s fine. However, if you want to conserve space by deselecting anything you don’t need copies of, that would be a good idea as well.
Step 6. Repeat the above procedures for all the devices you want to connect to the Time Machine Server.
Monitoring Your Backups and Your Time Machine Server
From time to time, it would be an excellent idea to make sure that your Time Machine server is working fine. Simply log in to your Time Machine server and check the backups if they’re being updated as scheduled. You’ll also need to make sure that the server is in working order at all times. To do this, it would be a good idea to use Mac repair app. This app will ensure that your Mac is in good working order at all times, so it can keep running Time Machine as long as you need it to.