With Calendar on iCloud, you can create and manage calendars for every area of your life, and changes you make automatically appear wherever you’ve set up iCloud for Calendar
Sometimes, though, things could go wrong and syncing errors can take place. Here are some fixes to Mac common issues, such as what you should do when Calendar returns the 400 error.
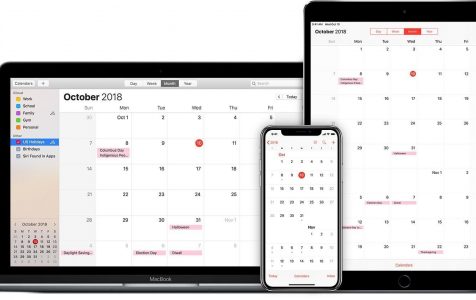
What is iCloud Calendar?
The Calendar feature of iCloud is one nifty tool for busy individuals. You don’t even have to connect your device to your computer to keep your calendars up to date – changes appear in your Calendar app if you’re on iPhone, iPad, iPod touch, or Mac. Changes appear in Microsoft Outlook if you’re a Windows user.
To use iCloud Calendar, simply go to icloud.com/calendar and then sign in with your Apple ID (if you’re not already signed in).
Pro Tip: Scan your Mac for performance issues, junk files, harmful apps, and security threats
that can cause system issues or slow performance.
Special offer. About Outbyte, uninstall instructions, EULA, Privacy Policy.
If you don’t see Calendar on iCloud.com, then your account has access only to iCloud web-only features. In this case you need to set up iCloud on your Mac or iOS device. Here are the steps to do this:
- On Mac: Choose Apple menu > Systems Preferences. Click iCloud, and enter your Apple ID and password. Turn on the features you’d like to use.
- On iOS devices: Go to Settings > [your name] > iCloud (or Settings > iCloud). Enter your Apple ID and password, and proceed to turn on the features you want to use.
Did you know that you can also share your calendars and invite other people to events? Follow these steps to share calendars on iCloud or to invite people to an event.
Working with iCloud Calendar requires using a recommended browser. For Apple users, here are some minimum system requirements:
- Mac
- macOS Mojave
- iTunes 12.7
- Safari 9.1 or later, Firefox 45/later, or Google Chrome 54/later
- iWork for Mac (Pages 5.5 or later, Numbers 3.5/later, Keynote 6.5/later
- iPhone, iPad, and iPod touch
- iOS 12
- iWork for iOS (Pages 2.5 or later, Numbers 2.5/later, Keynote 2.5/later)
iCloud Calendar sync error 400
It’s not always smooth sailing, though. Mac users who use iCloud on their machines can also encounter error number 400. If it’s the first time that you’re encountering this, know that the error indicates that it is unable to sync with your iCloud calendars, hindering you from using the Calendar app on your Mac.
This is typically the case if you open the Calendar app on your Mac and then see an error message that states “The request for account ‘iCloud’ failed.” The server responds with “400” to operation CalDAVUpdateShareesQueuableOperation, which means your Mac isn’t able to access the synced iCloud calendars on your account.
Learn how to fix this common error on macOS Sierra/Mac OS X 10.10 (Yosemite)/10.9/10.8/10.7 and lower, mostly through moving two of the calendar files from one folder to another on your Mac. Here are the steps:
- Ensure that Finder shows hidden files. Enable it through executing a command in Terminal: open the Terminal app and type in the following command: defaults write com.apple.finder AppleShowAllFiles YES. Hit Enter.
- Relaunch Finder on your Mac. Do this by finding the Finder icon in your Dock, and then holding down the Option key on your keyboard. Afterwards, right-click on the Finder icon. Select Relaunch, which will relaunch the app for you.
- Open a Finder window. Proceed to the /Users/your-username/Library/Preferences/ path, and once you’re there find these files and drag and drop them onto your desktop: apple.iCal.plist and com.apple.CalendarAgent.
- Now that the two files have been moved to your desktop, restart your Mac. Do this by clicking on the Apple logo found in the top-left corner of the screen and then choosing Restart.
- Wait for your Mac to reboot and see if the iCloud 400 error has been resolved.
Notes and recommendations

iCloud is fast becoming a highly essential tool for online data storage, enabling access to your data everywhere you are in the world. Security, however, is always an important aspect, so you should take meaningful steps to keep your data in iCloud safe and secure. Do this by enabling iCloud’s two-step authentication – here are the steps:
- Keep trusted Device as Mac:
- Go to the Apple Menu > System Preferences.
- Proceed to iCloud > Account Details > Security Section.
- Click on Two-Factor Authentication.
- Keep trusted Device as iPhone, iPad, or iPod Touch:
- Go to your iPhone’s Settings.
- Tap on iCloud > Apple ID.
- Enter Apple ID password > Password & Security.
- Scroll down and tap on Two-Factor Authentication.
Through these steps you can add or update the trusted phone number for your Apple ID. This security feature allows you to get a verification code on your trusted device and trusted number whenever you sign in on a new device or browser.
Don’t neglect the health of your Mac or iOS devices, too. Keeping iCloud Calendar working smoothly involves regular optimization of your machine for top performance. A tool like Mac repair app could be one of the options for such maintenance.
Have you ever encountered this error? Tell us about your previous experience! If it’s your first time to see it, good luck and we hope the solution above works for you!
The request for account “iCloud” failed.
The server responded with
“400”
to operation CalDAVUpdateShareesQueuableOperation.
Thanks! the instructions worked perfectly!