Partitioning your Mac hard drive can provide several benefits, including the ability to run multiple operating systems, create backups, and troubleshoot disk issues.
What happens when you don’t need a partition anymore? The practical thing to do is to delete it in order to claim back the storage space originally allocated for that partition. All you need to do is erase the drive using Disk Utility, and the space taken up by the purged partition can be reallocated for other purposes.
For some reason, though, some partitions don’t go away completely even after they have been deleted. Some Mac users reported that their partition is still showing even after deleting via Disk Utility. Because of this, they are unable to reclaim the storage allocated to the deleted partition.
Before You Delete the Partition
Before deleting a partition, ensure all important files are backed up. Outbyte macAries is a tool that can help you remove unnecessary files from your partition. Double-check to make sure it meets your needs before proceeding.
Pro Tip: Scan your Mac for performance issues, junk files, harmful apps, and security threats
that can cause system issues or slow performance.
Special offer. About Outbyte, uninstall instructions, EULA, Privacy Policy.
After creating your backup, check the name and format type of your partition. You will need this information if you want to delete the partition using the Terminal app.
To check your disk name, follow the steps below:
- Launch Terminal under Finder > Go > Utilities.
- Type in diskutils list in the Terminal window. This command gives you a list of all the disks and their partitions.
- Look for the partition you want to erase, then take note of its Identifier. You will need to enter this information when you want to delete that partition.
After doing all the necessary preparations, you can then delete your Mac’s partition using the methods below.
How to Delete Partition in High Sierra
There are two ways to delete a partition on Mac: using Disk Utility and Terminal commands.
Method 1: Deleting a Partition via Disk Utility.
Erasing a partition using Disk Utility is the easier method between the two. It is a two-step process that involves erasing the disk and then reallocating the space to the rest of your drive.
To do this, follow the instructions below:
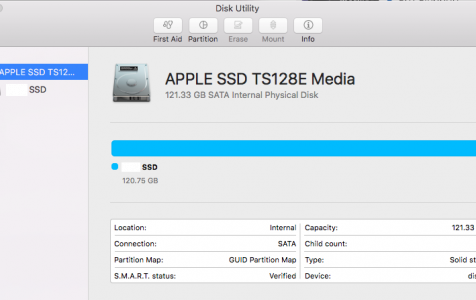
- Launch Disk Utility by going to Finder > Go > Utilities, or by searching for it via Spotlight.
- On the left panel, choose the partition you want to delete.
- Click on the partition, the hit the Erase button at the top of the Disk Utility window.
- Click Erase when the confirmation message appears, then hit Done.
- Once the data has been erased from your partition, click the partition again from the list on the left.
- Click the Partition button at the top of the Disk Utility window.
- A pie graph will appear showing all the available partitions on your computer. Click on the part that corresponds to the partition you just erased.
- Click the (-) button at the bottom of the pie.
- Click Apply.
- Wait for the process to finish, then hit Done.
Method 2: Deleting a Partition via Terminal.
The other way to delete a partition on Mac is by using command lines. You need to be logged in using your admin account to be able to use this method. You also need the identifier that corresponds to the partition you want to delete, which we’ve discussed above.
To delete the partition, follow the steps below:
- Launch Terminal using the steps above.
- Type in the following command, then press Enter: diskutil eraseVolume JHFS+ Blank <identifier>. This command deletes the partition and replaces it with a blank space.
- Next, type in this command to merge the blank partition with your normal system disk: diskUtil mergePartitions JHFS+ <main disk> <deleted disk>
- Hit Enter and wait for the merging process to be completed.
Merging the two disks will leave you with a single partition while preserving all the data on your system disk. Make sure to double-check the name of your partitions to avoid erasing the wrong disk and losing data.
What to Do When Partition Is Still Showing Even After Deleting It
Sometimes, deleting a partition using Disk Utility or Terminal results in an error and fails to complete. It is also possible that you’ve deleted the partition but it still appears on your computer. These errors could be due to incorrect volume format or because the partition was created using Bootcamp. Follow the solutions below to fix these issues and successfully delete your partition.
How to Delete an APFS Partition
Since the release macOS 10.13 High Sierra, the recommended format for volumes is APFS or Apple File System. If the volume you want to delete has been converted to APFS, you will need a High Sierra USB installer to remove the APFS Container your High Sierra partition is in.
To do this, you need to download the High Sierra installer app, then create a bootable USB installer using that file. Boot your Mac using the thumb drive, just like when you’re booting into Recovery Mode. In the Utilities Menu, choose Terminal. Type in this command: diskutil apfs deleteContainer <identifier>. Reboot your computer and check if the drive has been completely deleted by typing in diskutils list in the Terminal window.
How to Delete a Partition Using BCA
Boot Camp Assistant or BCA is a macOS utility that allows users to install Microsoft Windows operating systems on Mac. If your partition was created using Boot Camp Assistant, then only this utility can be used to delete it and reallocate the space back to the macOS partition.
To delete a BCA partition, follow the instructions below:
- Go to Finder > Go > Utilities > Boot Camp Assistant.
- Hit Continue when the Boot Camp Assistant Introduction window appears.
- Choose Create or remove a Windows partition, then click the Continue button.
- Click Restore. This will delete the Windows partition and restore your disk to a single-partition volume.
- Enter your admin password when prompted, then click OK.
Wait for Boot Camp Assistant to do its work. Once done, the Windows partition will be gone and you’ll be left with a single macOS volume.
Summary
Deleting a partition is an uncomplicated process that can be accomplished via Disk Utility or Terminal. You just need to be careful when choosing the partition you want to delete to avoid making a mistake and losing your data.
It is also possible to encounter errors when deleting a partition, particularly if your disk format is incorrect or the partition you want to delete was created using Boot Camp Assistant. We hope that this step-by-step guide helps you delete your partition successfully and resolve any problem that you may encounter in the process.