Apple users trying to burn DVDs on their Macs and MacBooks have reportedly encountered error code 0x8002006E, keeping them from successfully writing on their DVDs. While some were able to find alternative methods to burn DVDs, others were left feeling hopeless about the situation.
What does error code 0x8002006E mean? In most cases, disk burning problems are associated with system or app issues. But there are times when they are triggered by hardware problems. Newer Mac models have better tolerance for scratches and dust compared to the earlier models, most likely preventing bad media from affecting the hardware. As a result, it is the software that suffers. Then again, the solutions often come on a hardware level.
Before we give you a fix to the burning error in Macs, let us first cover the basics and discuss how to properly burn CDs and DVDs.
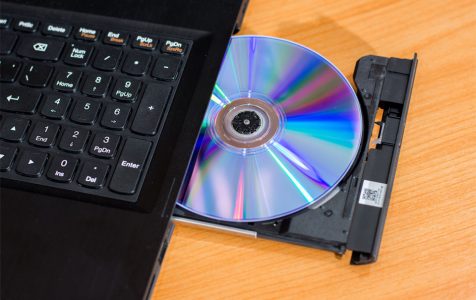
How to Burn Data Discs, Audio CDs, and DVDs
Let’s begin with the basics of burning files on CDs and DVDs.
Pro Tip: Scan your Mac for performance issues, junk files, harmful apps, and security threats
that can cause system issues or slow performance.
Special offer. About Outbyte, uninstall instructions, EULA, Privacy Policy.
Data Discs
Burning a data disc is very easy. Just follow these steps:
- Copy all the data you wish to burn into one folder. It doesn’t matter where you save the folder or what name you give it. What’s important is that all data you want to burn is there.
- Right-click on that folder and select Burn ‘Folder Name’ to Disc. If you haven’t inserted a disk in your optical drive, you will be prompted to insert one.
- Give the disc a name and select the burning speed, which by default is set to the maximum possible speed.
- Hit Burn and the DVD or CD will start to burn.
Audio CDs
On a Mac, you can easily burn audio files via iTunes. Follow these steps to know how:
- Launch iTunes.
- Add all audio files you want to burn to your library. After adding the audio files, create a playlist.
- Select all the songs you want to have on your audio CD. Take note that you can only save up to 72 minutes of audio files. If you are burning MP3 files, you can save up to 700 MB worth of music files.
- The playlist you created should now be on the left-hand side of iTunes under Playlists. Click on that playlist. And then, navigate to File > Burn Playlist to Disc.
- By now, the Burn Settings dialog box should appear. Adjust the settings according to your preferences before burning an audio CD. Once you’re done, hit Burn.
Video DVDs
There is no official program on Apple devices that you should use for burning DVDs, so you have to download a third-party software for this.
The most popular program is Burn. Although it hasn’t been updated for years now, it still works well enough for many. To use it, follow these steps:
- Download and install the Burn app. If you get an error message telling you that the program is blocked due to security reasons, go to System Preferences > Security and Privacy. Next, click Open Anyway.
- Once the app opens, navigate to the DVD tab.
- Give your new DVD a name and click on the drop-down arrow.
- Change the default format from VCD to DVD-Video. Take note that if the video format is incorrect, an error message will pop up telling you that it is incompatible.
- Click the tiny + icon at the bottom-left portion of the app. Your video should now be added to a project.
- Now, you may click the Convert button and the video DVD file will be converted right away.
- After adding and converting all video files, you may proceed with burning them. Simply hit the Burn button to start the process.
Congratulations, you already know how to burn audio, video, and data disc files. Now, what about resolving the most common burning error problem?
How to Solve Error Code 0x8002006E
While burning files, you may encounter problems like error code 0x8002006E. Don’t worry, because this problem can be fixed in many different ways. Try any of the solutions below:
● Clean Up Your Mac.
Sometimes, system issues caused by junk files trigger error code 0x8002006E to appear. To fix that, you can use third-party tools like Mac repair app.
Using Outbyte macAries could help you identify and remove junk files such as browser cache and old updates. If you decide to use it, make sure it aligns with your system cleanup requirements.
● Clean Your Disk Drive Lens.
Some Mac users were able to solve the problem by simply cleaning their disk drive lens. Follow these steps below to do this right:
- Unplug your computer.
- Open the optical drive by pressing the Eject button.
- Get a piece of cotton swab and dampen it with rubbing alcohol or warm water. Make sure the cotton swab is only lightly dampened, as too much moisture won’t do any good to your optical drive.
- Wipe the drive’s lens with the cotton swab. Do it slowly because the lens is quite delicate and can be easily scratched.
- Get another clean, dry cotton swab and wipe the drive again. Make sure the drive is completely dry before using it.
3. Get a New External DVD Writer.
If the first three solutions did not work, you might need to buy a new external DVD writer. Unfortunately, it seems that Apple is slowly getting rid of drives in their latest computer models.
4. Visit the Nearest Apple Store.
If your Mac is still covered by AppleCare, you can bring it to the nearest Apple store to be checked. The Apple Genius in the store can inspect the hardware and the software, and suggest the best solutions to fix the problem.
Conclusion
Hopefully, this short article provided you with everything you need to know about burning discs on a Mac and how to address error code 0x8002006E. If you still have any questions, do not hesitate to comment below. Enjoy!