If you want to allow your children to download content while monitoring and controlling their activity, Apple’s Family Sharing feature is a great option. It allows every member of a family to share their apps, movies, books, TV shows, an Apple News+ subscription, and music with other family members. There are other benefits, too, such as pooled iCloud storage, a shared family calendar, and photo album, and the ability to track the location of all family members using their devices.
Usually, only users 13 years old and above can sign up for an Apple ID. They can’t have their own Apple ID yet. But kids below 13 can be added to a family sharing account with their own Apple ID. The process is very simple and this guide should show you how to do it.
Why Use a Child Account in Family Sharing on Mac?
In this age where cybercrime is a common thing and child predators are constantly lurking the internet looking for young victims, it is important for every parent to know what their child is doing on the internet. It would be better to have a family-centered online account, you should give the Family Sharing feature a go. This feature will let you know what videos, apps, TV shows, and music your child is listening to.
Using Family Sharing also makes it easier to share content to other family members. You can share photos and videos across different devices without installing a third-party software.
Pro Tip: Scan your Mac for performance issues, junk files, harmful apps, and security threats
that can cause system issues or slow performance.
Special offer. About Outbyte, uninstall instructions, EULA, Privacy Policy.
The most important function of this feature is location tracking. You can find out where a family member is in real time. So if you’re at work and you want to monitor whether your kids are actually going to school or not, you can track them using this feature. It is a great help during an emergency.
Requirements to Use Family Sharing
All family members will need to be running iOS 8 and later or OS X Yosemite and later for the Family Sharing feature to be available.
Each family member can only be in one family group at a time. You’re also only allowed to switch to a different family group twice per year.
There is also an option for setting up an Apple ID for a child under the age of 13, allowing them to be a part of your Family Sharing group. To do this, follow the instructions below.
How to Setup Family Sharing on Your Mac
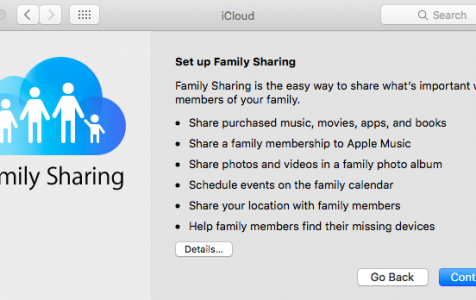
Family Sharing is simple to set up. The person who sets it up becomes what Apple calls the Organiser, and they are able to choose the features your family shares, as well as invite up to five family members to join their Family Sharing group.
Once an invite is accepted, that family member will see Family Sharing setup on their device automatically.
- Choose the Apple Menu in the top left of your screen.
- Open System Preferences.
- Click on iCloud or the Family Sharing icon if you’re running macOS Catalina.
- Tap on Set up Family or Add Family Member.
- Enter a family member’s name, email address or Game Centre nickname.
- Click Continue.
- Enter the security card for your card to confirm you are the Family Organiser.
- Choose whether to send an invitation or ask your family member to enter the password for their Apple ID.
How to Create a Child Account for Family Sharing on a Mac
If you have a child below 13 years old and you want to add them to Family Sharing on your Mac, follow the instructions below to create an Apple ID for your child:
- From the Apple menu, choose System Preferences.
- Click Family Sharing.
- At the bottom of the list of family members click the + button.
- Choose the option to Create an Apple ID for a child and click Continue.
- Enter the child’s information, including creating a new Apple ID, and click Next. If the Apple ID you want to create is already in use by someone else, you’ll be notified to make another attempt.
- Confirm by clicking Create again.
- Follow the onscreen instructions and enter the verification code. Click Next.
- Read the Parental Privacy Disclosure and click Agree.
- Enter security questions and answers.
- Click Next.
- Agree to iCloud and Game Center Terms and Conditions.
- Agree to iTunes Terms and Conditions.
- Enter your password to view account details.
- Click Continue.
Your child should now be added to your Family Sharing account.
When you first setup Family Sharing, as the Family Organiser, you choose which features you want to share with your family. The options that first appear are: iTunes & App Store Purchases, Apple Music, iCloud Storage, Location Sharing and Screen Time.
Here’s a run down of what sharing each of those features with your family through Family Sharing actually entails.
iTunes and App Store Purchases
Family members will be able to view and download the music, movies, TV Shows, books and apps that you have purchased.
Each family member will get immediate access to paid apps already purchased by other members of your family. You can download your own copy of these apps directly to your Apple device without having to ask for or share Apple IDs and passwords. You can only share apps that offer support for Family Sharing though.
Apple Music
With an Apple Music Family plan – which you can read about in our separate feature – up to six members of your family will get unlimited access to Apple Music on their devices for $14.99/month or £14.99/month.
Each family member will get their own Apple Music account with a personal music library and recommendations, but the cost is significantly less than six individual subscriptions.
iCloud Storage
Family members will be able to share a storage plan for everyone’s photos, files and backups so each member doesn’t need to purchase their own plan. There’s a choice of 200GB or 2TB, both of which are shareable.
Family members won’t have access to each other’s files, but you’ll be able to see how much storage everyone is using.
Location Sharing
Family members will be able to view each other’s locations on Find My and Messages. Setting this feature up will also allow family members to see the location of each other’s devices in Find my iPhone.
If a family member wants some privacy from their family, they can switch off ‘Share My Location’ in iCloud settings to turn their location off until they choose otherwise.
Screen Time
Setting up the Screen Time feature on Family Sharing will allow you to see your child’s screen time reports and set parental controls from your iPhone. This feature is for those who have children in their family – you won’t be able to set a time limit on a specific app for your partner for example, but you can for a child.
It’s also possible to name another family member as a parent/guardian, so you can both keep an eye on your kids and their screen time.
Apple Subscriptions
If you have any Apple subscriptions, whether it’s Music, Arcade, News+, once you have subscribed once, everyone in your family gets access using their own devices and accounts with this feature turned on.
Everyone in your family will be able to watch from multiple devices and get personalised recommendations based on what they watch.
Enable Ask to Buy
The basics of the Apple ID are set up, and you’re just about done. Before you finish, though, configure a useful feature for your child’s Apple ID: Ask to Buy. Use this feature to approve or deny purchases your child wants to make from the iTunes and App Stores. Parents of younger children might want to monitor what their children are consuming. To turn Ask to Buy on, move the slider to on/green. When you’ve made your choice, tap Next.
How to Remove a Child from the Family Group
Your child has to remain part of your family group until they turn 13. However, if necessary, you can transfer a child to a different family group.
If you need to see the options you have for managing your child’s account, you can sign in with their Apple ID and password at privacy.apple.com.
You can also turn off Family Sharing by going to Settings > Tap on your name > Tap on the Family Sharing tab > Tap on your name at the top > Press ‘Stop Family Sharing’ > Confirm ‘Stop Sharing’.